Calibration – Sealey HBS97 User Manual
Page 4

14. 1. The paint work is detergent resistant. Clean with a damp cloth, removing any stains. A small amount of alcohol may be applied
to stubborn areas of grime.
14. 2. DO NOT leave the machine in areas where corrosive vapour is present, i.e. Battery charging or painting shops etc.
14 .3. DO NOT oil the column.
14 .4. An optical box dust cover is available upon request.
14. CARE OF THE BEAM TESTER
01284 757500
01284 703534
Sole UK Distributor
Sealey Group,
Bury St. Edmunds, Suffolk.
www.sealey.co.uk
Web
NOTE:
It is our policy to continually improve products and as such we reserve the right to alter data, specifications and component parts without prior notice.
IMPORTANT: No liability is accepted for incorrect use of this product.
WARRANTY: Guarantee is 12 months from purchase date, proof of which will be required for any claim.
INFORMATION: For a copy of our catalogue and latest promotions call us on 01284 757525 and leave your full name, address and postcode.
13. CALIBRATION
We suggest the unit is periodically checked for calibration in situ. If the unit is
covered by a service agreement with the MOT package installer, they will carry
this out on your behalf. Should you wish to regularly check the calibration
yourself, we recommend you purchase an Alignment Device from your local
dealer.
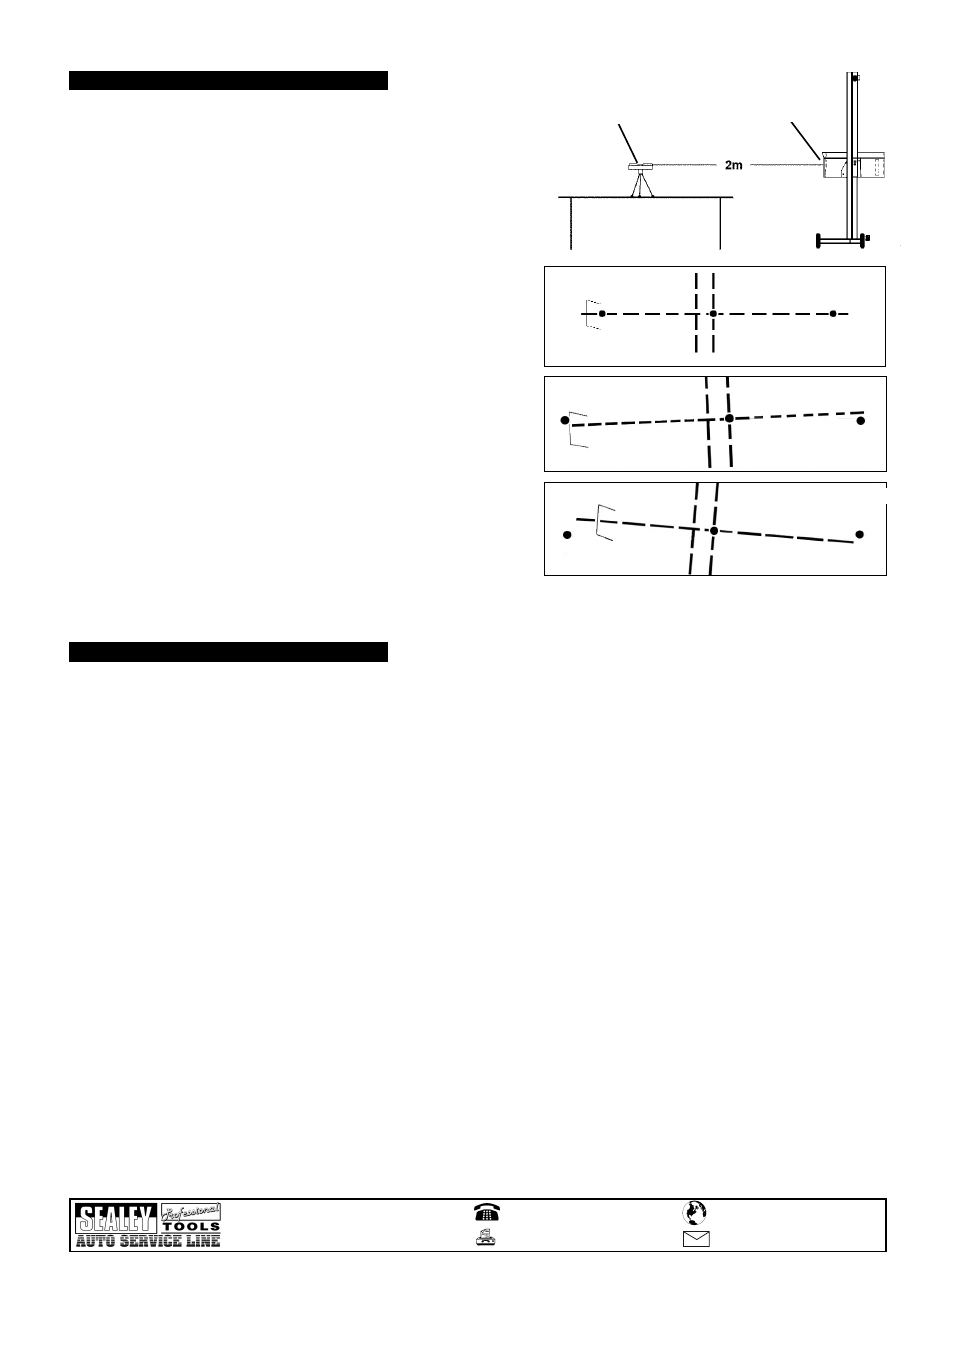
Periodical calibration of the relationship between the test area and the aiming
screen is required. Calibration maybe carried our using an AK9999 Laser
Calibration Gauge or a similar serial numbered laser device calibrated to a
traceable standard. For the purposes of calibration, it is assumed that the vehicle
standing area is flat and level.
13.1
Place the calibration gauge within the vehicle standing area.
13.2 Switch on the laser and ensure the beam is flat and level by use of the
integral spirit level.
13.3 Check that that the optical box is flat and level by checking the spirit
level in the base of the optical box. The spirit level may be viewed
through the plexiglass cover. Adjust the pitch of the optical box by
loosening the screw (See fig.4B). Ensure screw is re-tightened after
adjustment.
13.4 Project the laser beam through the lens of the optical box. There is a
Ø30mm margin for error in alignment of the beam centrally through the
lens.
13.5 Align the projected red dot centrally on the screen. The dot should fall
on the hatched 0% line.
13.6 Move the screen left and right across the beam by rotating the column and
ensure that the dot remains on the 0% line indicating that the aiming
screen is level.
13.7 If adjustment of the aiming screen is required;
13.7.1 Undo the four screws which retain the plexiglass cover and remove it.
13.7.2 Loosen the two screws which retain the aiming screen.
13.7.3 Adjust aiming screen so that laser dot falls on 0% line.
13.7.4 Retighten screws and replace cover.
Laser device
Beam setter lens
Alignment OK
Adjust screen
Adjust screen
Once calibration has been completed the serial numbers of the HBS and the calibration device used to complete the calibration should be
recorded on a suitable document. This document should be retained for inspection by VOSA if required.
HBS97.V2, HBS971 - 2 - 290806
