Step 1: connect the cables – Eicon Networks Diva 2440 User Manual
Page 16
Setup
Page 16
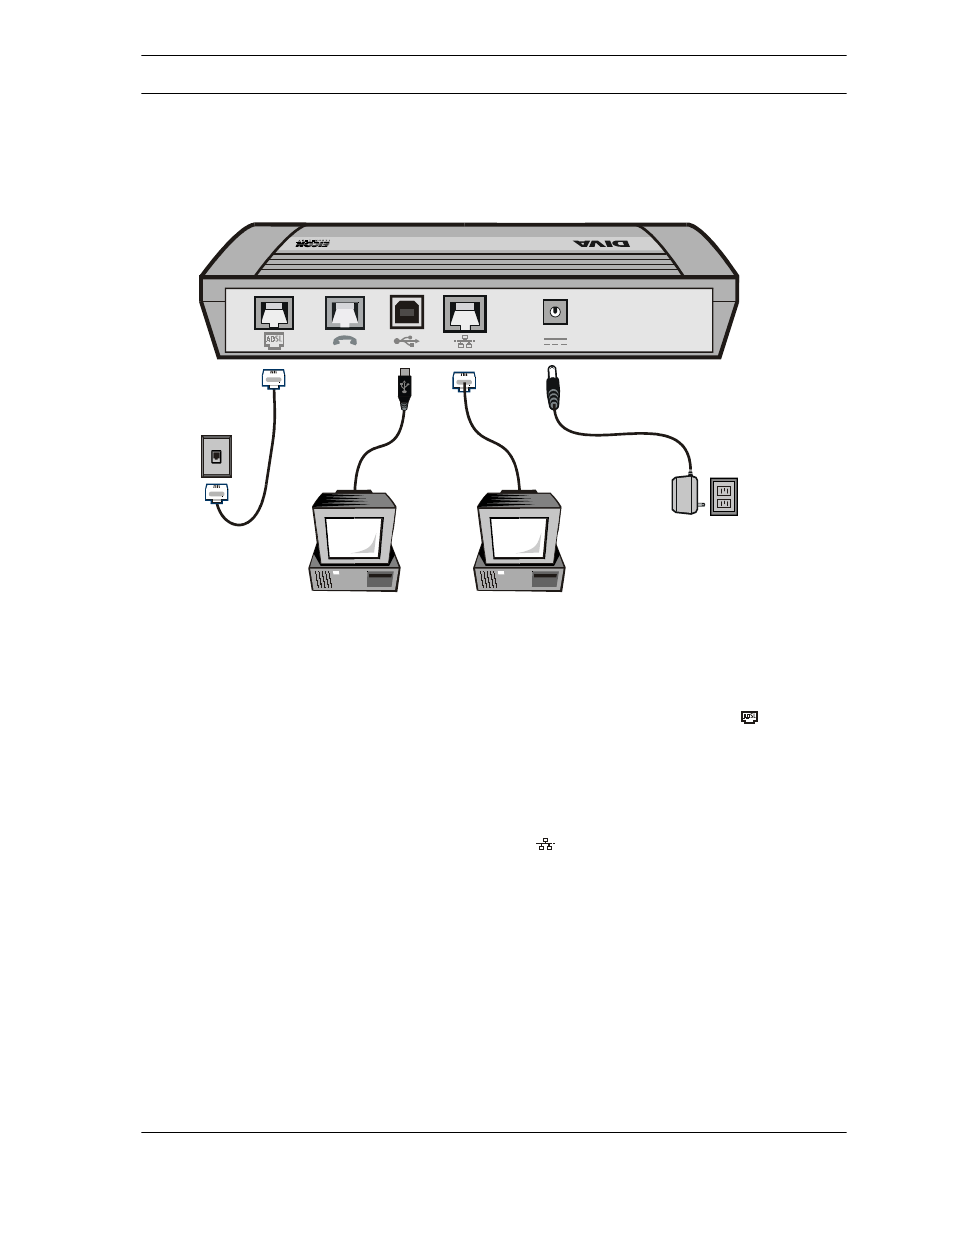
Step 1: Connect the Cables
Leave your computer on when connecting the cables.
As shown in the diagram below, both the USB and Ethernet ports can be used at the same
time. However, it is recommended that you use only one port during setup. Once you have
verified that you can access the Internet, you can then connect a second computer.
ADSL Cable Notes
•
Do not install a microfilter on the cable that connects your ADSL device to the telephone jack.
•
If your Diva 2440 has a phone port, make sure you do not use this port to connect the ADSL
cable.
•
Several seconds after connecting the ADSL cable, the ADSL indicator light (
on the front
of the device) should start flashing. This light will stop flashing and stay on when a link has
been established with your ADSL service provider’s network.
Ethernet Cable Notes
•
The Ethernet port can be used with any computer supporting an Ethernet card and TCP/IP.
•
When connected, the Ethernet indicator light (
on the front of the device) will turn green
when the Diva 2440 is plugged in and the computer is on.
•
When finished connecting the cables, restart your computer so that your Ethernet card
acquires a new IP address.
Yellow
Ethernet
Cable
ADSL
Cable
Power
Adapter
USB
Cable
To
Phone
Jack