Connecting print queues – Epson 1440 User Manual
Page 43
Section 4: Performing Additional NetWare Setup
AXIS 1440 User’s Manual
33
Connecting
Print Queues
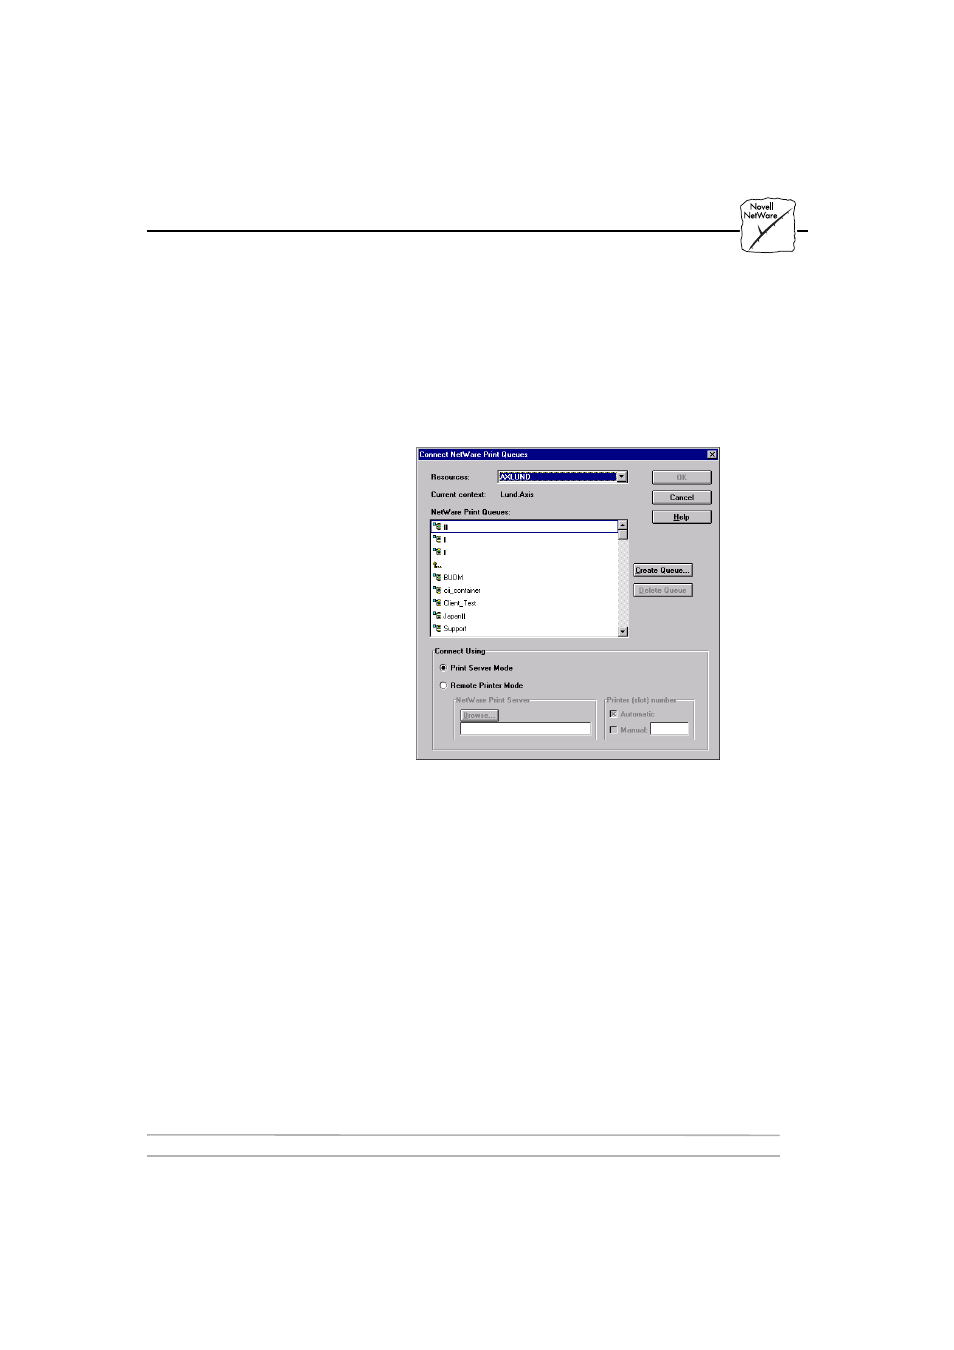
Follow these steps to connect a print queue to the print server port:
1. In the Network Environments window, select the print server
port to which you want to connect.
2. Click the Connect... button. The Connect NetWare Print
Queues window appears.
Connect NetWare Print Queues window
3. Select the location of the print queue from the Resources box.
4. Select an existing NetWare print queue for connection to the
server port, or create a new print queue by clicking Create
Queue... If you are connecting an existing queue, skip to step 7. If
you’re creating a new queue, continue with step 5.
5. Type the queue name in the Create Queue dialog window. (If you
want to create a queue in an NDS tree, you must also type the
name of the volume where the queue will be stored.) Click OK.
6. Select the newly created queue from the queue list.
7. Select Print Server Mode or Remote Printer Mode. If you selected
Print Server Mode, skip to step 10. If you selected Remote Printer
Mode, continue with step 8.