Installation part 22 – installing the ecu – Ella Moss Automobile Parts User Manual
Page 40
M:\Product Information\366-348\Instructions\366-348 MGB Fuel Injection Installation Instructions_Grant_2.doc
Installation Part 22 – Installing the ECU
366-348 Inst Fig 220
220.1
You will be removing some items temporarily to facilitate the
installation of the ECU system. Keep these items and their
mounting hardware organized, as they will be reinstalled
once the ECU is mounted. These images and instructions
are specific for the 77-80 application, Earlier cars will differ.
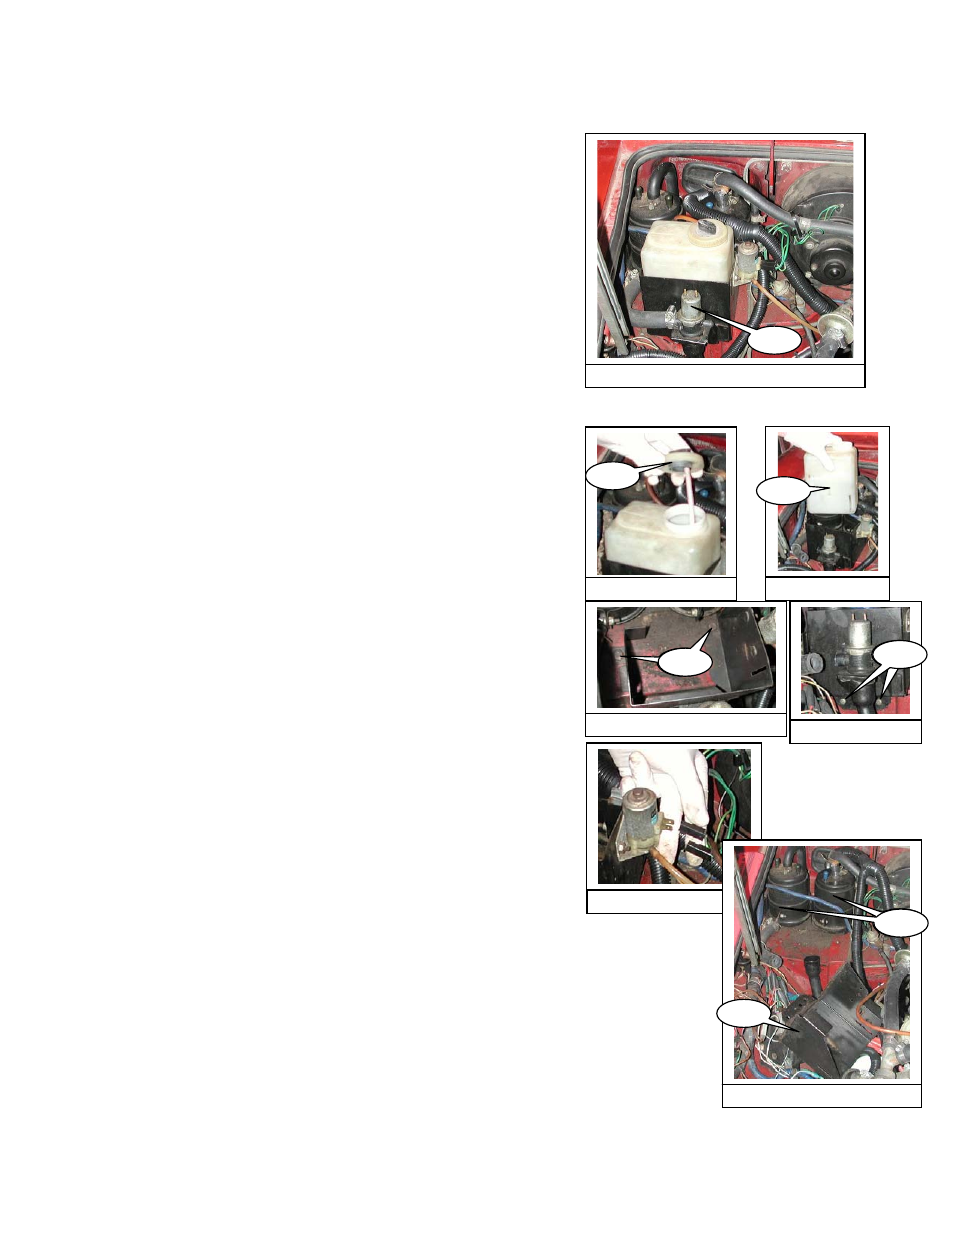
267.
Remove the three hoses and the two wires from the
run-on control valve (220.1).
268.
Remove the lid off of the washer bottle and set it to
one side in the engine compartment, leaving the washer
fluid tube attached. (221.1)
366-348 Inst Fig 221
221.1
366-348 Inst Fig 222
222.1
269.
Lift the washer bottle (222.1) out of the sheetmetal
bracket and set is aside.
270.
Using a 7/16” socket, remove the two bolts (224.1)
that secure the washer bottle bracket.
271.
Remove the two Phillips head screws under the
washer bottle bracket’s front edge. (225.1)
366-348 Inst Fig 224
223.1
224.1
186.1
366-348 Inst Fig 225
225.1
366-348 Inst Fig 226
366-348 Inst Fig 227
227.1
227.2
227.2
272.
Remove the two wires connected to the windshield
washer pump. (Fig 226)
273.
Remove the washer bottle bracket and set it out of
the way. (227.1) We need to remove the two carbon
canisters (227.2) next, but they are attached with bolts
from inside the cockpit.
Page 40 of 52