The main menu, Advanced settings, The main menu advanced settings – Lanner LEC-7100 User Manual
Page 17: Chapter 4, Bios settings
14
Bios Settings
Chapter 4
Embedded and Industrial Computing
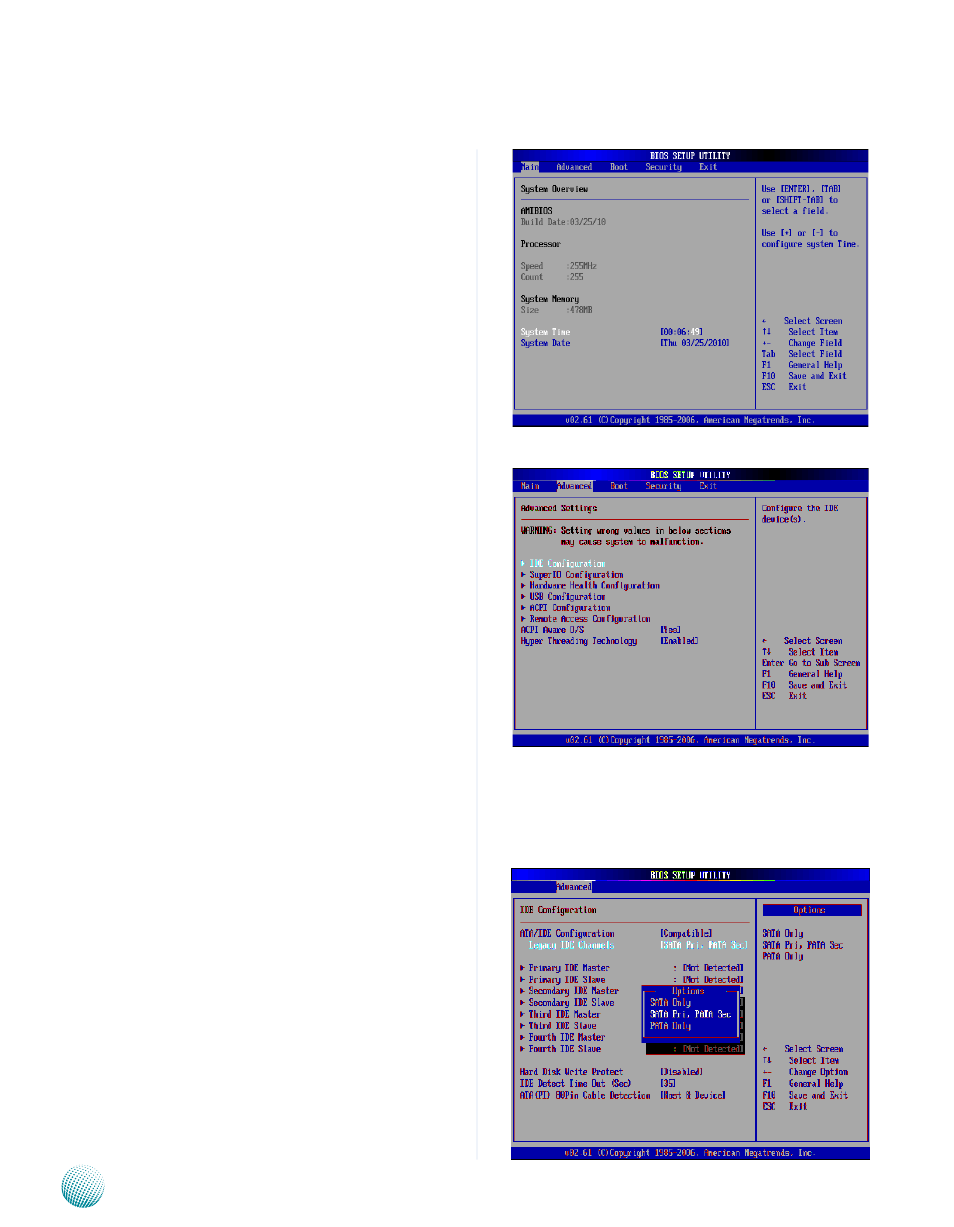
The Main Menu
The main BIOS setup menu is the first screen that you can
navigate. Each main BIOS setup menu option is described
in this chapter.
The Main BIOS setup menu screen has two main frames.
The left frame displays all the options that can be
configured. “Grayed-out” options cannot be configured.
Options is blue can be.
The right frame displays the key legend. Above the key
legend is an area reserved for a text message. When an
option is selected in the left frame, it is highlighted in
white. Often a text message will accompany it.
System Time/System Date
Use this option to change the system time and date.
Highlight System Time or System Date using the
keys. Enter new values through the keyboard. Press the
The date must be entered in MM/DD/YY format. The time
is entered in HH:MM:SS format.
Advanced Settings
Select the Advanced tab from the setup screen to enter
the Advanced BIOS Setup screen. You can select any of
the items in the left frame of the screen, such as SuperIO
Configuration, to go to the sub menu for that item. You
can display an Advanced BIOS
Setup option by highlighting it using the
All Advanced BIOS Setup options are described in this
section. The Advanced BIOS Setup screen is shown at
the right. The sub menus are described on the following
pages.
IDE Configuration Settings
You can use this screen to select options for the IDE
Configuration Settings. Use the up and down
keys to select an item. Use the
change the value of the selected option. A description of
the selected item appears on the right side of the screen.
The settings are described on the following pages. An
example of the IDE Configuration screen is at the right.
Primary IDE Master, Primary IDE Slave, Secondary IDE Master,
Secondary IDE Slave:
Select one of the hard disk drives to configure it. Press
sub menu are described as in the following..
Hard disk drive Write Protect
Set this option to protect the hard disk drive from being
overwritten. The Load Optimal
default setting is Disabled.