SMA SB 2500 Installation User Manual
Page 59
SMA Solar Technology AG
Troubleshooting
Installation Manual
SB25-30-IA-en-51
59
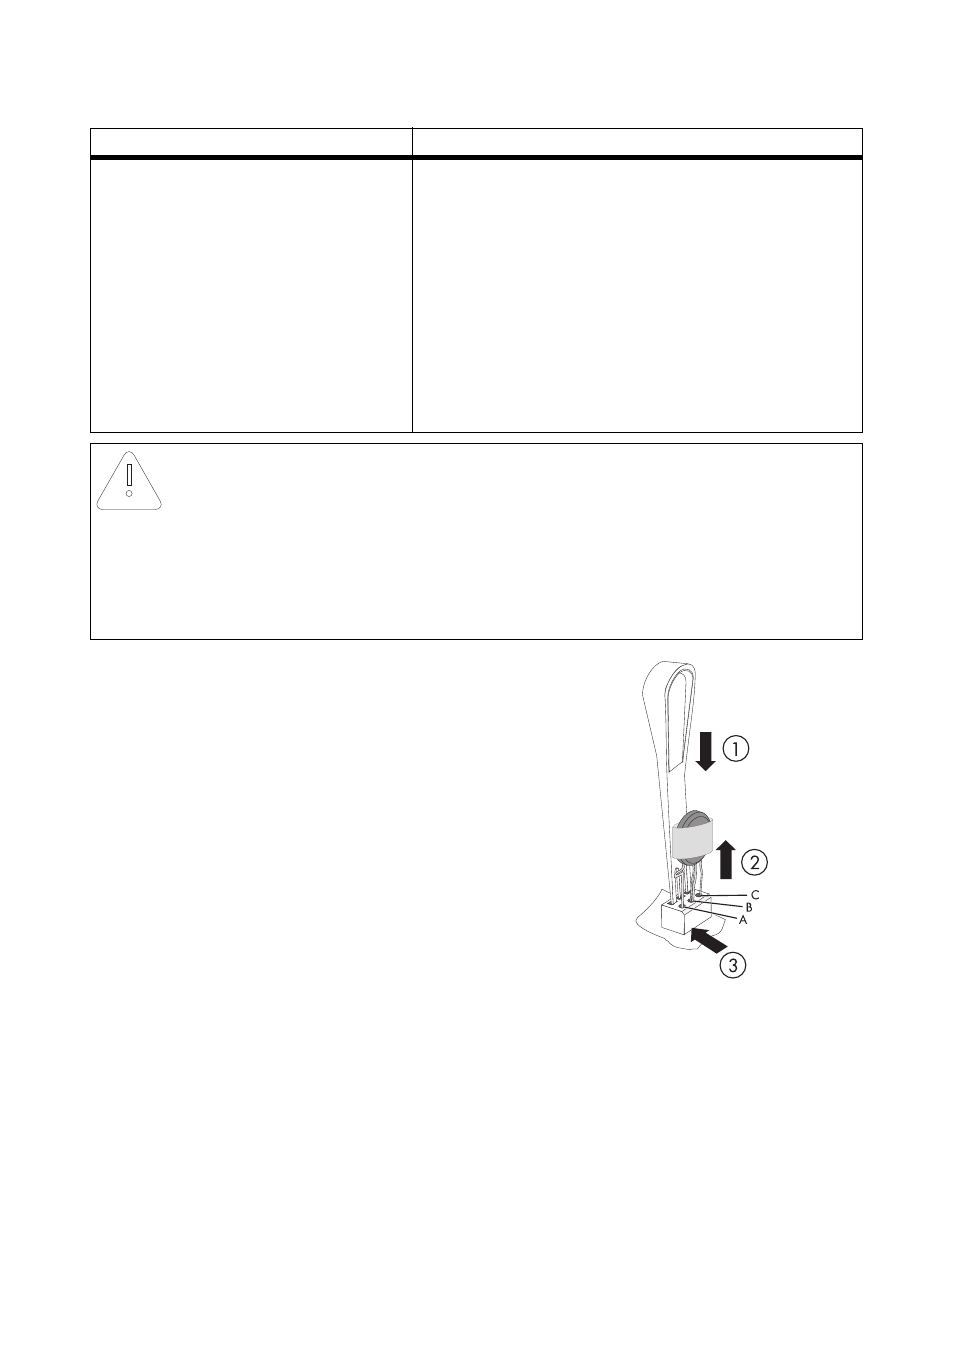
3. Insert an insertion tool into the openings of the
terminal contacts (1).
☑ The terminals will loosen.
If you do not receive an insertion tool for operating
the terminals with your replacement varistors,
contact SMA Solar Technology AG. As an
alternative, the individual terminal contacts can be
operated using a screwdriver with a blade width of
3.5 mm.
4. Remove the varistor (2).
5. Insert the new varistor (3).
The pole with the small loop (crimp) must be fitted
to terminal A when replacing the varistor.
6. Close the inverter as described in Section 7.3
"Closing the Inverter" (page 47).
☑ The check and replacement of the varistors is
completed.
☑ There is no conducting
connection.
The respective varistor is defective and must be replaced.
Varistor failure is generally due to influences which affect
all varistors similarly (temperature, age, induced
overvoltage). SMA Solar Technology AG recommends
that you replace both varistors.
The varistors are specially manufactured for use in the
inverter and are not commercially available. They must be
ordered directly from SMA Solar Technology AG
(see Section 12 "Accessories" (page 70)).
• To replace the varistors, proceed to step 3.
NOTICE!
Destruction of the inverter due to overvoltage
If varistors are missing, the inverter is no longer protected against overvoltages.
• Replacement varistors should be obtained as soon as possible.
• Do not operate the inverter without varistors in installations with a high risk of
overvoltages.
Result
Measure