6 commissioning, 1 commissioning the inverter, Commissioning – SMA SB 3300-11 Installation User Manual
Page 39: Commissioning the inverter
SMA Solar Technology AG
Commissioning
Installation Manual
SB33-38-11-IA-en-62
39
6 Commissioning
6.1 Commissioning the Inverter
1. Check the following requirements before commissioning:
– The inverter is securely in place.
– The AC cables are correctly connected (power distribution grid).
– All DC cables are completely connected (PV strings).
– Unused DC inputs are closed using the corresponding DC connectors and sealing plugs.
– The enclosure lid is securely screwed in place.
– An external DC switch-disconnector is additionally connected or, if available,
the Electronic Solar Switch (ESS) is firmly in place.
– The miniature circuit-breaker is correctly laid out.
2. Switch on the miniature circuit-breaker.
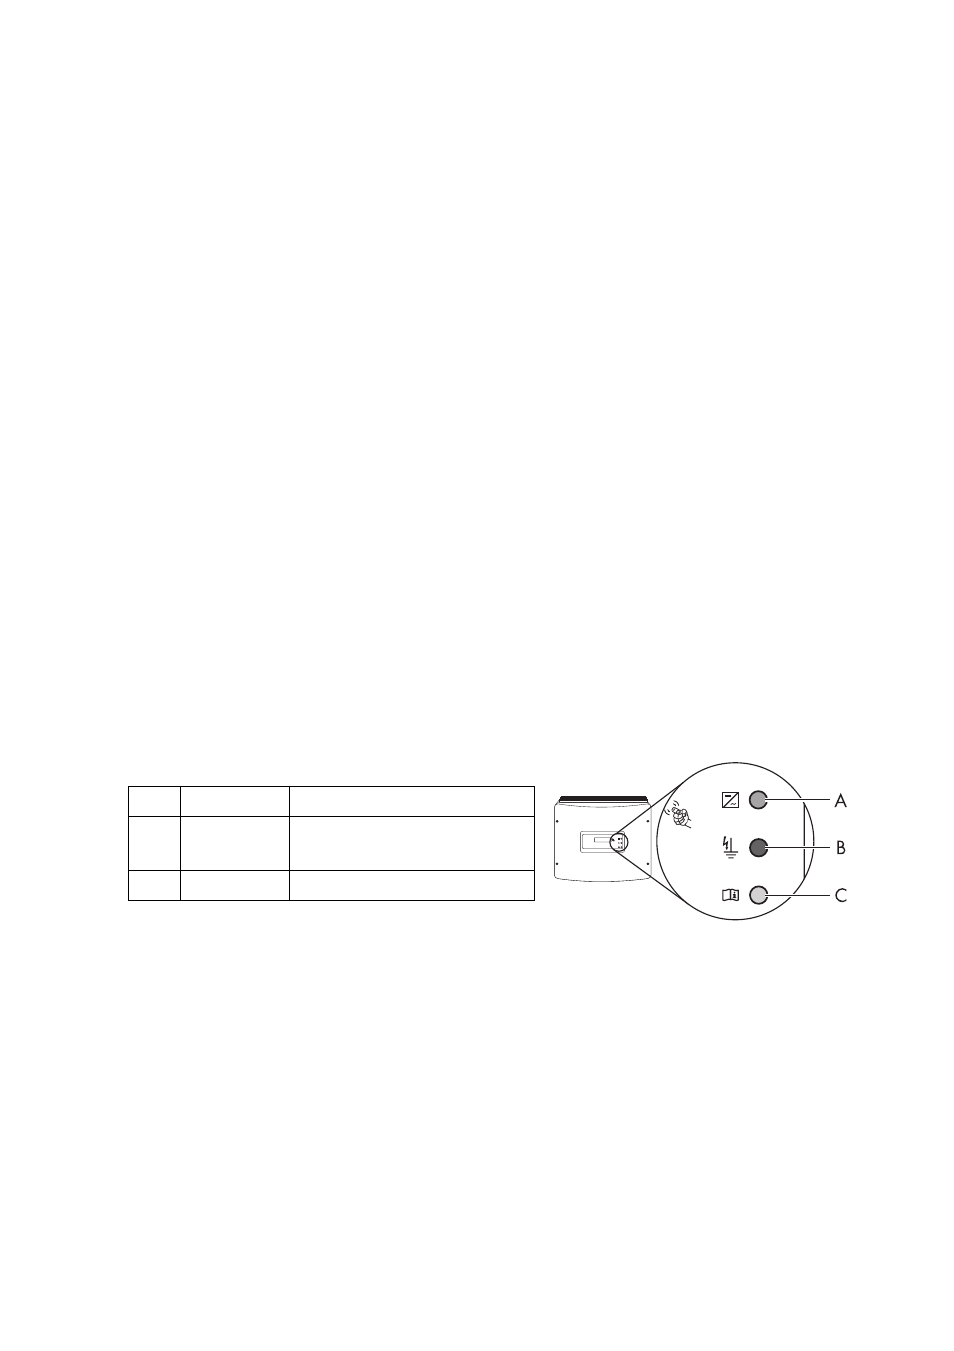
☑ All 3 LEDs are glowing or flashing: the startup phase is starting.
☑ Green LED is glowing: commissioning was successful.
or
☑ Green LED flashes in case of insufficient irradiation: Grid connection conditions have not yet
been reached. Wait for sufficient irradiation.
or
☑ The red or yellow LED is glowing or flashing: a disturbance has occurred. Proceed to step 3.
3. Read section 9 "Troubleshooting" (page 50) and if necessary, eliminate the error or fault.
A
Green LED
Operation
B
Red LED
Ground fault or varistor
defective
C
Yellow LED Fault