SMA SB 3300-11 Installation User Manual
Page 19
SMA Solar Technology AG
Mounting
Installation Manual
SB33-38-11-IA-en-62
19
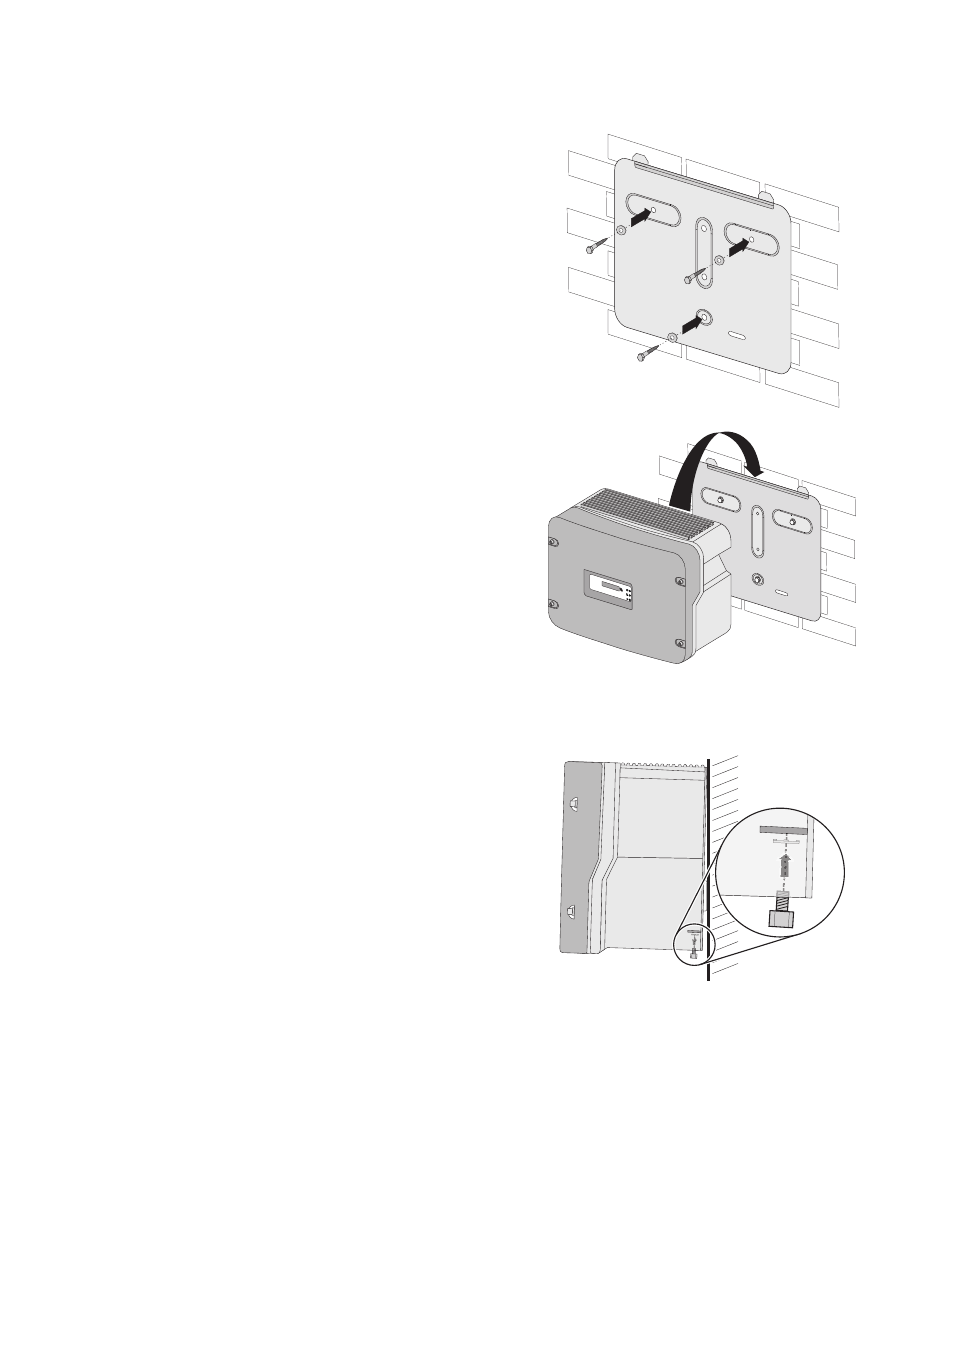
3. Attach the wall mounting bracket to the wall using
appropriate screws and washers.
4. Hang the inverter in the wall mounting bracket. In
doing so, lead the anchorage brackets through the
cut-outs on in the inverter.
☑ Both brackets of the wall mounting bracket
extrude out of the cut-outs on the inverter.
5. If a second protective conductor is required, ground the inverter and secure against being
pulled out (5.3.3 "Connecting Additional Grounding" (page 28)).
6. If a second protective conductor is not required,
secure the inverter against being pulled out:
– Plug the cheese-head screw with conical spring
washer through the metal shackle on the
underside of the enclosure. The teeth of the
conical spring washer must be facing the metal
shackle.
– Tighten the cheese-head screw to a torque of
6 Nm.
7. Check to ensure that the inverter is securely in place. The wall mounting bracket is designed in
such way that the inverter tilts backward slightly on a perfectly vertical wall.