8 opening and closing the sunny sensorbox, 1 opening the sunny sensorbox, 2 closing the sunny sensorbox – SMA Sensorbox User Manual
Page 61: Opening and closing the sunny sensorbox, Opening the sunny sensorbox, Closing the sunny sensorbox
SMA Solar Technology AG
Opening and Closing the Sunny SensorBox
Installation Guide
Sensorbox-IEN100914
61
8 Opening and Closing the Sunny SensorBox
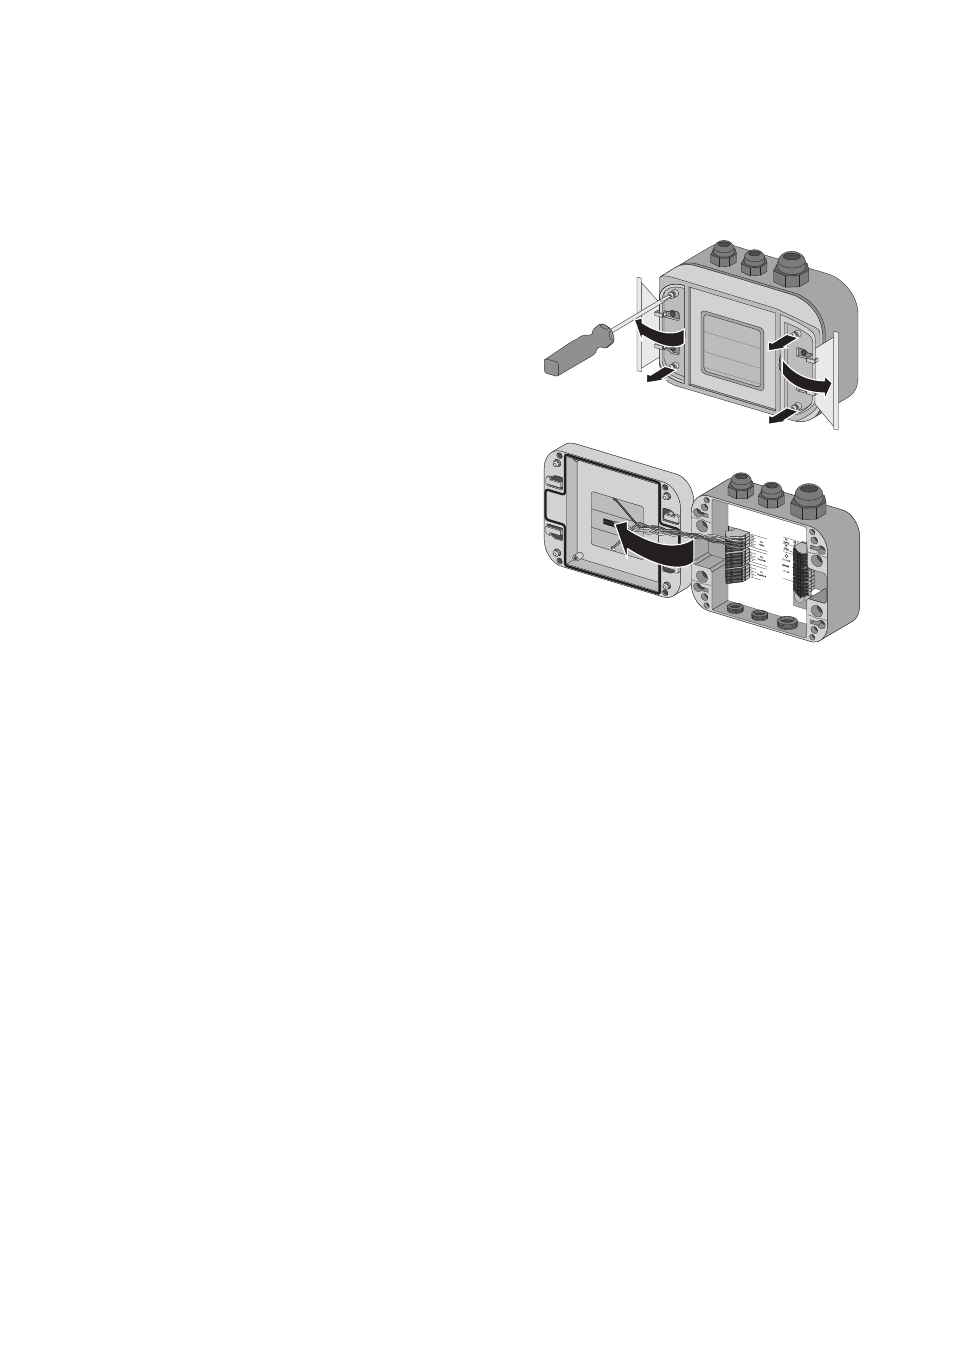
8.1 Opening the Sunny SensorBox
1. Using the notches as a guide, open the side flaps of
the Sunny SensorBox
2. Loosen the screws in the corners of the Sunny
SensorBox.
3. Open the enclosure lid up towards the left. The lid is
connected to the lower shell by hooks.
☑ The Sunny SensorBox is open.
8.2 Closing the Sunny SensorBox
1. Check the sealing of the Sunny SensorBox enclosure before closing the lid on the lower
enclosure shell. If the sealing of the enclosure has become porous over time, make sure you
replace the enclosure gaskets (see section 9.4 ”Replacing the Gaskets of the Sunny SensorBox”
(page 63)).
2. Close the lid of the Sunny SensorBox on the lower enclosure shell.
3. Initially turn the screws of the enclosure lid a little to the left, until the screws fall into the first turn
of the thread.
4. Insert screws into the lower enclosure shell and turn until finger tight (torque: 1 Nm).
5. Close the side flaps of the Sunny SensorBox.
☑ The Sunny SensorBox is closed.