SMA SIC 50 User Manual
Page 24
Electrical Connection
SMA Solar Technology AG
24
SIC50-IA-en-11
Installation Guide
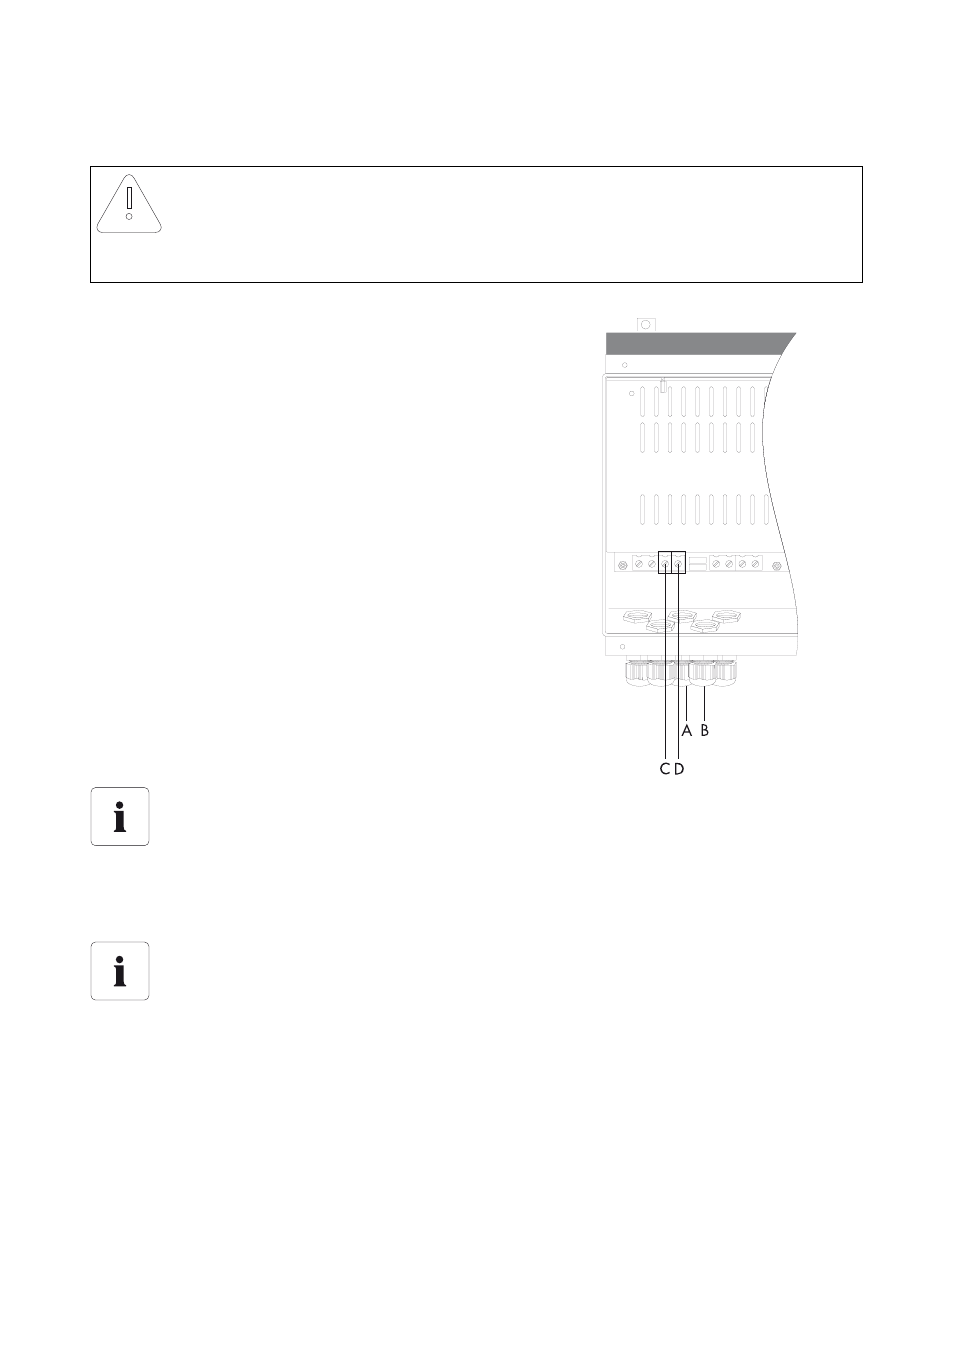
Connection Procedure
1. Unscrew the lock nut of the metric-thread cable
gland (A) and slide it along the battery's "BAT-"
cable.
2. Route the "BAT-" cable of the battery through the
cable gland into the charge controller and connect
it to the "BAT-" connection terminal (C).
3. Retighten the lock nut of the cable gland.
4. Unscrew the lock nut of the metric-thread cable
gland (B) and slide it along the battery's "BAT+"
cable.
5. Route the "BAT+" cable of the battery through the
cable gland into the charge controller and connect
it to the "BAT+" connection terminal (D).
6. Retighten the lock nut of the cable gland.
NOTICE!
Reversing the poles when connecting the battery may irreparably damage the
charge controller.
• Make sure that the poles of the cables leading to the battery are correct.
Replacing the thermal fuses when reversing the poles of the DC cables
If the poles of the DC cables are reversed when connecting, the thermal fuse will be
irreparably damaged.
Proceed as described in section 9.1 ”Replacing the Thermal Fuses” (page 38) to replace
the thermal fuses.
Multicolored LED
Once the battery has been connected, the multicolored LED of the charge controller will
glow red. If the LED is not glowing, the poles of the DC cables are reversed and the thermal
fuses must be replaced. If this is not the case, the charge controller is defective and must
be replaced. In this case, contact the SMA Service Line. See section 14 ”Contact”
(page 45).