Installing the switch into the 19-inch rack, Rack mounting by using front mounting brackets – H3C Technologies H3C S3100V2 Series Switches User Manual
Page 24
18
Installing the switch into the 19-inch rack
CAUTION:
•
Ensure a clearance of 1U (44.45 mm, or 1.75 in) between equipment for heat dissipation.
•
For a switch with the depth greater than 300 mm (11.81 in), the front mounting brackets only secure the
switch rather than bear its weight.
Rack mounting by using front mounting brackets
NOTE:
The installation procedures for front mounting brackets with different length are similar. The following uses
supplied front mounting brackets as an example.
Follow these steps to install the switch to the rack by using front mounting brackets:
Step1
Wear an ESD-preventive wrist strap and make sure it makes good skin contact and is well grounded,
check that the rack is sturdy and well grounded.
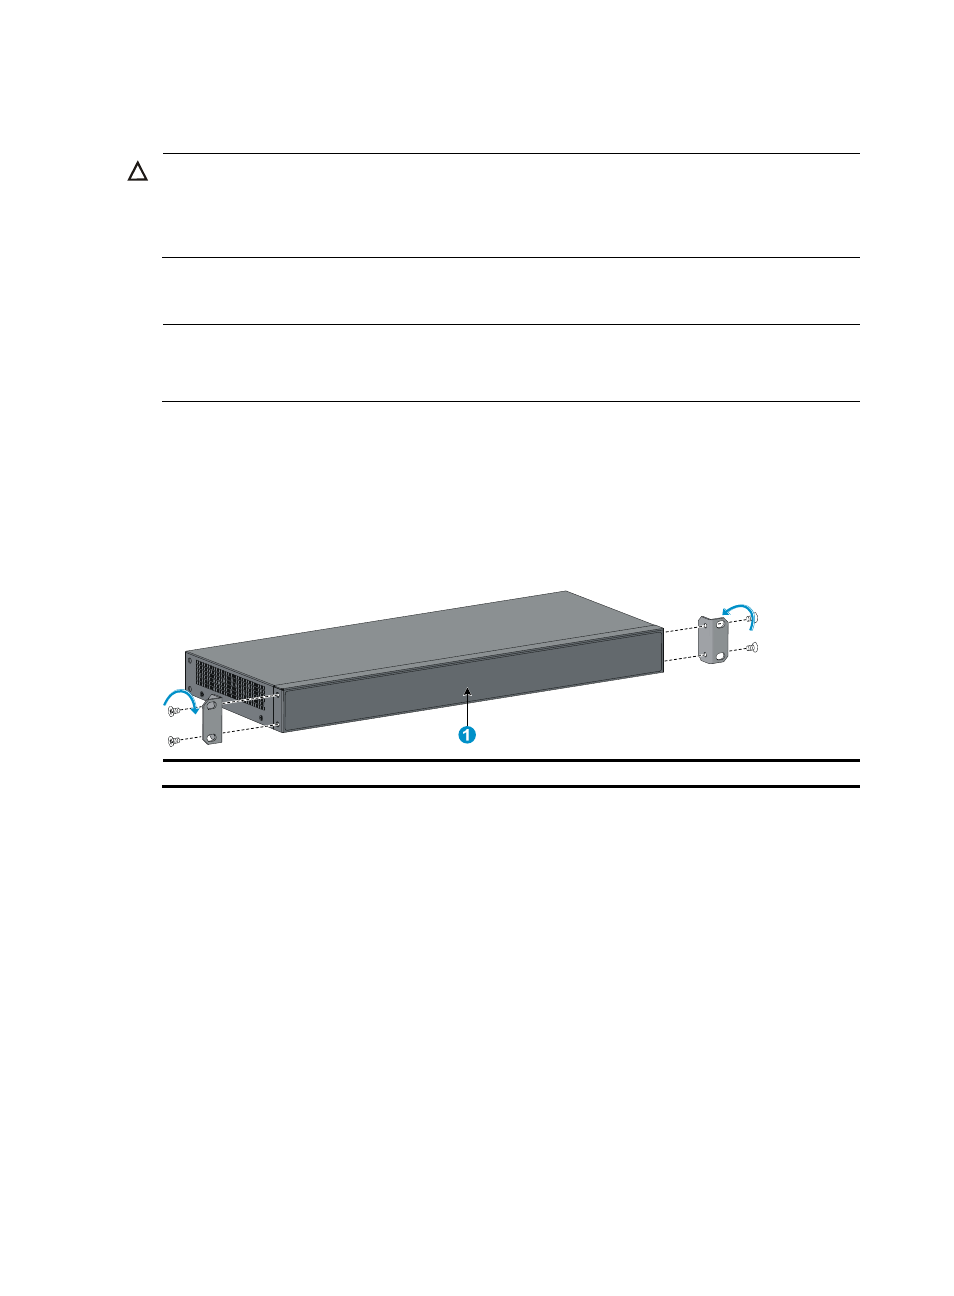
Step2
Unpack the screws (packed with the front mounting brackets), and install the front mounting brackets to
the switch with the screws, as shown in
.
Figure 24 Install the front mounting brackets
(1) Switch front panel
Step3
Determine where to install the switch in the rack, and install the cage nuts to the corresponding positions
on the front rack posts.
Step4
Supporting the bottom of the switch, move the switch to the appropriate position. Have another person
to install the mounting brackets to the rack posts with the M6 screws, as shown in