Connecting the grounding cable – H3C Technologies H3C S7500E Series Switches User Manual
Page 31
21
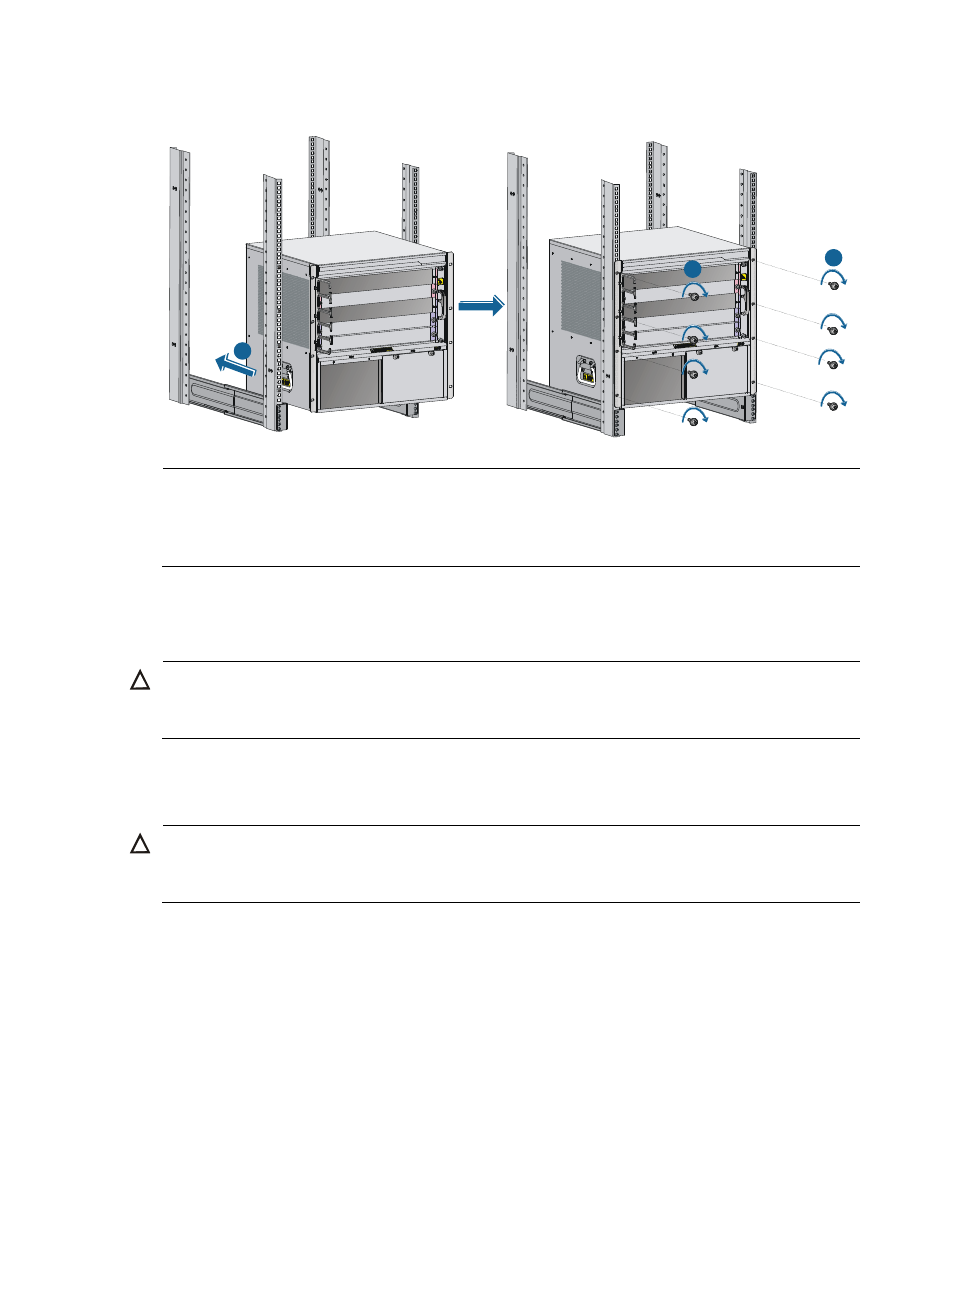
Figure 15 Installing the chassis in the rack (S7503E)
NOTE:
If the screw holes in the mounting brackets cannot align with the cage nuts on the rack, verify that the
bottom edge of the slide rail aligns with the middle of the narrowest metal area between holes and that the
cage nuts are installed in the correct holes.
Connecting the grounding cable
CAUTION:
Before using the switch, connect the grounding cable correctly to guarantee lightning protection and
anti-interference of the switch.
Connecting the grounding cable to a grounding strip
CAUTION:
Connect the grounding cable to the earthing system in the equipment room. Do not connect it to a fire main
or lightning rod.
When a grounding strip is available at the installation site, connect the grounding cable through the
grounding strip.
To connect the grounding cable:
1.
Unpack the grounding cable.
Use the provided grounding cable (yellow-green grounding cable). The provided grounding cable
is compliant with the NEBS standards.
2.
Remove the grounding screws from the grounding holes at the rear of the chassis.
3.
Use grounding screws to attach the two-hole grounding lug of the grounding cable to the chassis.
4.
Connect the other end (ring terminal) of the grounding cable to the grounding post of the
grounding strip, and fasten the grounding cable to the grounding strip with the hex nut.
1
2
2