Eneo KBD-NSC-100 User Manual
Page 30
30
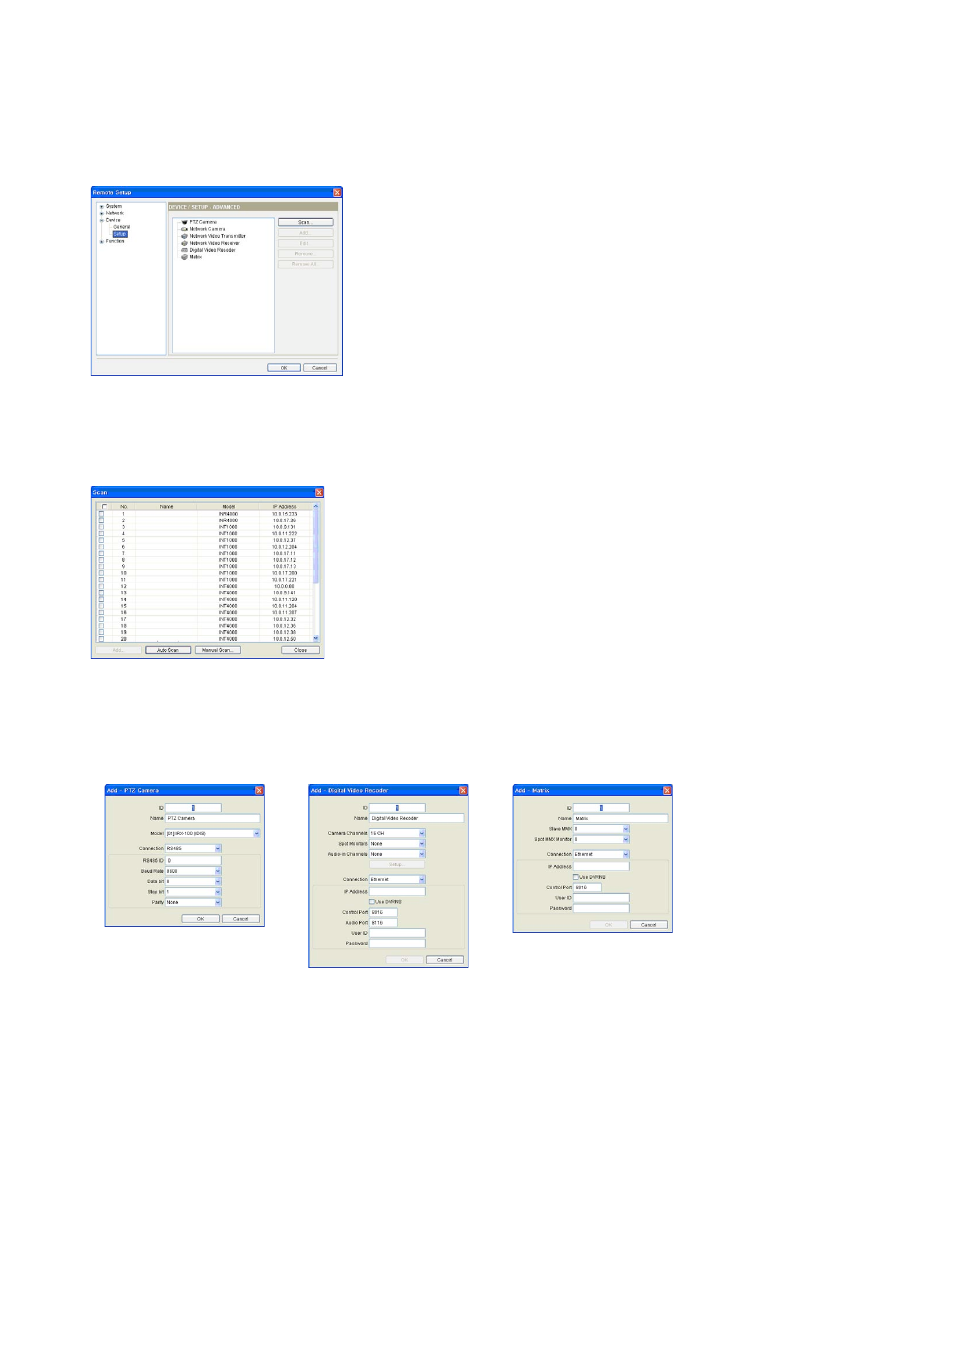
General – Advanced Mode
You can control devices via network and RS-485 connections when registering the devices in the Advanced mode.
•
Scan, Add, Edit: See below.
•
Remove, Remove All: Select a device in the list and click the Remove button to delete it.
Clicking the
Remove All button deletes all devices from the list.
•
Scan: Click to find and list up devices connected to a network. (Network cameras, network video transmitters, network video receivers and MMXs only)
– Auto Scan: Click to reload the list of the device networked via LAN.
– Manual Scan: Click the button and enter the IP address of the device to find out when
the device is networked via WAN or temporarily disconnected from the network.
– Add: You can register the listed device on the network keyboard. Check the devices in
the list and click the button, and a setup screen appears. Enter the user ID and password
for the connection to the selected devices and click the
OK button. Do not check the
Apply to all box if the user ID and password of selected devices are different from each
other, and the
OK button changes to Next. Click the Next button and enter the
information for connection to each device. Refer to the following section for details of the
information setup.
•
Add: Select the device in the device list and click the button to register the device on the network keyboard. A setup screen appears allowing you to enter
the information for connection to the device.
– ID: The network keyboard assigns the ID automatically when the device is registered, and you can change the ID. The ID will be used to distinguish the
device from other devices when controlling it by using the network keyboard, so each device should have its own unique ID.
– Name: Set up the device’s camera name for your reference.
– Camera Channels: Select the number of camera channels supported in the device.
− Spot Monitors: Select the number of spot outputs supported in the device.
– Audio-in Channels: Sets up audio channels for two-way audio communication if the device supports two-way audio communication and allows you to
select an audio channel for two-way audio communication remotely. Select the number of audio inputs supported in the device and click the
Setup
button. Selecting a camera to be associated with each audio channel enables two-way audio communication with the remote site. The two-way audio
communication is available only when controlling the camera via network connection.
– Slave MMX: Select the number of slave MMXs daisy-chained to the master MMX.
– Spot MMX Monitor: Select the number of spot monitors connected to spot MMXs which are connected to the master MMX and slave MMXs.
– Connection: Select the device’s connection type to the network keyboard, and configure the settings. Enter the Watch port or Control port set up at the
device in the
Control Port field. When registering a DVR connected to the network keyboard via RS-485 connection, you will be asked to enter the
system ID set in the DVR.
PTZ Camera
DVR
MMX