Create users – Super Systems SuperDATA Load Entry User Manual
Page 43
SuperDATA Standard Load Entry Operations Manual
Super Systems Inc.
Page 43 of 58
Load Entry requires a SQL database
instance for the Load Entry database.
The SQL server can be present on the
local computer or on a networked
computer that the local computer has
access to.
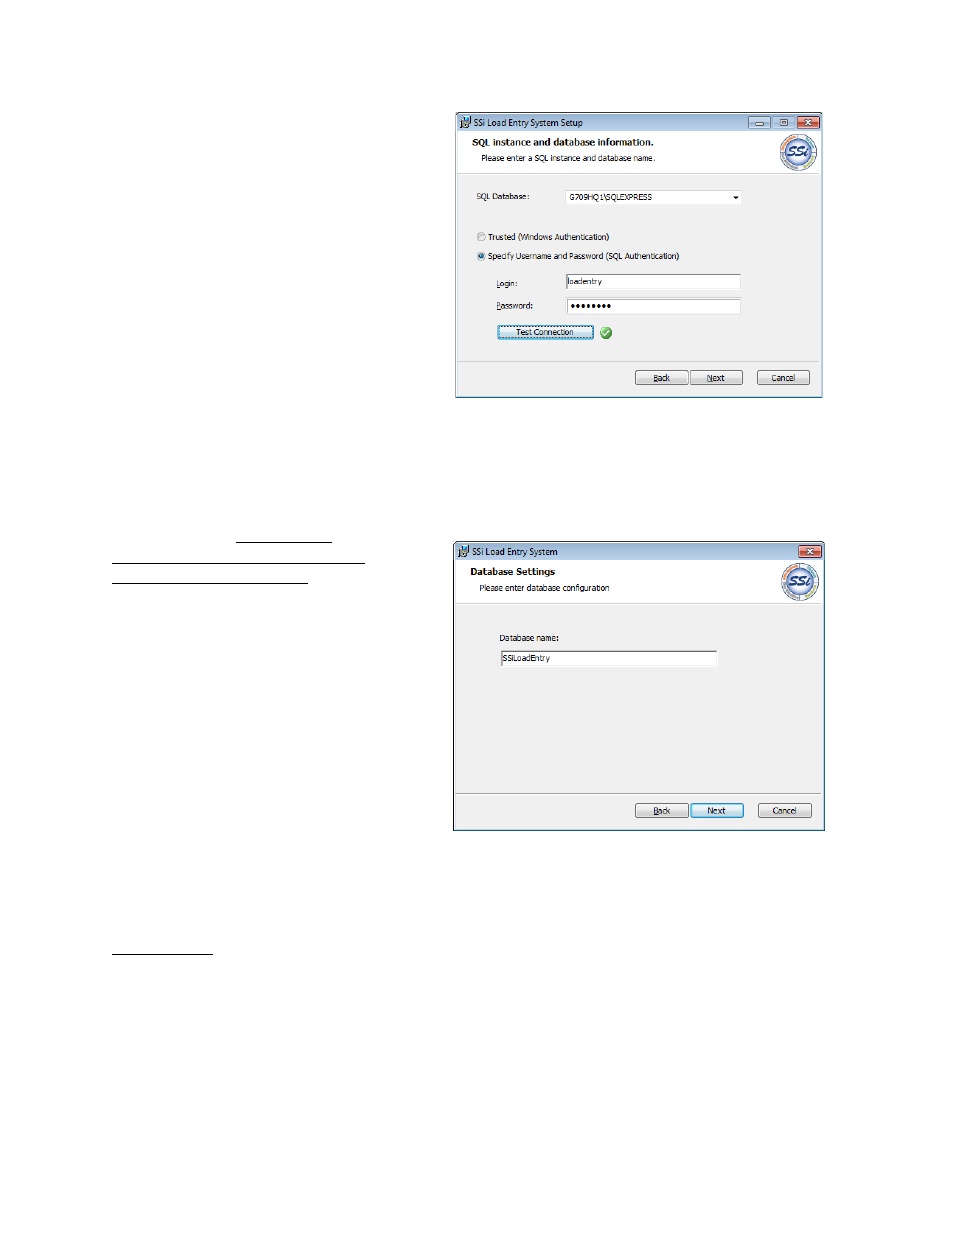
Load Entry will create a new database
during installation, provided that it can
connect to the SQL server with specified
credentials. In the example at right, the
SQL database instance is
“G709HQ1\SQLEXPRESS” and
credentials have been entered for a
specific login and password. When Test
Connection is clicked, the setup
program will try to connect to the
specified database using the credentials
provided. A green circle with a check
mark in it indicates that the connection
was successful. A successful
connection is required in order to
continue with installation.
See SQL Setup on page 7 for guidelines
on SQL server configuration needed for
Load Entry. If needed, refer to SQL
setup documentation for additional
information on configuring the database
to your needs.
Click Next when ready to proceed. Enter
a database name for the new database,
or proceed with the default, which is
“SSiLoadEntry”. Click Next again.
When ready to proceed, click Install. A
series of completion screens will
appear. Click the necessary buttons to
continue and finish the installation.
Create Users
Once the application is installed, you are now ready to add users. This is essential because each
user will be associated with a specific, assigned access level providing access to certain
features.
To start Load Entry, open the SSi Load Entry System program from the Start Menu. By default,
this program shortcut is located in the SuperSystems program group. The program may take
longer to open than other programs due to database connection startup.