Installation instructions – Sloan MCR 4004-A CONTROLLER User Manual
Page 2
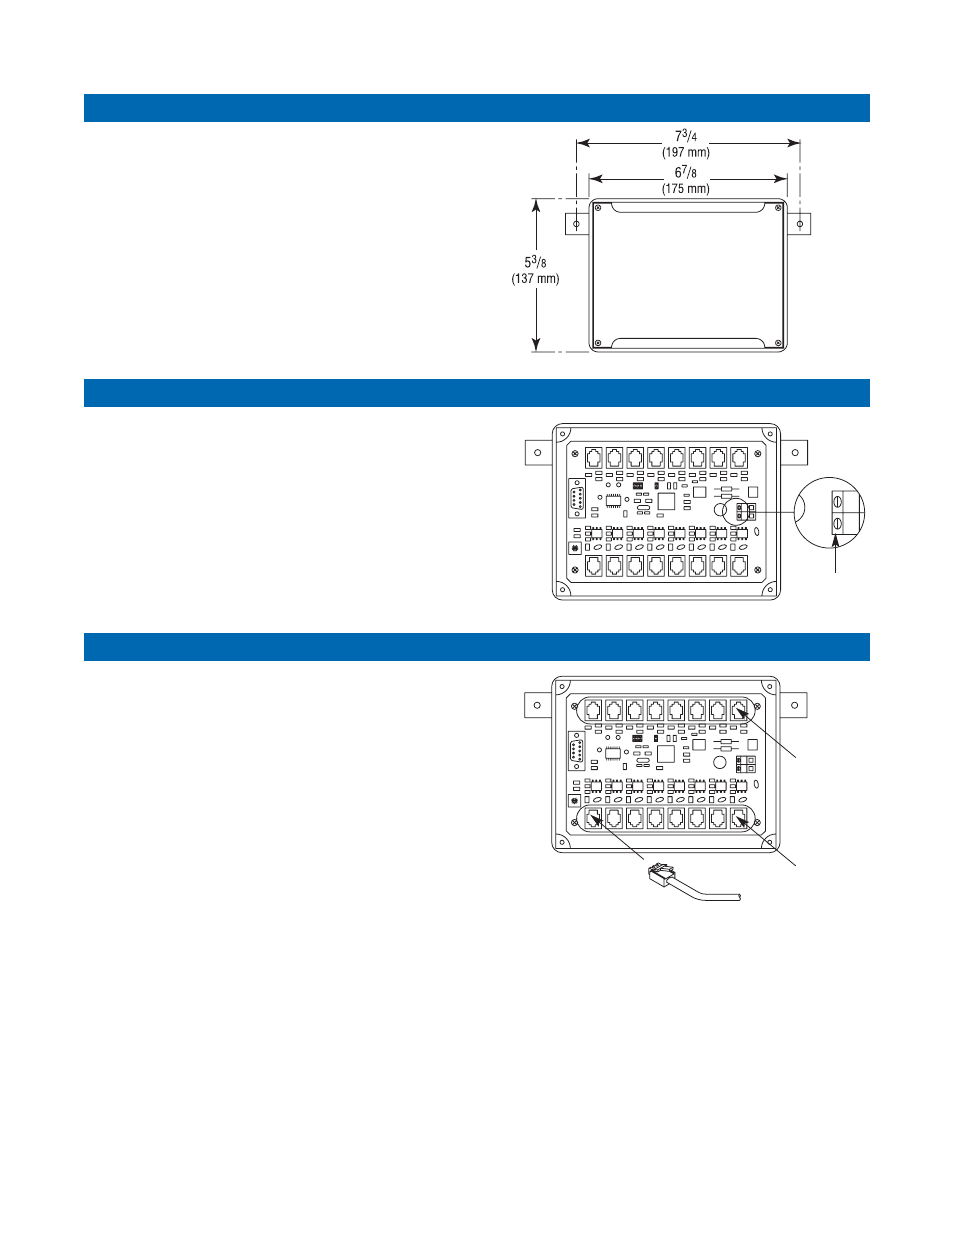
1. Remove plastic cover from front of controller.
2. Install controller so that all cables for solenoids enter from
the bottom and all cables from push buttons enter at top.
Controller must be located within 200 ft. from furthest push
button and within 200 ft. of power supply transformer.
3. Mount controller to wall using mounting screws and
plastic anchors.
NOTE: Extension cables are available as an accessory item
from PWT. Using extension cables other than PWT supplied
cables with this installation may void your warranty.
1. Make sure power is off to 24 VAC transformer.
2. Run 18-gauge wire from secondary side (24 VAC output) of
transformer to terminal block inside controller.
3. Turn power on and look for power indicator to illuminate.
4. Turn power off until push buttons and solenoids are installed.
IMPORTANT: Be sure that wire is completely inserted into
terminal and that no strands are crossing from one side to
the other.
1. Plug RJ-11 connectors from push buttons into appropriate
input connections in controller. Refer to Operating Chart
sheet for input/output designations.
2. Plug RJ-11 connectors from Flushometers, lavatories and/or
shower solenoids into appropriate output connections in
controller. Refer to Operating Chart sheet for input/output
designations.
3. Power up controller.
IMPORTANT: Make sure that all push buttons are connected
to the input and solenoids connected to output. Improper
connections will result in failure of controller and/or push
buttons and solenoids and will require replacement.
INSTALLATION INSTRUCTIONS
Step 1 — Mount Controller
Step 2 — Connect Power Supply
Step 3 — Connect Push Button and Solenoid
PUSHBUTTON
CONNECTIONS
SOLENOID
CONNECTIONS
TERMINAL BLOCK
The information contained in this document is subject to change without notice.