5 setting the mixing valve for the pump group hgm, Setting the mixing valve for the pump group hgm – REMKO HGM-HGU User Manual
Page 17
4.5
Setting the mixing valve for the
pump group HGM
The motorised mixing valve enables temperature
regulation of the inlet by mixing hot or cold liquid.
Regulation can be carried out manually using the
rotary regulator or using an actuator.
The mixing valve that is integrated into the HGM
has an integrated bypass that can be regulated.
The bypass with the electrical actuator enables the
advantages of inlet temperature control to be uti-
lised. It enables the inlet temperature to be regu-
lated if the return flow of the mixing valve is com-
pletely closed. (Maximum fluctuation performance)
The mixing valve has a turning angle of 90°.
In this way, it restricts the height of the temperature
in the regulation area and prevents fluctuating tem-
peratures, dangerous temperature spikes (e.g. in
systems with underfloor heating) and continuous
changes to the turning direction of the motor.
Attention: If there are large temperature differ-
ences between the temperature in the buffer tank
and the temperature in the heating cycle, it is pos-
sible that the setpoint will not be reached even if
the bypass is open. Obviously, the best possible
regulation should be used.
To ensure precise calibration of the temperature,
the heating cycle must be put into operation with
the planned maximum inlet temperature. This is
the only way to retain the setting precisely in oper-
ation.
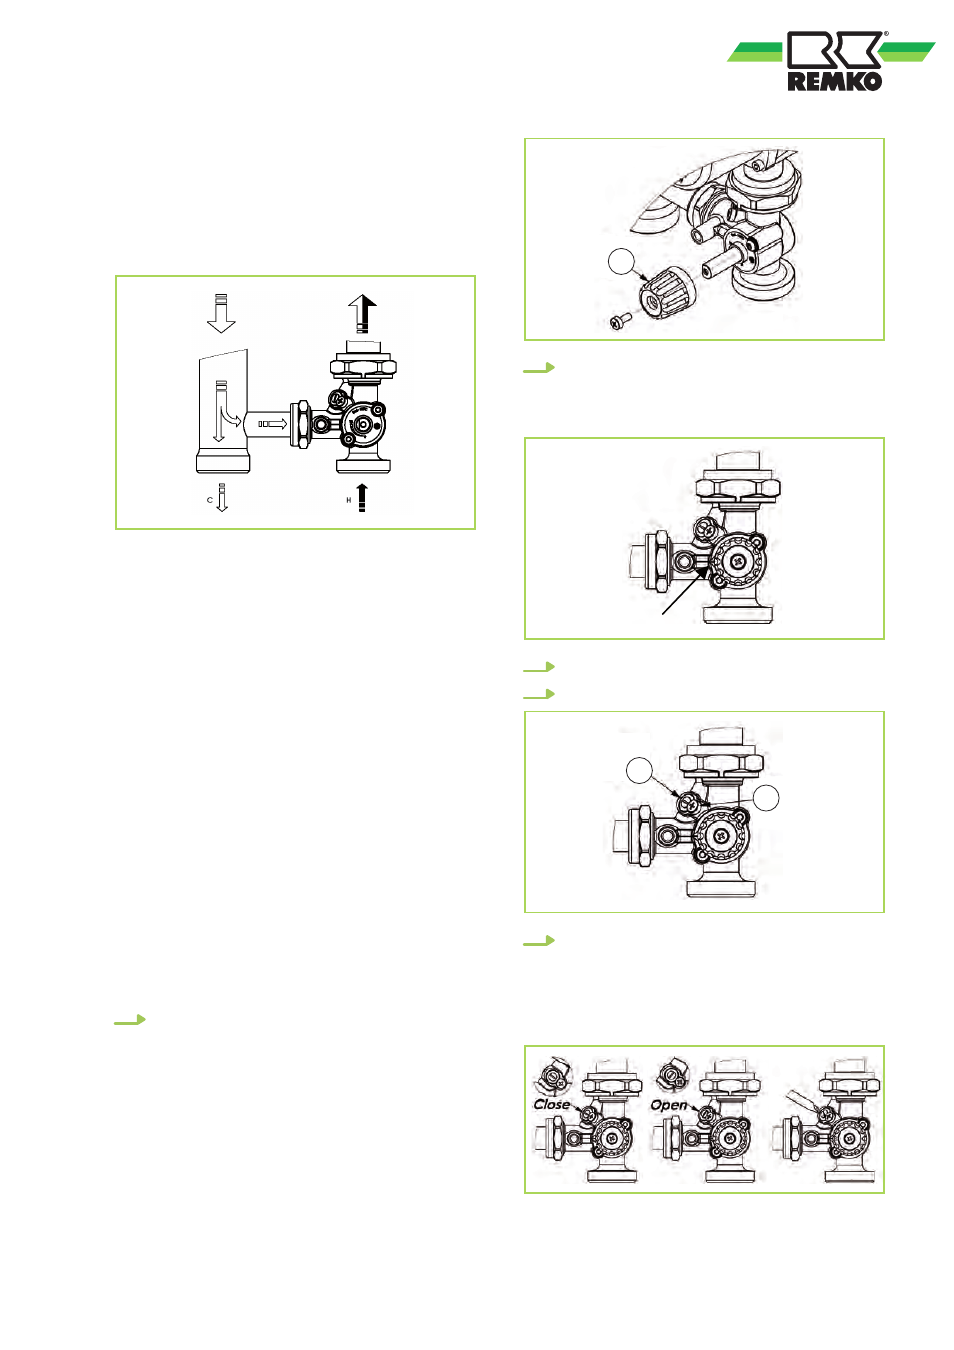
1.
Install the rotary regulator (1) with the sup-
plied screw.
1
2.
Move the rotary regulator (1) to the position
where the arrow points to the value 10. This
is the position in which there is no tempera-
ture mixing.
3.
Activate the pump.
4.
Loosen the bypass screw (2).
2
3
5.
Position the bracket regulator (3) in order to
set the operating temperature and ensure
that the bypass is closed completely as
shown in the left picture in the diagram below
and completely open as shown in the middle
picture. Tighten the screw (2).
17