Standard Horizon HX-100S User Manual
Page 15
Page 15
HX100/HX150
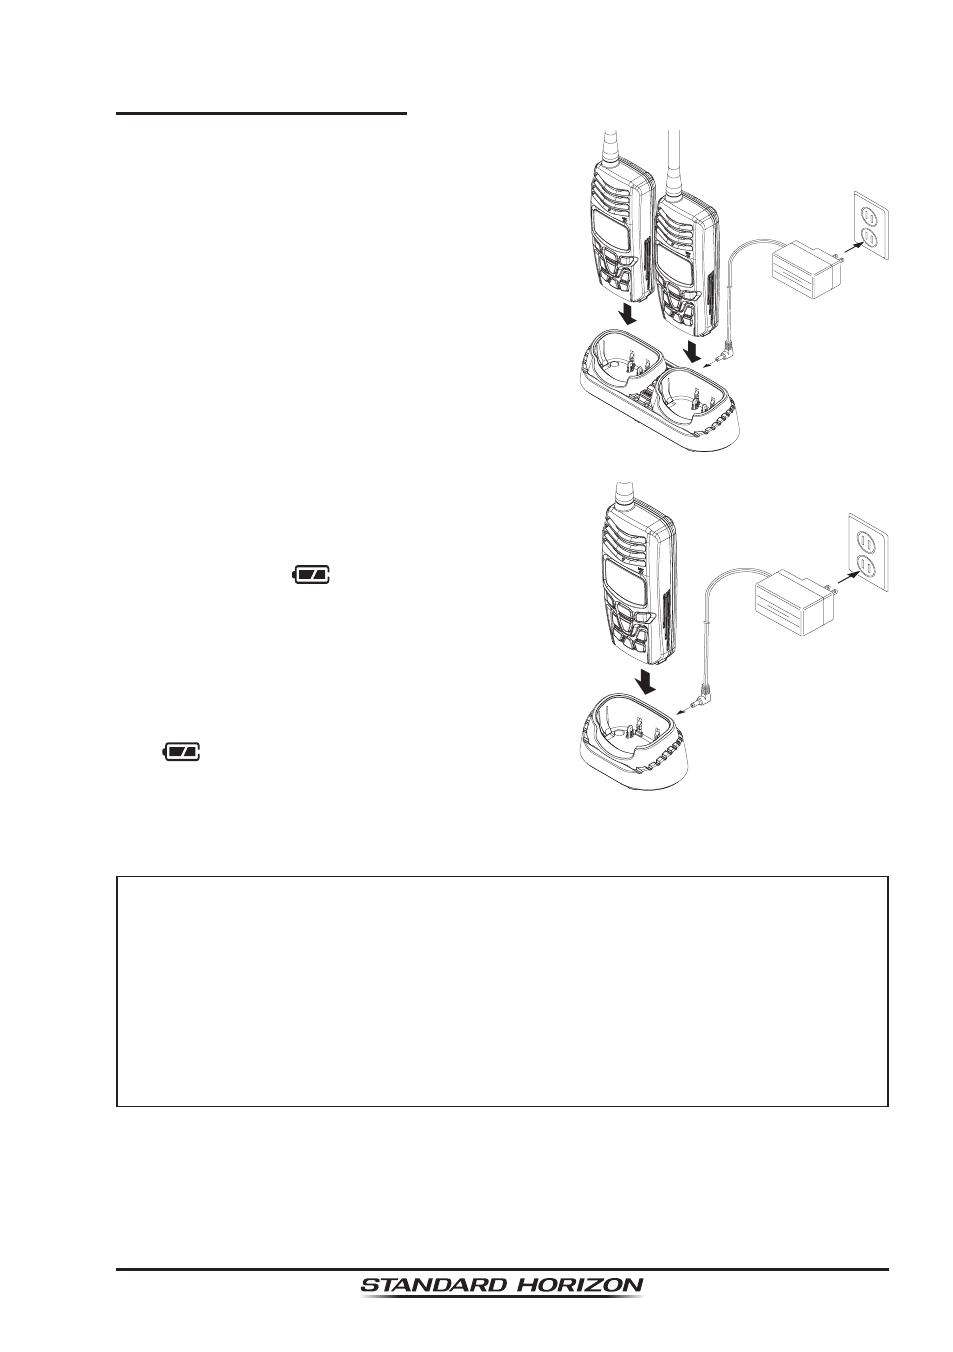
4.2.3 BATTERY CHARGING
1. Turn the transceiver off.
2. Insert the DC plug from the
PA-48B into
the DC jack on the
CD-56 (for HX100)
or
CD-57 (for HX150) Charging Cradle,
then plug the
PA-48B into the AC line
outlet.
3. Insert the
HX100 or HX150 (with the bat-
tery pack) into the
CD-56 (for HX100) or
CD-57 (for HX150); the antenna should
be at the left side when viewing the
charging cradle from the front.
4. If the transceiver and battery pack are
inserted correctly:
HX100: The RED indicator on the
CD-56
will glow.
HX150: The “
” icon will appear in the
display.
5. A fully-discharged pack will be charged
completely in approximately 10 hours
(for HX100) or 6 hours (for HX150). The
HX150 is completely charged when the
“
” disappears and “FL” for FULL ap-
pears on the LCD display.
6. Remove the transceiver(s) from the
CD-56 or CD-57, then unplug the
PA-48B from the AC line outlet.
CAUTION
Do not connect an improper battery charger to the DC jack on the
CD-56 and CD-57 Charging Cradle.
The
PA-48B, CD-56 and CD-57 are not designed to be water-
proof. Do not attempt to charge in a water hazardous environment.
Please dry the transceiver and charge contacts using a soft cloth
before charging.
PA-48B
HX100
CD-56
PA-48B
HX150
CD-57