Equipment required, Programming, Tools – GAI-Tronics 13363 Addressable Amplified Speakers Installation and Operation Manual User Manual
Page 42: Mounting
Pub. 43004-034F
Model 13353, 13363, and 13373 Addressable Amplified Speakers
Page 37 of 52
e:\radio products-current release\43004\43004-034f\43004-034f.doc
03/15
Equipment Required
Programming
PC with Windows 95 or newer operating system.
N
OTE
: CARD Suite is not compatible with Windows NT.
XAC4000A Programming Software (all models)
XAC0004A Programming Cable (all models)
19101-024 RF Programming Kit (Models 13363 and 13373 only)
Tools
#1 Phillips screwdriver
1/16-inch flat blade screwdriver (for TB101, TB1 and TB2 connections only)
Mounting
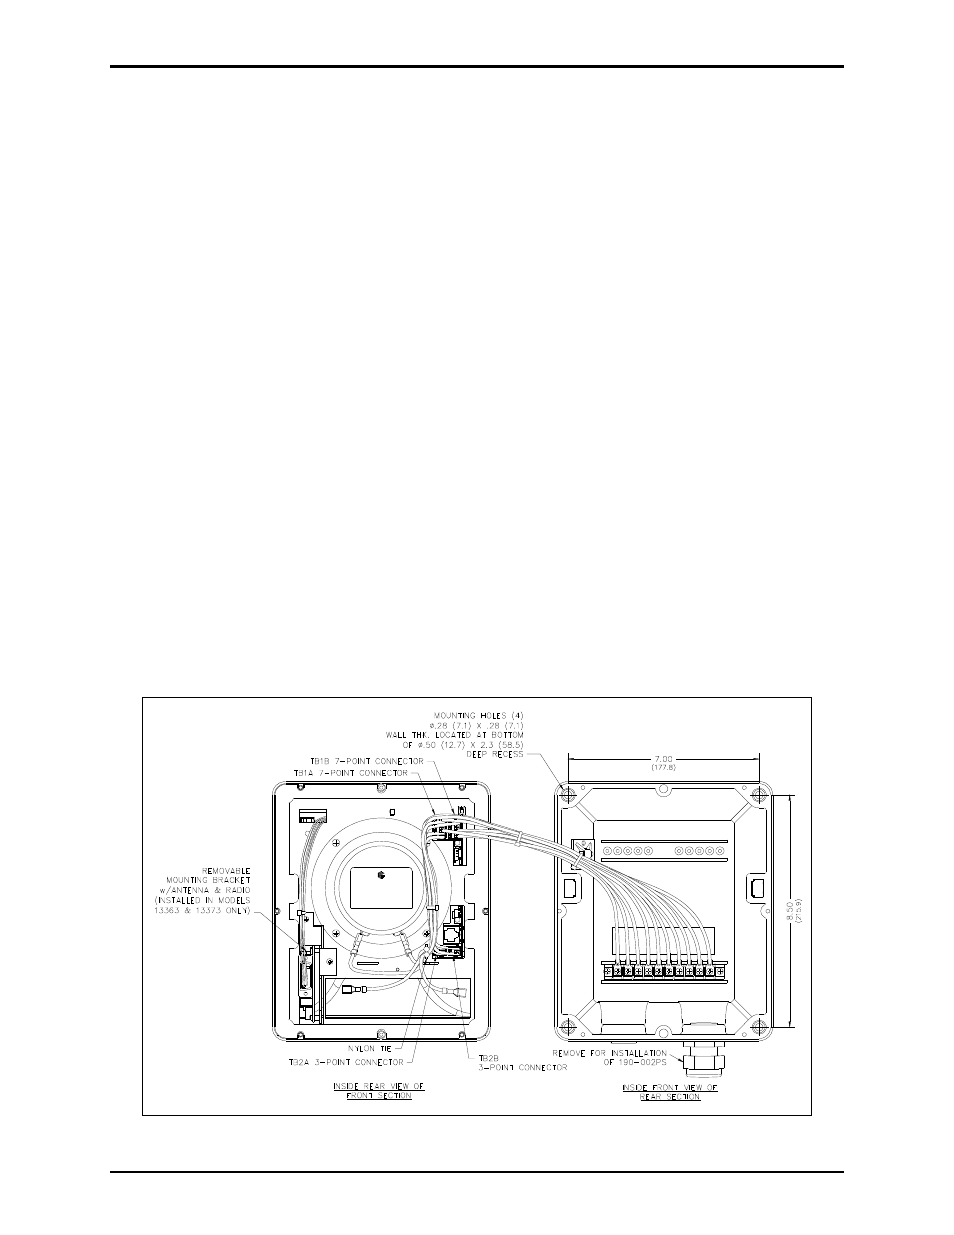
1. Open the Addressable Amplified Speaker as explained on page 16.
2. After opening the Addressable Amplified Speaker, untwist the nylon tie used for wire management.
Unplug the quick-connect fastons from the speaker and unplug the dual 7-point connectors (TB1) and
dual 3-point connectors (TB2) from the PCBA. The front section can now be completely separated
from the rear section. See Figure 7.
3. Mount the rear section to any flat surface using 1/4-inch diameter customer-provided screws in each
of the four 0.280-inch mounting holes in the corners of the rear section. Refer to Figure 7 for
mounting hole pattern dimensions. A Model 231-001 Pole Mounting Kit can also be used for pole or
surface mounting. Two customer-provided mounting screws are required to surface mount this kit.
The kit includes four mounting screws needed to secure the speaker to the kit’s bracket.
Figure 7. Mounting Detail