Assembly – Formax FD 2092 User Manual
Page 5
Steps for assembling the conveyor:
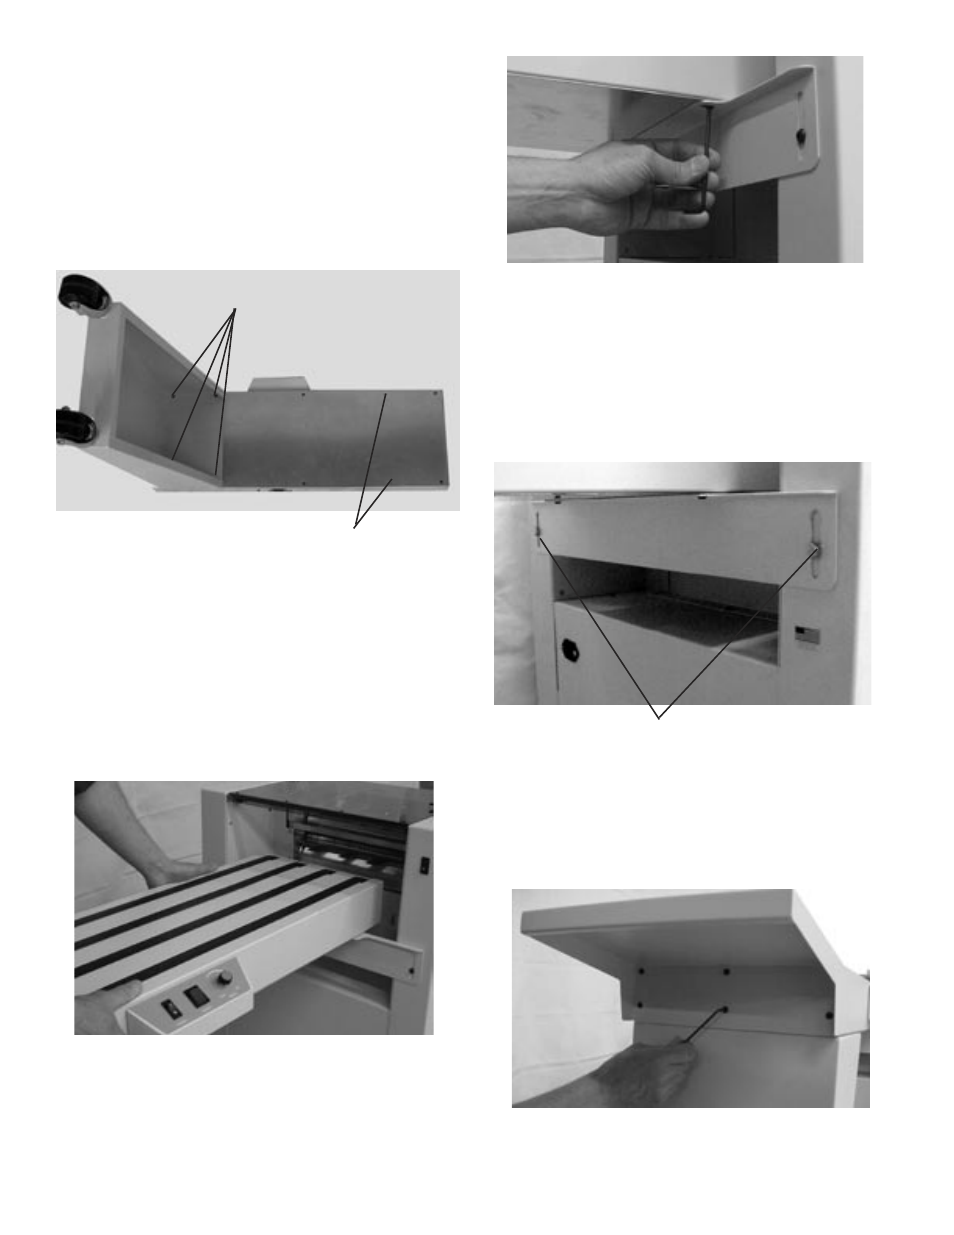
1. Turn conveyor over and remove the four screws to
the far left of the control panel with a 3/8” allen wrench.
Then attach the conveyor leg using the same four
screws (Fig 1).
2. With the conveyor still turned over remove the
second to last set of screws that are located to the
right of the control panel (These screws will be used to
attach the conveyor to the mounting bracket)
(Fig1)
.
3. Turn the conveyor to its upright position and roll
it up to the sealer so that holes on the underside of
the conveyor line up with the holes in the mounting
bracket. The conveyor should fit up tight against the
sealer outfeed (Fig 2).
4. Secure the conveyor to the mounting bracket
using the two screws removed form the bottom of the
conveyor (Fig. 4).
6. Attach conveyor extension to the end of the
conveyor using the six 3/8” allen screws provided
(Fig 6).
5. Once the conveyor is securely mounted, the bracket
can be adjusted up or down to level the conveyor.
Loosen the allen screws and slide up or down and
retighten (Fig 5).
ASSEMBLY
3
Fig 2
Fig 4
Fig 5
Fig 6
Fig 1
Step 2
Step 1
Step 5