Echo Bear Cat 77000-00 User Manual
Page 2
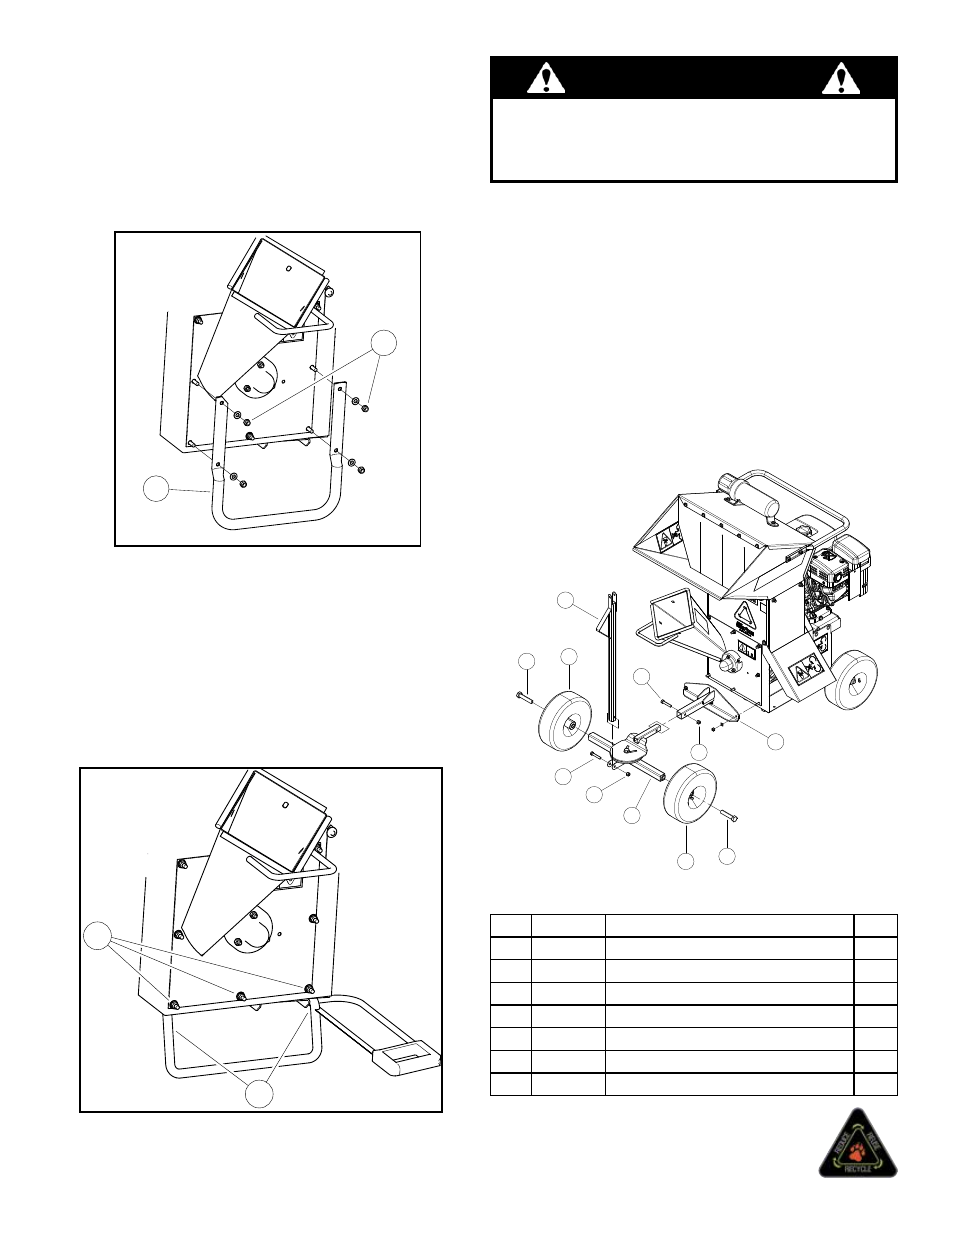
ITEM pART NO. DESCRIpTION
QTY
1
15008
BOLT, 3/8 X 2 HEX HD GR5 ZP
2
2
15019
BOLT, 5/8 X 3 HEX HD GR5 ZP
2
3
15388
NUT, 3/8 NE NYLOCK ZP
2
4
16003
WHEEL ASSY, 410/350-4
2
5
75608-12
WELDMENT, TOW BAR
1
6
76996-00
ASSEMBLY, TWO WHEEL TOW KIT
1
7
76999-12
WELDMENT, TOW BAR
1
pARTS LIST, KIT NO. 77001-00
INSTALLING ThE KIT
1. Lay tow kit assembly (6), on a flat working surface.
2. Attach tow bar weldment (7), to the tow kit assembly (6)
using 3/8 x 2" bolt (1) and lock nut. Tighten securely.
3. Attach the tow bar (5), to the assembly using the
remaining 3/8 x 2" bolt (1) and lock nut (3).
4. Install the wheels (4) using 5/8 x 3" bolts (2) and tighten
securely.
5. Attach hitch assembly to the machine by placing the hitch
on the three lower bolts on the housing and securing with
the three nuts and washers or flange nuts removed in
the previous steps.
EChO BEAR CAT
www.bearcatproducts.com
237 NW 12th Street, West Fargo, ND 58078-0849
Phone: 701.282.5520 • Toll Free: 800.247.7335 • Fax: 701.282.9522
E-mail: [email protected] • [email protected]
1
1
2
2
3
3
4
4
5
6
7
SC3265 MODEL SHOWN
INSTALLATION fOR SERIAL NUMBERS 707807
AND BELOW (fIGURE 3)
1. fOR 3-INCh ChIppER/ShREDDERS SN 707807 AND
BELOW
, cut the leg (1) off with a hacksaw or other saw
appropriate for cutting metal. Make the cut approximately
1/4" - 1/2" from the chipper frame.
2. Discard metal leg.
3. Remove the three 5/16" nuts (2) and washers.
1
2
INSTALLATION fOR SERIAL NUMBERS 707865
TO C03262 (fIGURE 2)
1. fOR 3-INCh ChIppER/ShREDDERS SN 707865 TO C03262
,
remove the metal leg (1) by removing the four 5/16" nuts
(2) and washers. Also remove the nut and washer from
the middle lower bolt.
2. Keep and reuse all of the nuts (2) and washers; Discard
the metal leg.
1
2
Figure 2. Leg removal, 3" Chipper/Shredder 707865 to C03262
Figure 3. Leg removal, 3" Chipper/Shredder 707807 and below
If you have an older model chipper/shredder, you will
have to cut off the existing metal leg before installing the
kit. Newer models have a detachable leg. Choose the
instructions below that are appropriate for your machine
NOTE