Removing and replacing the blower exit elbow – DR Power Tow-Behind 9.00 Commercial (May 2006 - July 2010) User Manual
Page 46
42 DR
®
COMMERCIAL LEAF and LAWN VACUUM
Removing and Replacing the Blower Exit Elbow
BEFORE PERFORMING ANY MAINTENANCE, SHUT OFF
THE ENGINE, ALLOW FIVE (5) MINUTES FOR PARTS TO
COOL AND DISCONNECT THE SPARK PLUG WIRE.
Tool Needed:
•
Diagonal or wire cutter
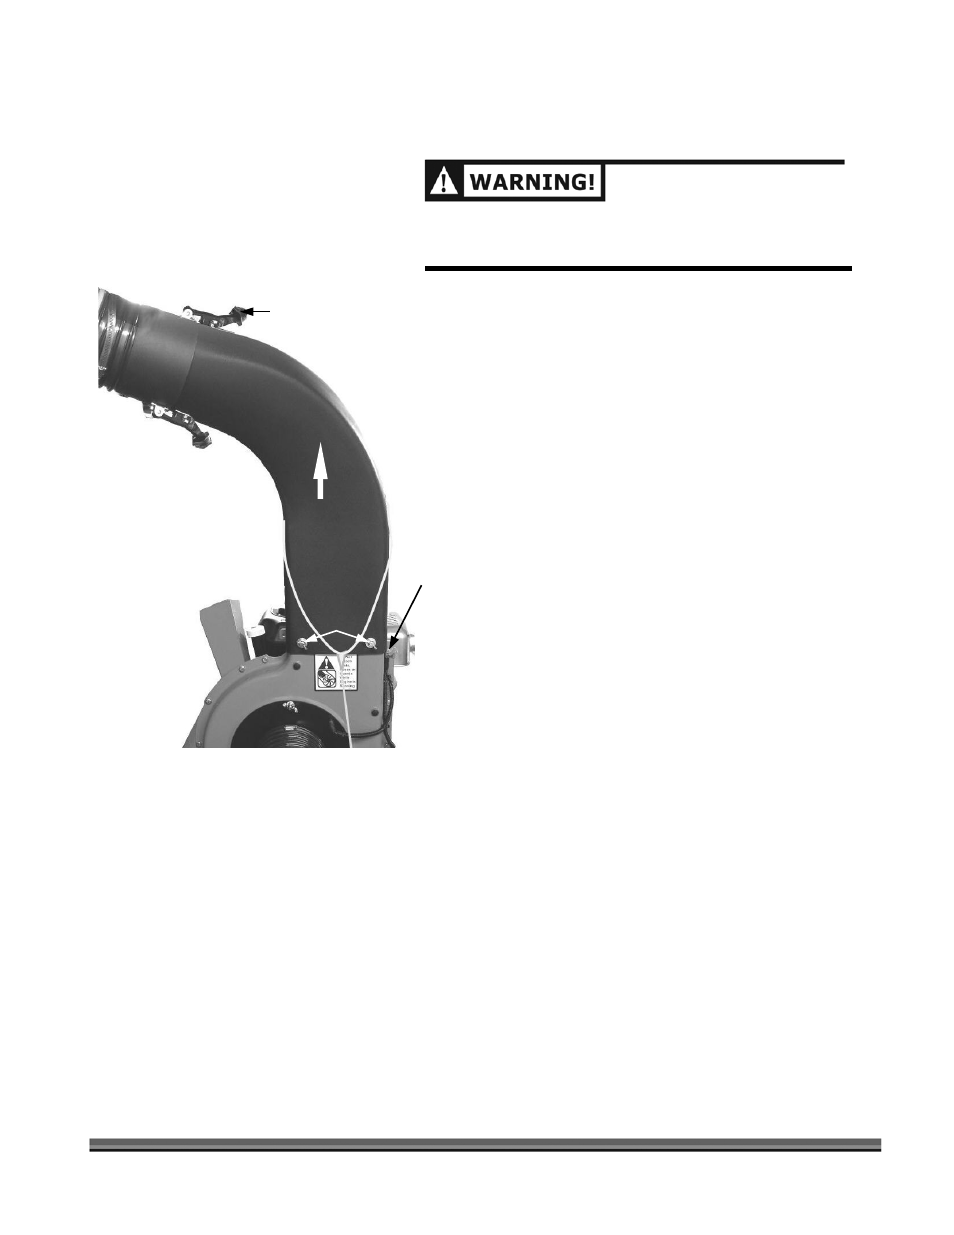
Wing
Screw
4-places
Lift Off
Collector Box
Hose
Blower Exit
Elbow Assembly
Flexible Latch
Figure 45
Safety
Interlock
Switch
1. Disconnect the Blower Exit Elbow to the Collector
Box Hose by releasing the two (2) Flexible Latches
(Figure 45) and separate the Hose.
2. Remove the four (4) Wing Screws from the Blower
Exit Elbow Assembly (Figure 45).
3. Lift the Blower Exit Elbow Assembly from the top of
the Blower and install a new assembly in the
reverse order (Figure 45).
4. Install the Lanyard over the new Elbow Assembly
before attaching the Elbow to the top of the Blower.
5. Check the Safety Interlock Switch to be sure that it
is depressed.