6 replacement parts – Daktronics DF-12xx User Manual
Page 31
Maintenance and
3-9
Troubleshooting
Power On Self-Test:
A useful troubleshooting tool is the power on self-test the host driver performs every
time it powers up:
• If the signal wiring between each controller is correct, the first two digits of
each driver will display “Ad” momentarily, and the first digit will then flash
three numbers indicating the decimal address that is set with the address
plug in J19. (If a client driver displays “A
test.)
• Next, the first two digits of each line will display “Lx”, where “x” is the
line number that the driver is set to control (set with address plug).
• Finally, each line will display “1234…” according to the column number of
each of its digits. Every line should show “1” on the left-most digit, and all
digits should be numbered consecutively from left to right. If this is not the
case, either the wrong address plug is installed, or the driver or digit harness
is connected incorrectly.If there is no address set (or address plug installed)
in the host driver, the host driver will display “E5,” and all client drivers
will continually cycle through the power on self-test.
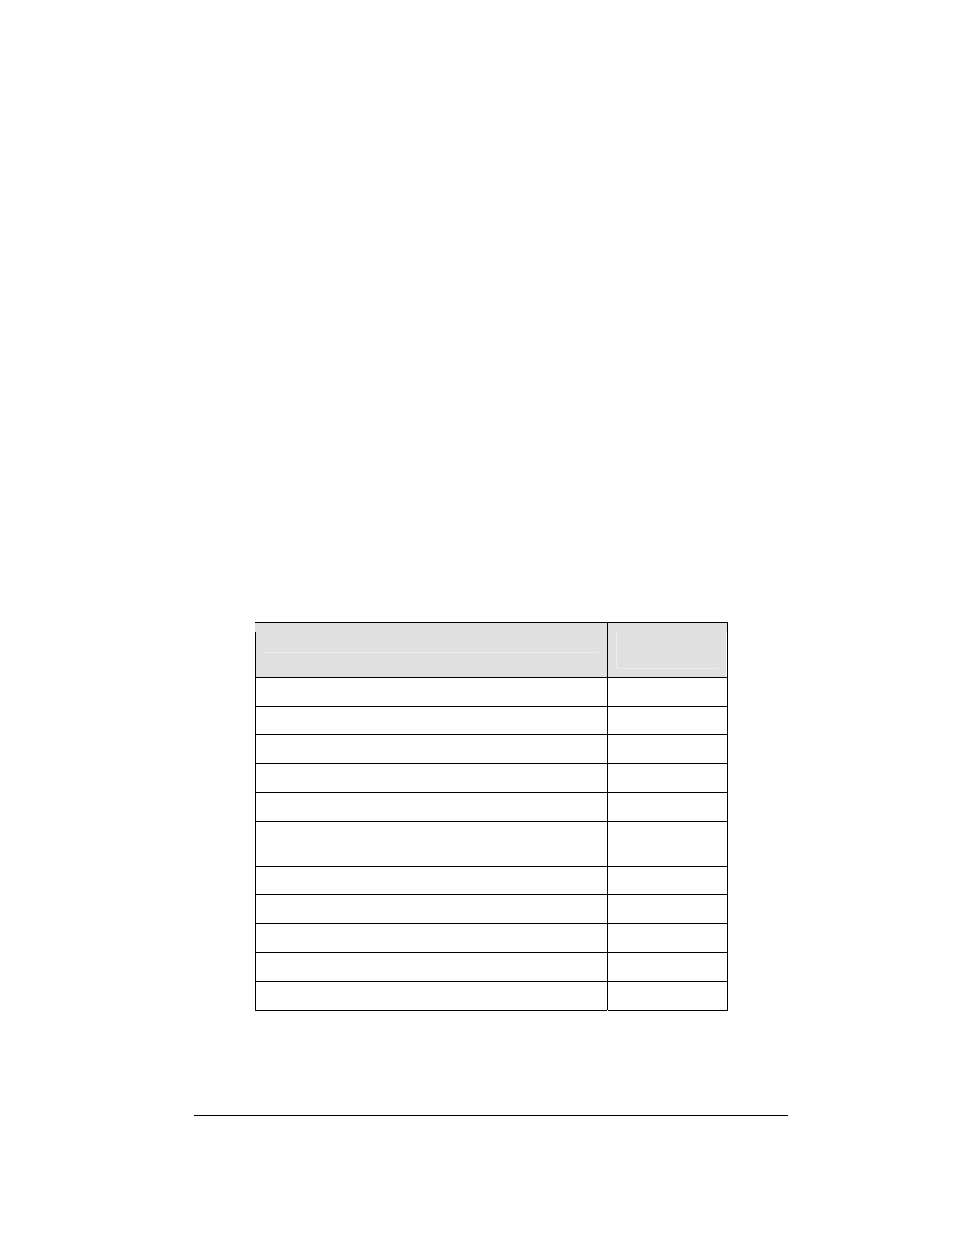
3.6 Replacement Parts
Refer to the following table for Daktronics replacement parts.
Description
Daktronics
Part No.
Driver, 4-column MASC, LED
0P-1192-0068
Light sensor
P-1279-203
Protocol plug (Protocol 4)
0A-1279-0089
Power supply, 24 V DC, 150 W
A-1720
Transformer, Pri. 115V; Sec. 10 VCT @1.2A
T-1072
Transformer, wall pack (for DataMaster 100 and
signal converter)
T-1118
Address #1 Plug
0A-1150-0122
Communication Boards and Accessories
Signal surge suppression board
0P-1110-0011
Modem, RS232 coated, internal,
0P-1279-0003
J-box, signal converter, w/modem
0A-1279-0162