Daktronics DF-12xx User Manual
Page 25
Maintenance and
3-3
Troubleshooting
5. Reconnect the power/signal connector. Note: This is a keyed connector it
will attach in one way only. Do not attempt to force the connection!
6. Close and secure the digit panel and test the display.
Replacing an LED Driver
Reference Drawings:
4 Column MASC LED Driver Specifications ................Drawing A-166216
Shop Dwg, DF-1219, 18” Drop-in w/ BL Grade ID ......Drawing B-225876
The driver is mounted inside the display enclosure and behind a digit. Refer to
Drawing-225876 for location of the driver. This display is only front-accessible.
To replace the driver in the display enclosure:
1. Open the digit panel or display face panel..
2. Remove the cover from the driver enclosure.
3. It is helpful to have the cables labeled as to which was removed from which
connector.
4. Disconnect all connectors from the driver. Release each connector by
squeezing together the locking tabs as you pull the connector free. Note:
When reconnecting, remember that these are keyed connectors and will
attach in one way only. Do not attempt to force the connections.
5. Remove the wing nuts securing the driver to the inside of the enclosure.
6. Carefully lift the driver from the display and place it on a clean, flat surface.
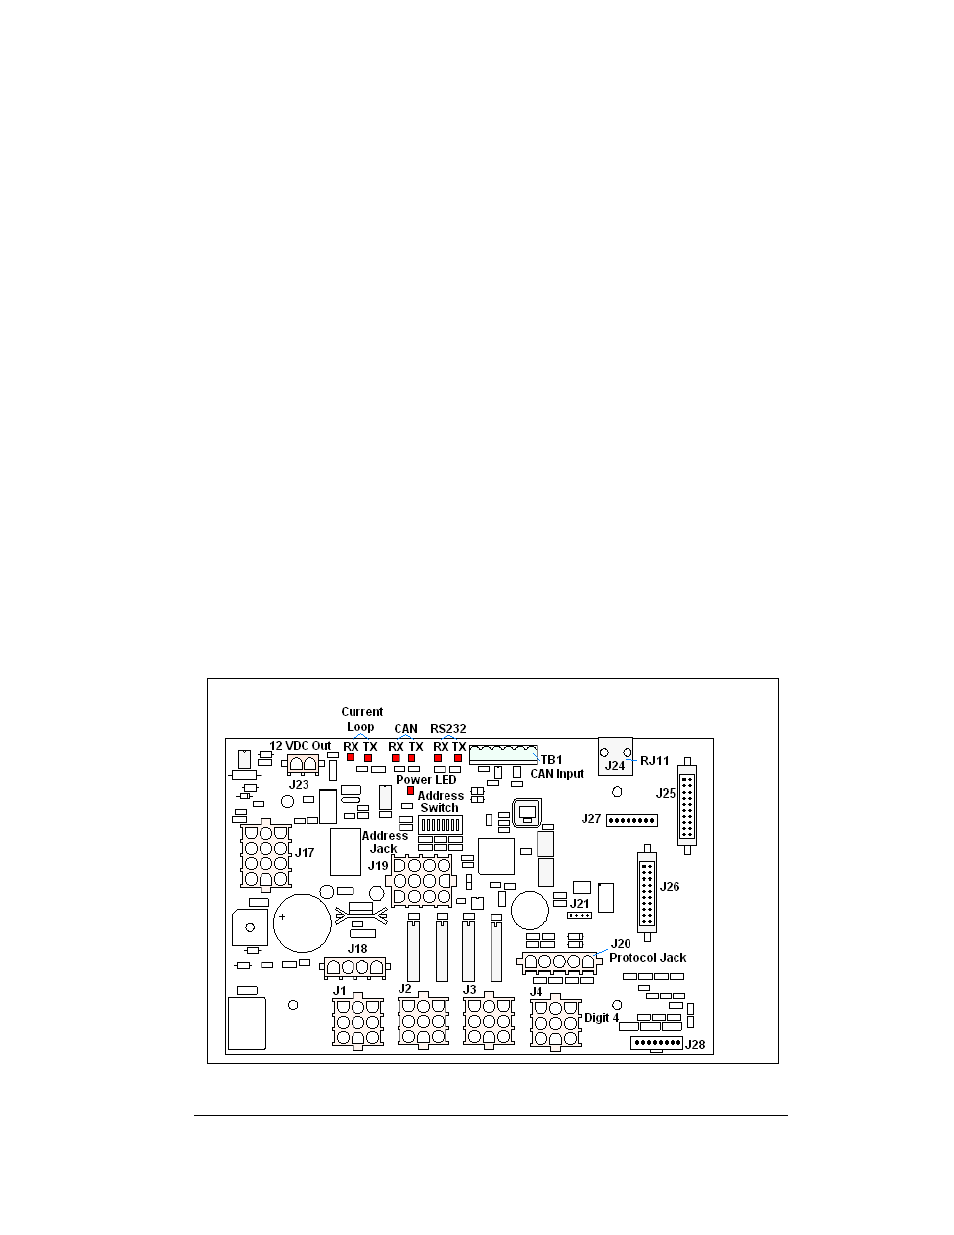
7. Follow the steps in reverse order to attach a new driver. This display uses a
4- column driver. The major functions are identified in
Figure 12
.
Figure 12: 4-column Digit Driver