3 connecting display sections, 4 installing the display inside a sign cabinet, Connecting display sections – Daktronics Fuelight FL-3000 and FL-4500 Series 36 and 48 Petroleum Price Display and Cash/Credit Display User Manual
Page 10: Installing the display inside a sign cabinet, Corner gas
4
Mechanical Installation
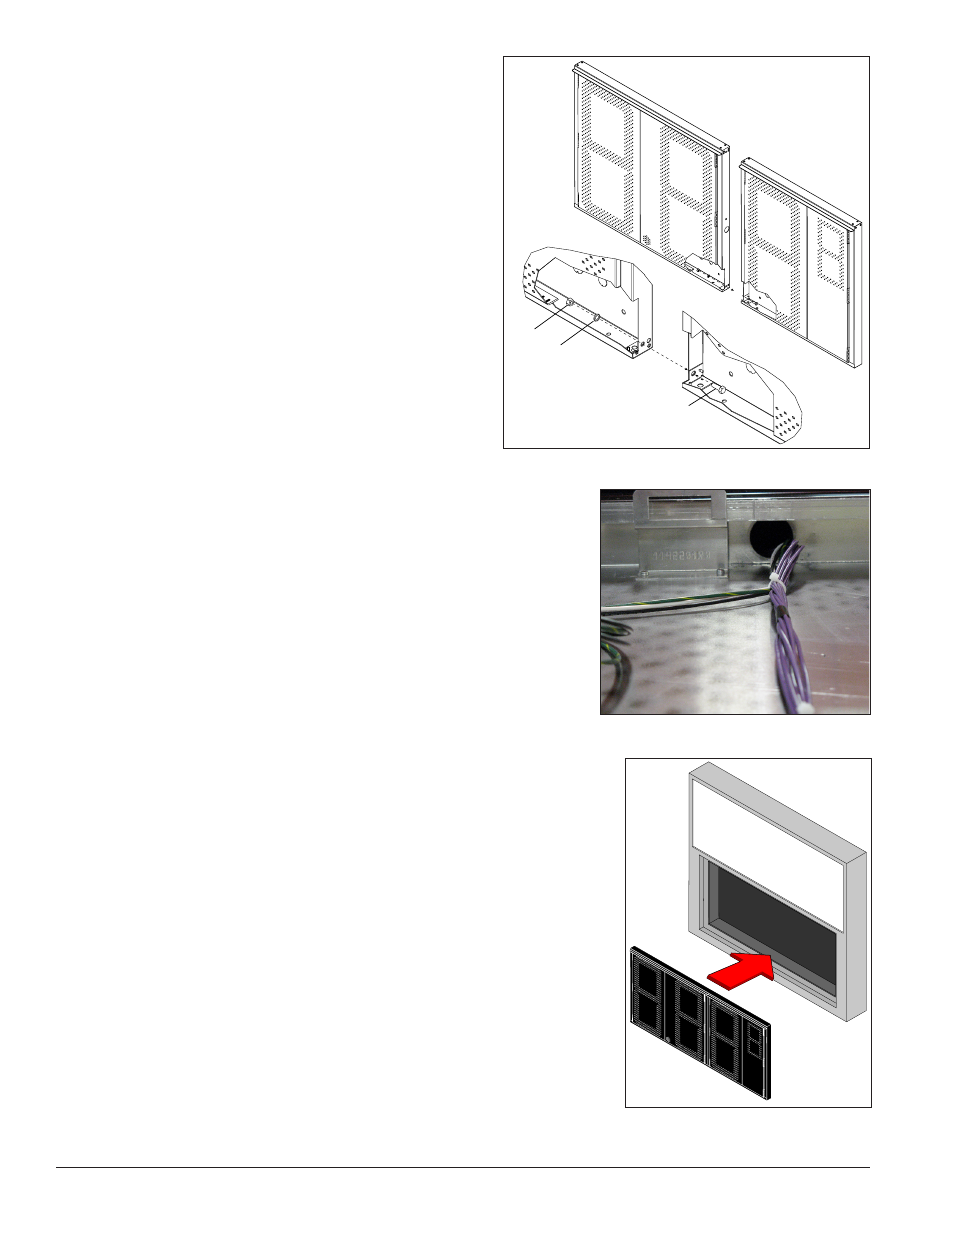
2.3 Connecting Display Sections
FL-3000 and FL-4500 36- and 48-inch displays come in
two, three, or four sections that must be connected to
one another before installation on a sign structure or in
a sign cabinet.
1. Open digit doors in each section by gently
turning the slotted fasteners on each door
counter-clockwise with a flat-head screwdriver.
2. Join the sections together in the designated
locations with 3/8-16 bolt, lock washer, and
nut, as shown in
3. Route signal interconnect cables using the 1.50”
holes in each section, as shown in
Section 4 for Display Interconnection details.
4. Close and latch the doors of each section
securely.
2.4 Installing the Display Inside a Sign Cabinet
Design a space in the sign for the display so that the front of the
Fuelight
™
display cabinet is flush with the front of the sign, allowing
the doors to protrude ½” [12.5 mm].
Consult Drawing B-1154438 for more detailed information regarding
sign cabinet requirements. Use the display shop drawing to locate
mounting holes used in this installation type.
1. Lift the display into the support structure. Figure 5 shows a
display being inserted into a support structure.
Note: Daktronics assumes no liability for display damage
or injury resulting from incorrect setup or incorrect lifting
methods.
2. Use 3/8-16 bolts and the four mounting holes in each section to
attach the display to the sign cabinet. Actual site demands will
dictate variances and appropriate mounting methods.
3/8-16 Bolt
Lock Washer
Nut
Figure 3: Secure Display Sections Together
Figure 4: Route Cables Between Display
Sections
Corner Gas
Figure 5: Inserting Fuelight Display
Into Custom Cabinet