3 connecting to ross via lan (telnet) connection, Connecting to ross via lan (telnet) connection – Comtech EF Data ROSS User Manual
Page 29
ROSS
MN/13070
2. Apply input AC power to ROSS and push the front panel power button to boot ROSS.
Boot up requires approximately 25 seconds.
3. On the PC launch the Putty application clicking on the desktop ICON or from sourced
directory location.
4. Configure communications for serial, COM1 or available port# and port speed of
115200.
5. Click Open button to establish communications.
6. It will be necessary to refresh the window display text, select F12 on the PC keyboard.
4.3
Connecting to ROSS via LAN (Telnet) Connection
This connection interface is used for local LAN or remote control over the satellite
communications link. It operates using the same Putty application with a different setup
configuration. It is possible to establish local communications without initially configuring the
network interface IP address in the event that a serial cable is not available.
Each ROSS unit uses a factory default IP address and mask: “192.168.254.3/24”. When
configuring ROSS with its default IP address, any host IP address must be configured to be
within the 192.168.254.0 subnet.
Note it extremely important to ensure that the correct IP address is assigned. An incorrect
address may cause the ROSS unit to be unreachable from a remote host.
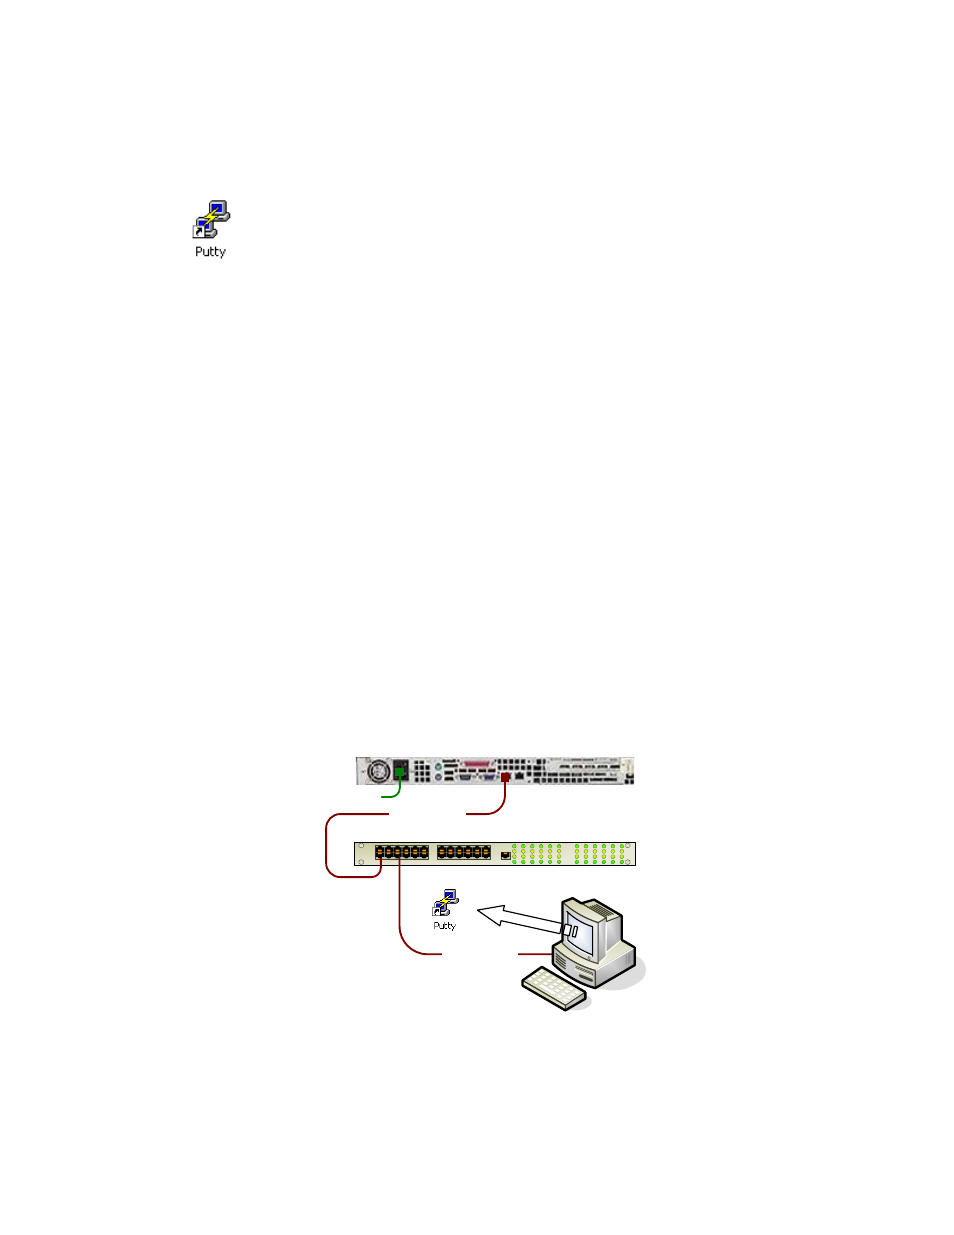
1. Connect the CAT5 cables as shown below, note if an Ethernet switch is not available
use a crossover LAN cable between ROSS and PC.
Ethernet Switch
LAN 10/100BaseT
LAN 10/100BaseT
110/220 VAC
ROSS
`
PC
Default - 192.168.254.3/24
Set - 192.168.254.100/24
Figure 4: Ethernet LAN connection to ROSS client interface
Comtech EF Data, Vipersat Products
Page 29 of 87