Cb 1 series, Administrator guide, Figure 1 – Code Blue CB 1-E ECONOMICAL HELP POINT User Manual
Page 29: Figure 2
Code Blue
•
259 Hedcor Street
•
Holland, MI 49423 USA
•
800.205.7186
•
www.codeblue.com
GU-157-E
page 29 of 71
CB 1 Series
Administrator Guide
Dispose of gloves when completed.
3.1.2
Attach The Stainless Steel Sleeve – The sleeve must be attached to the center of
the solar panel and set at the correct angle based on the unit’s latitude. Use the two 3/8
bolts and nuts and four 3/8 washers provided. See the chart below for recommended
settings (
Fig. 2).
3.1.3
Position The Solar Panel – Slide the sleeve and panel assembly over the collar.
NOTE: Panel must face south and be at the proper angle.
3.1.4 Once the panel is set in place, the two 3/8 set-screws should be tightened so that the
panel is facing due south.
3.1.5
Wiring – Both the CB 1-w unit and the solar panel assembly are pre-wired from the fac-
tory with sufficient length wires to make the opposing connection with the exception of the
antenna wire. The installer may choose to use one set as a “fish-tape” to pull the wires
to the necessary opposing connection or shorten both sets of wires to make a “wire-nut”
connection between the two wire sets within the stainless steel collar. Attach the antenna
mount to the top of the solar panel using one of the top bracket cross head screws. The
antenna wire must be run through the steel collar and passed to the solar panel conduit
and run out of the power distribution box. Run the antenna cable along the back side of
the solar panel frame.
CAUTION:
Be sure wires are not pinched during panel assembly to unit. A shorted wire
or loose connection will cause unit to fail.
4.0 INSTALL THE BATTERIES
NOTE:
Batteries must be
fully bench charged before installation.
4.1
Place The Batteries Into The Unit – Insert the battery shelf plates into the bottom access
door.
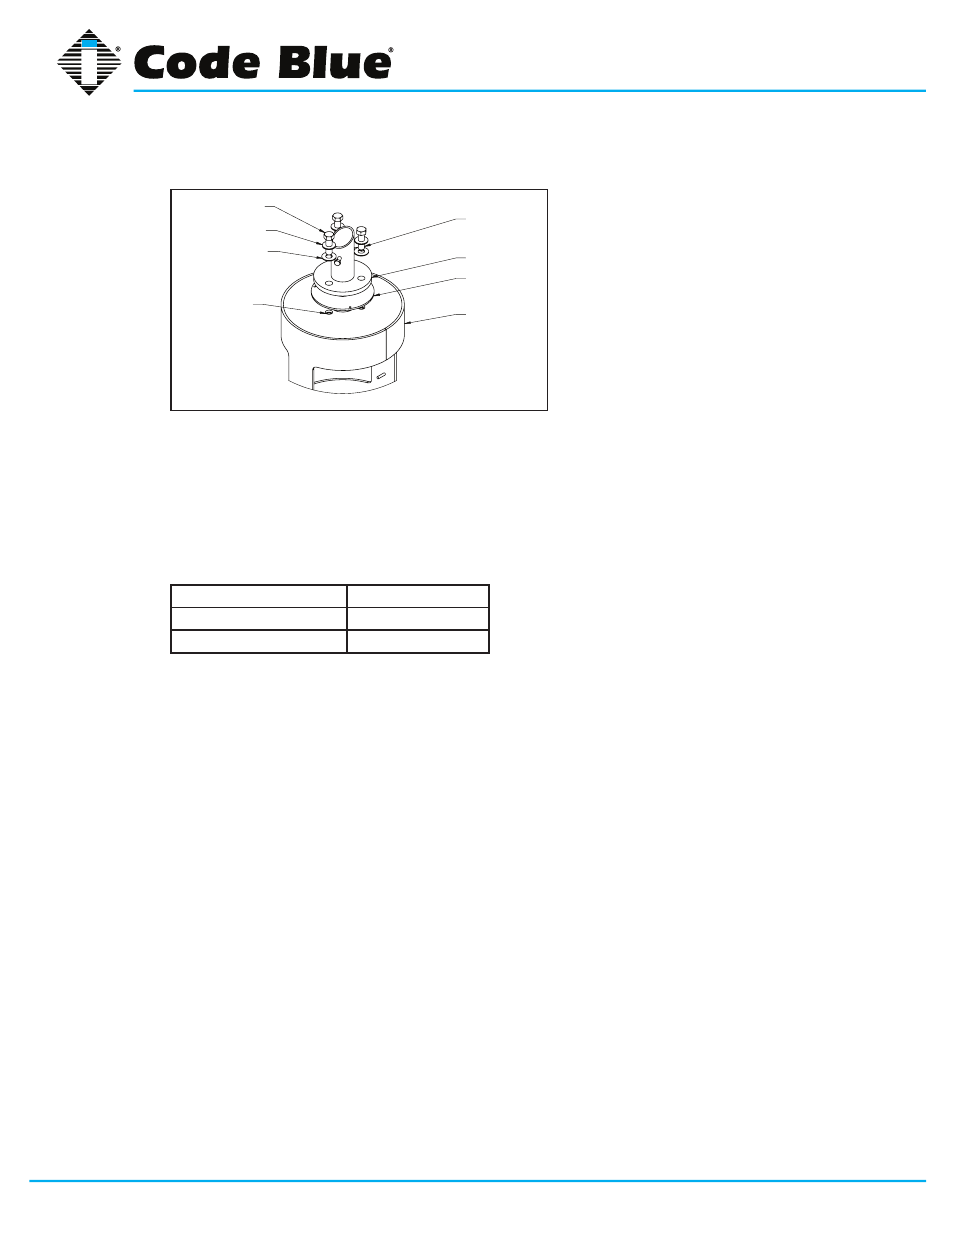
SOLAR BOLLARD
GASKET
SOLAR COLLAR
RUBBER WASHER
METAL WASHER
HEX BOLT
APPLY LOCTITE
TO THREADS OF NUT
APPLY LOCTITE TO
THREADS OF BOLT
Figure 1
32º to 44º latitude
60º from horizontal
23.5º to 32º latitude
45º from horizontal
23.5º S to 23.5º N latitude 30º from horizontal
Figure 2