Maintenance – Beisler 1911-4 User Manual
Page 49
- C 49 -
Short Seam Automat 1911-4 / 1912-4 Working Instructions
Beisler Automated Sewing Equipment
C.5
Maintenance
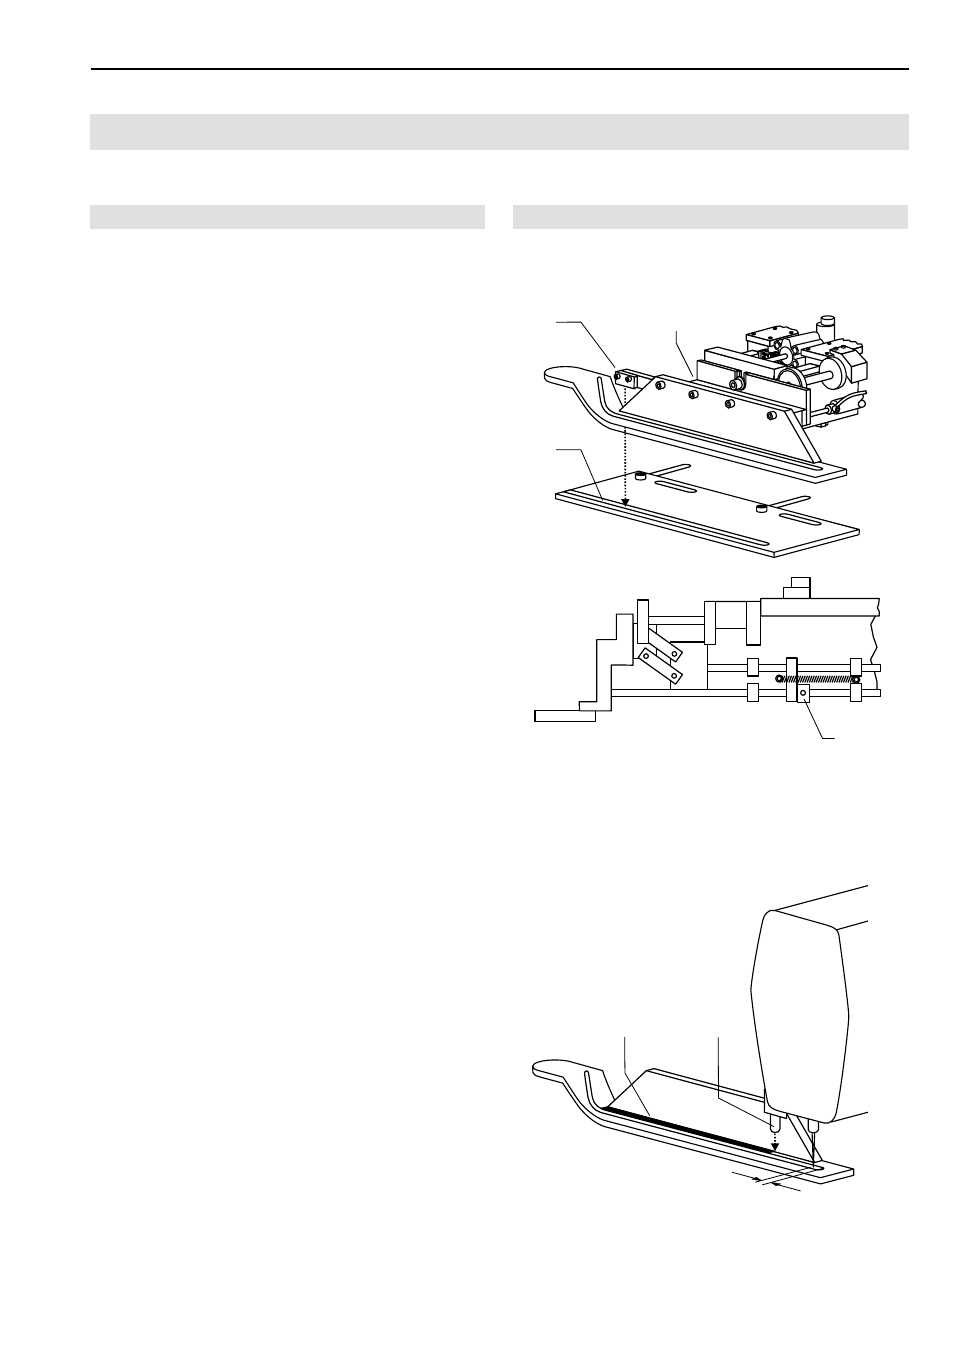
Fig. 17/18
Fig. 17
Fig. 18
1
3
2
4
C.5.5 Machine set-up
Adjusting the main clamp photocell for seam start
at the 1911-4 sewing machine:
Fig. 17: The side movement of the main clamp to the front
is controlled by the position of the photocell
1 over the
reflective stripe. The red scanning spot of the photocell
must be directed to the center of the reflective stripe
3.
This position is set by a stop at the left side
2 of the main
clamp.
1. Move main clamp sideways to front and check posi-
tion of scanning spot.
2. To reposition the stop, loosen stop disc set screw
4.
3. Move stop slide ring along guide rod, then tighten set
screw.
4. Check main clamp movements.
Safety photocell adjustment:
Fig. 18: The safety photocell
2 protects the sewing head
from sewing beyond the clamp rail groove and prevents
the needle from being damaged.
1. Lower main clamp.
2. Depressurize machine by disconnecting the compres-
sed air hose of the machine from the on-site compres-
sed air supply system.
3. Move main clamp manually under sewing head.
4. Lower needle using handwheel.
5. Fig. 18: Position main clamp so that distance E bet-
ween needle and end of clamp rail groove is 5 mm.
6. Cut reflective film
1 immediately below red marking
spot of photocell
2 and pull off.
E
2
1