Maintenance – Beisler 1911-4 User Manual
Page 46
Short Seam Automat 1911-4 / 1912-4 Working Instructions
- C 46 -
Beisler Automated Sewing Equipment
C.5
Maintenance
C.5.5 Machine set-up
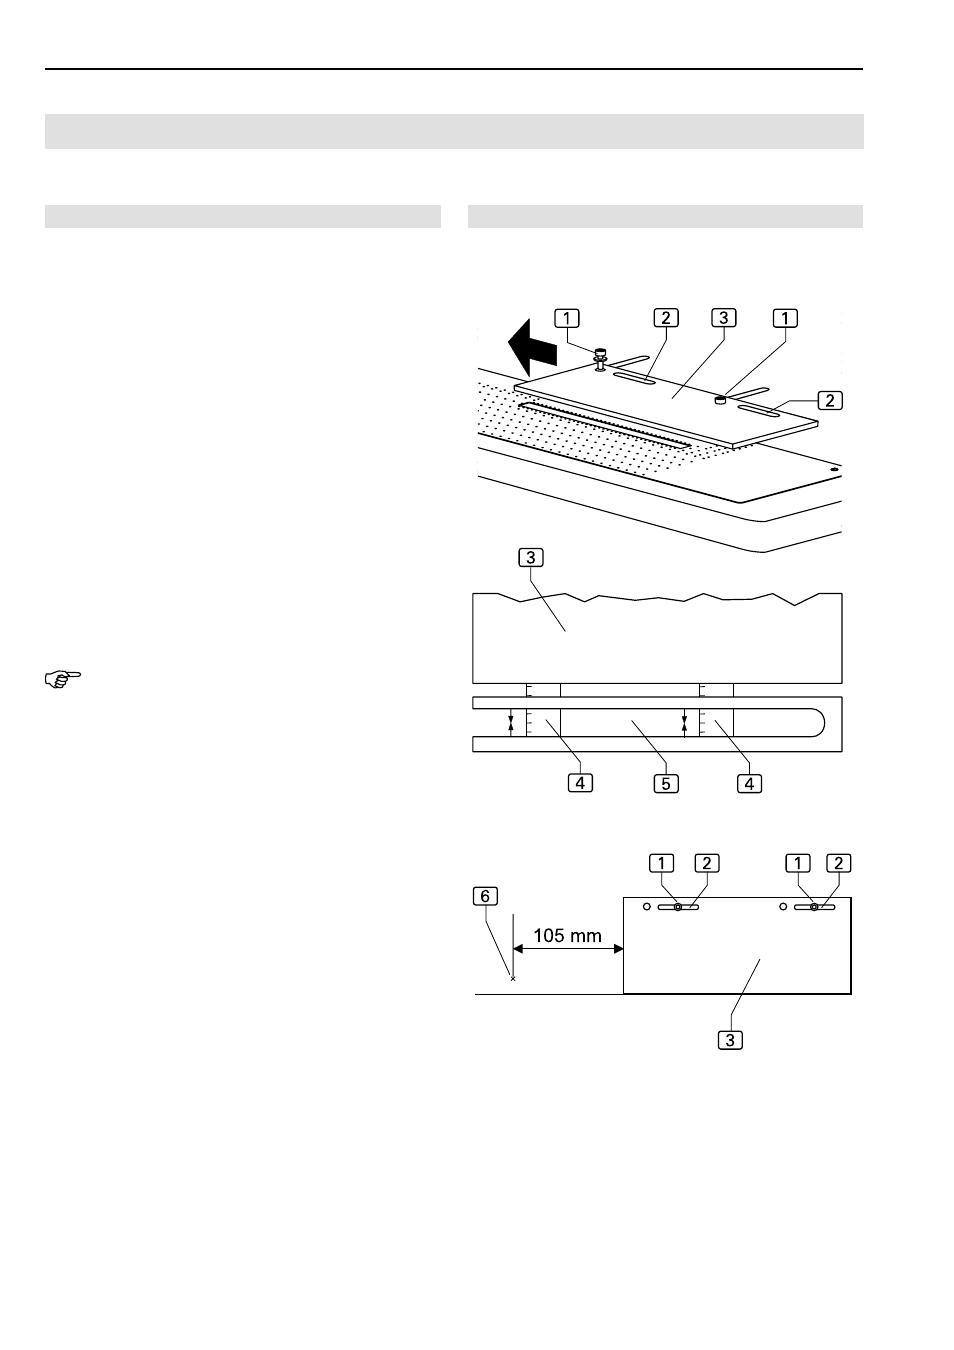
Aligning the stop for 1912-4 sewing machines:
For operations with the short seam automat Class
1912-4, the sewing piece is lined up at the stop rail. Se-
wing pieces with specific shapes may require a change
of the position of the stop rail on the working plate.
1. Disconnect machine from power supply.
2. Fig. 14: Remove two retaining screws
1.
3. Slide stop rail
3 left to desired position so that the
threaded holes are located under the two slots
2.
4. Position stop rail exactly parallel to main clamp by li-
ning up a ruler
4 or a measuring tape to the stop rail
3. Lower main clamp. Position stop rail at two loca-
tions at identical distance to the center of the clamp rail
groove.
5. At the factory, the distance
3 between stop and need-
le
6 has been set to 105 mm.
The pick-up position of the main clamp should be set
to a value of 300 for minimal stitch width (see Section
D, Programming Instructions).
6. Tighten two stop rail retaining screws
1.
NOTE - Photocell
After the position of the stop has been changed, the pho-
tocells must be repositioned (see Fig. 17/18).
Fig. 14
Fig. 14