Operation – Beisler 1911-4 User Manual
Page 19
- B 19 -
Short Seam Automat 1911-4 / 1912-4 Working Instructions
Beisler Automated Sewing Equipment
Fig. 7
Fig. 7
B.3
Operation
Bild Druckluftanschluss
B.3.2 Preparing the machine
Prior to the production start, check the supply connections,
connect the machine to the compressed air and power
supply systems and prepare the sewing head.
1. Insert needle, pass top thread through needle and insert
bobbin for bottom thread into sewing head (see working
instructions of sewing head manufacturer or supplier).
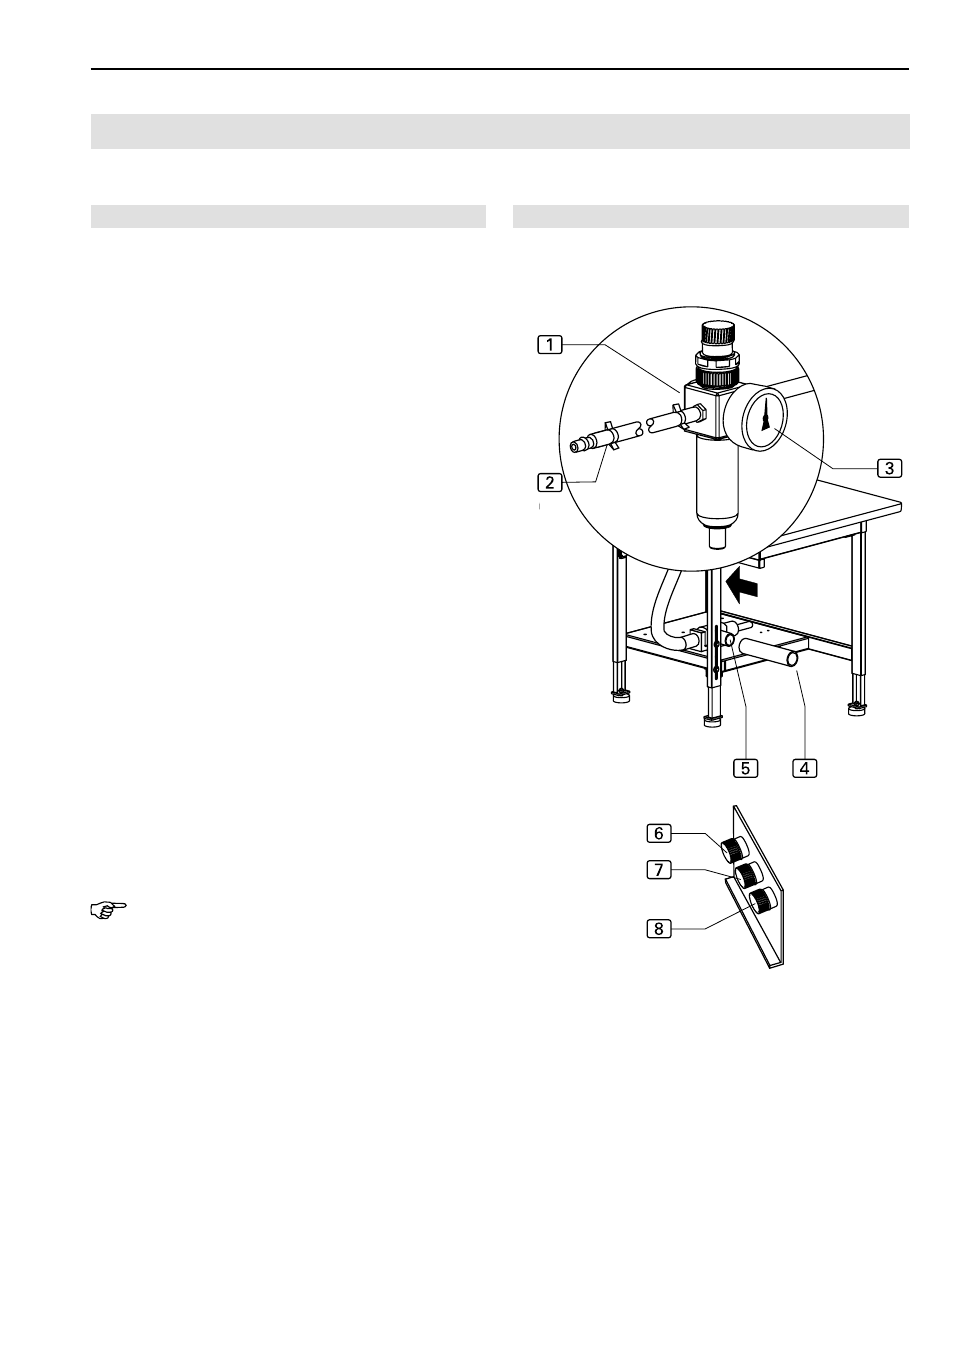
2. Fig. 7: Connect machine to compressed air supply by
inserting the plug-in connector 2 of the compressed
air supply hose into the compressed air receptacle in the
operating room. The pressure of the compressed air is
reduced to the required operating pressure of 6 bar by
a pressure reducer 1. Check manometer 3 to see if
the correct operating pressure is set. The pressure re-
ducer is installed at the side mounting wall of the
worktable.
Setting pressures:
The operating pressures are set at the three valves:
• To increase the pressure, rotate the switch in the
clockwise direction.
• To reduce the pressure, rotate the switch in the
counter-clockwise direction.
Function of the valves:
• Pneumatic spring 6: approx 0.4 bar, controls the
traveling speed of the clamp to the stop.
• Downholder 7: approx 0.4 bar, controls the pressu-
re of the roller on the clamp.
• Clamp pressure 8: 0.4 - 0.5 bar, controls the pres-
sure of the clamp on the sewing material.
NOTE - Vacuum supply!
If the machine is equipped with the optional vacuum pump,
the vacuum supply is now ready for operation.
If the machine is prepared for the on-site vacuum supply
system, the on-site vacuum hose 4 must be connected
to the sleeve 5 of the vacuum valve.