Avalon Firestyles Outside Air Kit User Manual
Outside air kit, Compatibility, Packing list
Outside Air Kit
99200139
Page 1 of 4
17601452 - 9/7/12
© Travis Industries, Inc.
Compatibility:
•
All Lopi and Avalon Wood Stoves*
• Leyden or Arbor Pellet Stove
*
Wood stoves that are shipped without legs may be placed on legs or use one of the universal pedestals:
-- Avalon Small (99200127) Avalon Large (99200129)
-- Lopi Small (99200124) Lopi Large (99200122)
Packing List:
•
Outside Air Duct Assembly
•
Hood (includes rodent screen)
• Flashing
•
3” Duct (4’ long)
•
Leyden / Arbor Start Collar
• Cover
Plate
•
(2) Hose Clamps
•
(2) #8 Screws
•
(for securing air duct assembly to stoves with legs).
•
(2) 1” Wood Screws, (2) 1-1/2” Wood Screws, (2) Drywall Anchors (for
securing the hood and flashing)
Cover Plate
When using outside air with wood stoves the cover plate may be required to insure combustion air is drawn from below.
See the table and instructions below for details.
MODEL
COVER PLATE DETAILS
MODEL
COVER PLATE DETAILS
Avalon Spokane 1250
Cover Plate Not Required
Lopi Republic 1250
Cover Plate Not Required
Avalon Spokane 1750
Cover Plate Not Required
Lopi Republic 1750
Cover Plate Not Required
Avalon Arbor
Cover Plate Not Required
Lopi Answer
See “Answer Cover Plate” Below
Avalon Pendleton
See “Pendleton Cover Plate” Below
Lopi Endeavor
Cover Plate Not Required
Avalon Rainier
See “Cover Plate Bridge” Below
Lopi Liberty
See “Cover Plate Bridge” Below
Avalon Olympic
See “Cover Plate Bridge” Below
Lopi Leyden
Cover Plate Not Required
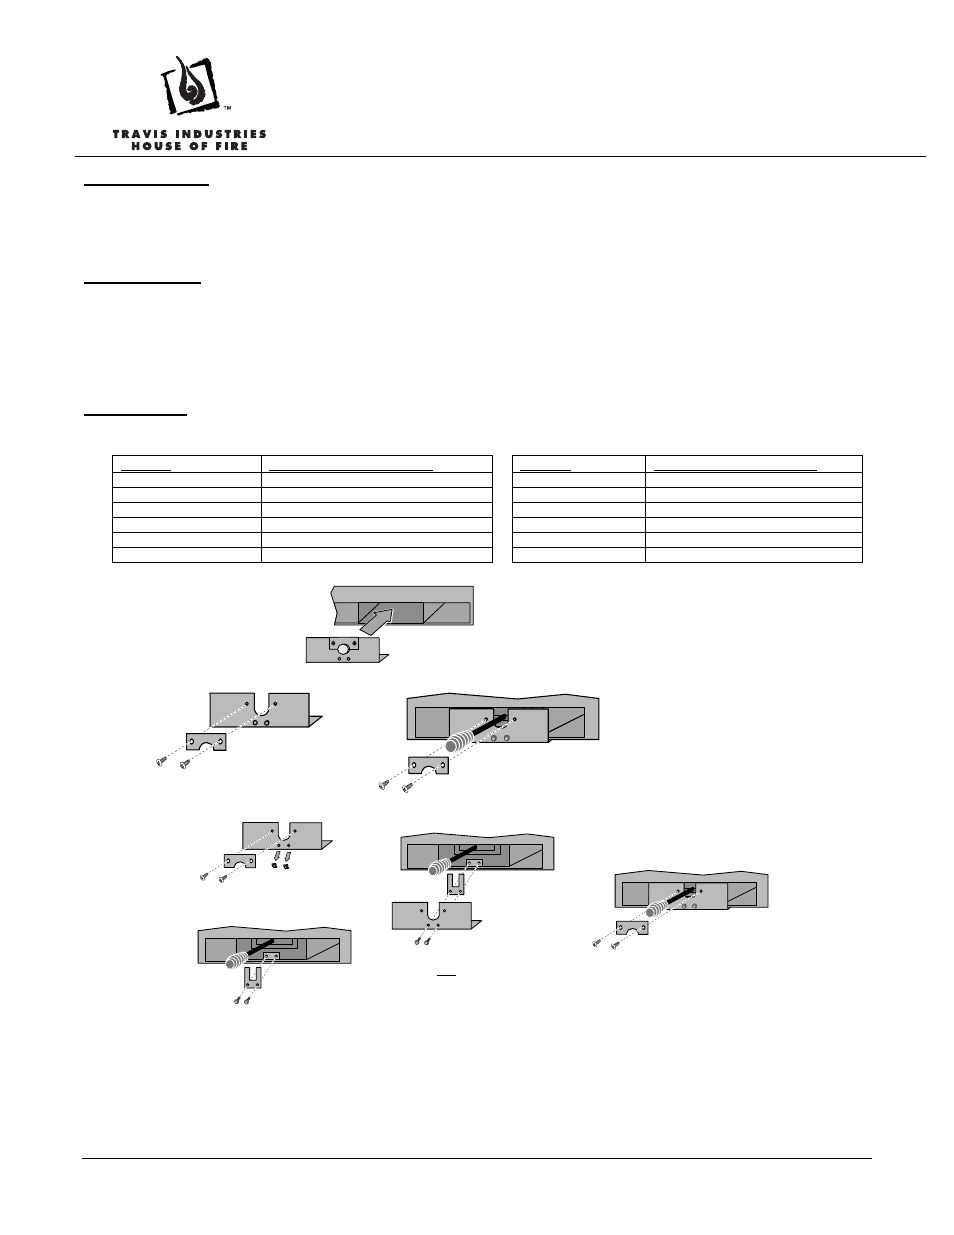
Pendleton Cover Plate
Make sure the button plug is installed in the
center of the cover plate. The cover plate
slides in below the ashlip and covers the air
inlet channel. It has two clips which slide over
the base of the stove, securing it in place.
Cover Plate Bridge
Remove the bridge from the cover plate.
The cover plate slides in below the ashlip
and covers the air inlet channel. It has two
clips which slide over the base of the stove,
securing it in place. Re-attach the bridge to
complete cover plate installation.
Answer Cover Plate
Remove the air control stop on the stove.
Remove the bridge and plugs from the front of
the cover plate.
Re-attach the bridge to complete the cover plate installation.
Attach the air control stop and cover plate as
shown above.
HINT
: Place one screw through the
cover plate and air control stop, and while holding
them together, slide the components into place
and tighten the screws to secure.