Remote receiver calibration, Setting the time and fahrenheit/celsius display – Avalon Firestyles Gas/Pellet Remote Thermostat User Manual
Page 5
Gas/Pellet Remote Thermostat
SKU 99300689
Page 5 of 8
3/7/12 - 17601682
© Travis Industries, Inc.
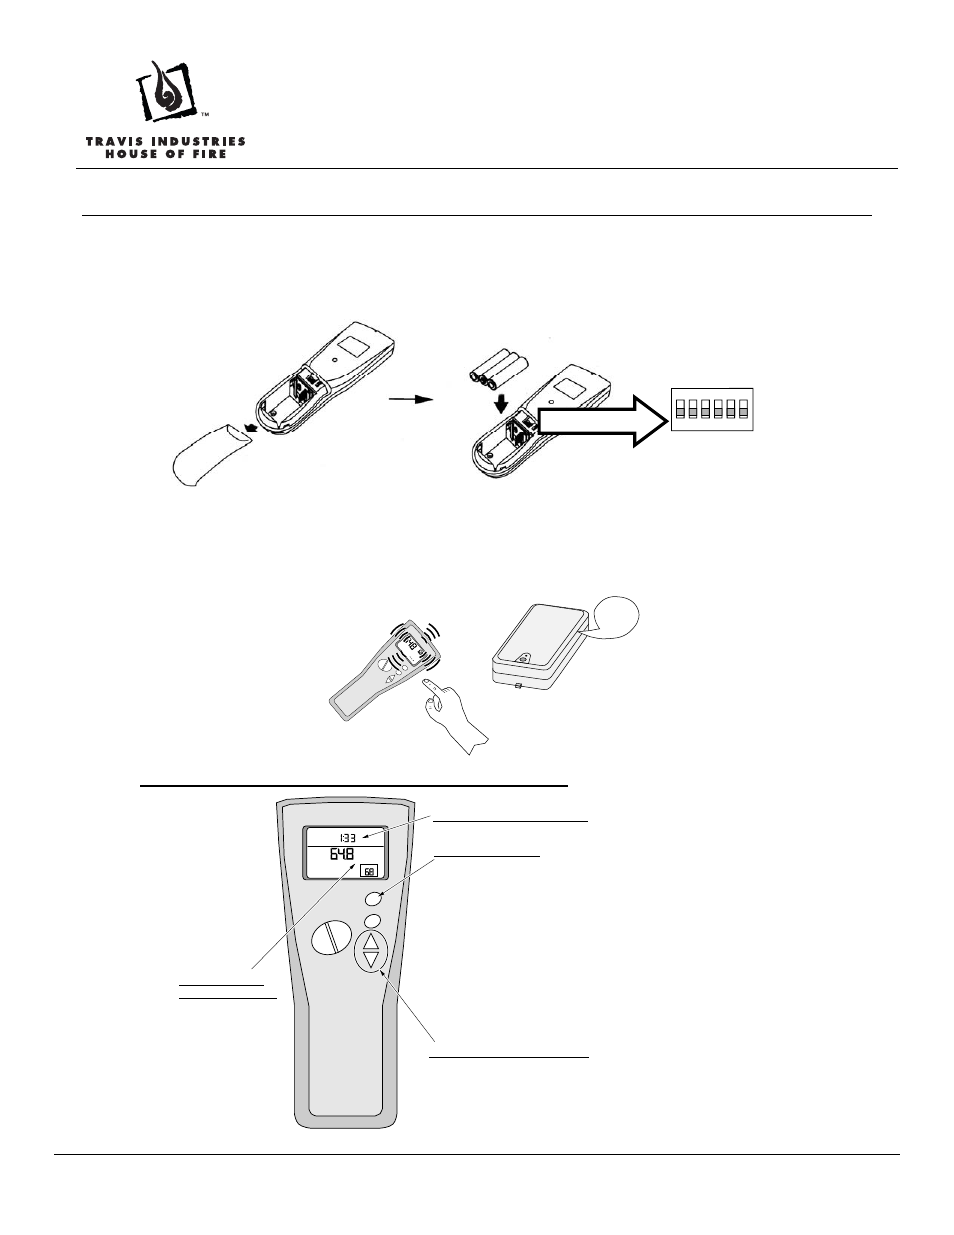
Remote Receiver Calibration
1 Plug in the receiver.
2 Remove the cover from the back of the transmitter. Insert three "AAA" batteries into the transmitter
as shown below to the right. Slide the dip switches on the transmitter to a random position (this
makes the transmitter unique to the receiver).
Set these dip switches
to a random position.
ON DIP
1 2 3 4 5 6
Transmitter Dip
Switches
3 Position the transmitter within 1 foot of the receiver. The LED indicator panel on the transmitter
should be flashing (if not, remove and replace the batteries). Press down any button on the
transmitter until the receiver "beeps". This indicates the transmitter and receiver are calibrated on the
same radio frequency (if it does not, unplug receiver, remove batteries, plug in receiver, replace
batteries, and repeat this process). Test operation of the remote control.
Receiver
"Beep"
MA
NUAL
ON/OFF
AU
TO
ON/
OFF
TIMER
CLOCK
ON
ROOM TEMP
°F
°F
SET TEMP
TIMER
MIN
Setting the Time and Fahrenheit/Celsius Display
MA
NU
AL
ON/
OFF
AUTO ON/
OFF
TIMER
CLOCK
AUTO
°F
AM
SET TEMP
“UP” and “Down” Arrows
1. Press and hold the “CLOCK” button for 2 seconds.
2. The hour display will flash. Use the “Up” and “Down”
arrow buttons to set the hour.
3. Press the “CLOCK” button again.
4. The minute display will flash. Use the “Up” and “Down”
arrow buttons to set the minute.
5. Press the “CLOCK” button again.
6. The “F” or “C” display will flash. Use the “Up” and “Down”
arrow buttons to select Fahrenheit or Celsius.
7. Press the “CLOCK” button again. Programming is
complete.
Fahrenheit or
Celsius Display
“CLOCK” Button
Hour and Minute Display