Ab c, Gas appliance receiver wire installation, Pellet receiver wire installation – Avalon Firestyles Gas/Pellet Remote Thermostat User Manual
Page 4: Transmitter mounting bracket
Gas/Pellet Remote Thermostat
SKU 99300689
Page 4 of 8
3/7/12 - 17601682
© Travis Industries, Inc.
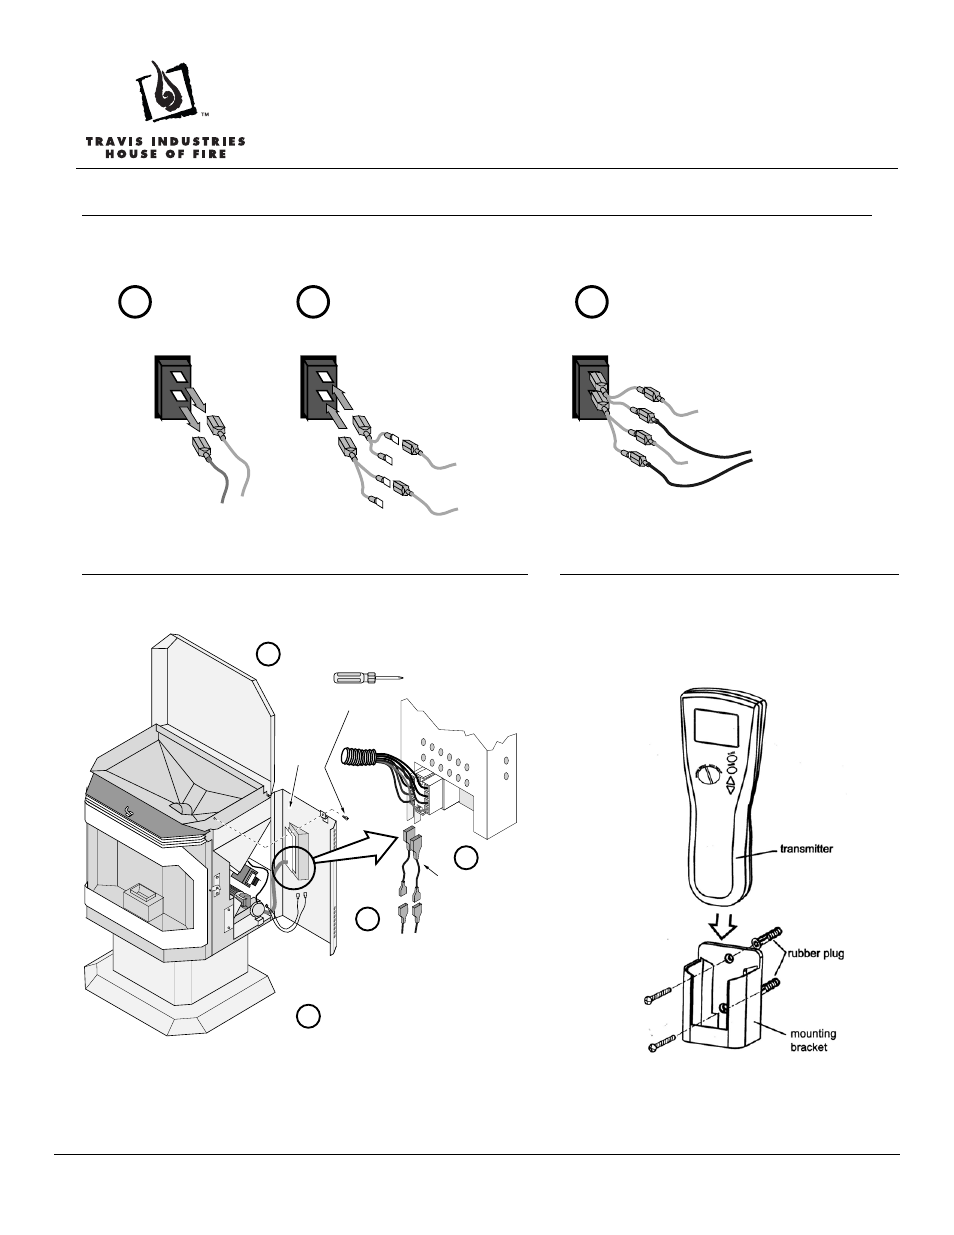
Gas Appliance Receiver Wire Installation
We recommend the receiver wires to be installed in a parallel circuit with the on/off switch (switch must be in
“OFF” position for remote to work). See the directions below for this type of installation.
Back of
on/off switch
Attach the wires removed in
step “a” to the “Y” jumper wires
and attach the jumpers to the
on/off switch (orientation does
not matter).
Attach the receiver wires to
the “Y” jumper wires
(orientation does not matter).
a
b
c
“Y” Jumper
Wires
Receiver
Wires
Remove the
wires from the
on/off switch.
Pellet Receiver Wire Installation
The receiver wires connect to the back of the pellet control board.
See the directions below for installation.
b
Swing the
panel
open.
d
a
Phillips
Screwdriver
Open the hopper lid and remove the
screw holding the right panel in place.
Route the wires up to the circuit
board and attach the quick-connects
to the thermostat posts (orientation
does not mater).
Bundle up any excess wire with a
lock-tie to prevent it from contacting
any hot or moving parts
If necessary, attach the
pellet stove connector
wires to the ends of the
receiver wires.
c
Transmitter Mounting Bracket
The optional transmitter mounting bracket may
be attached to a wall. This allows the
homeowner to place the remote in a single
location. See the directions below for
installation.