Installation – Avalon Firestyles 564 SS Gas Installation User Manual
Page 23
Installation
(for qualified installers only)
2 3
© Travis Industries
4 0 7 0 6 2 0
100-01188_000
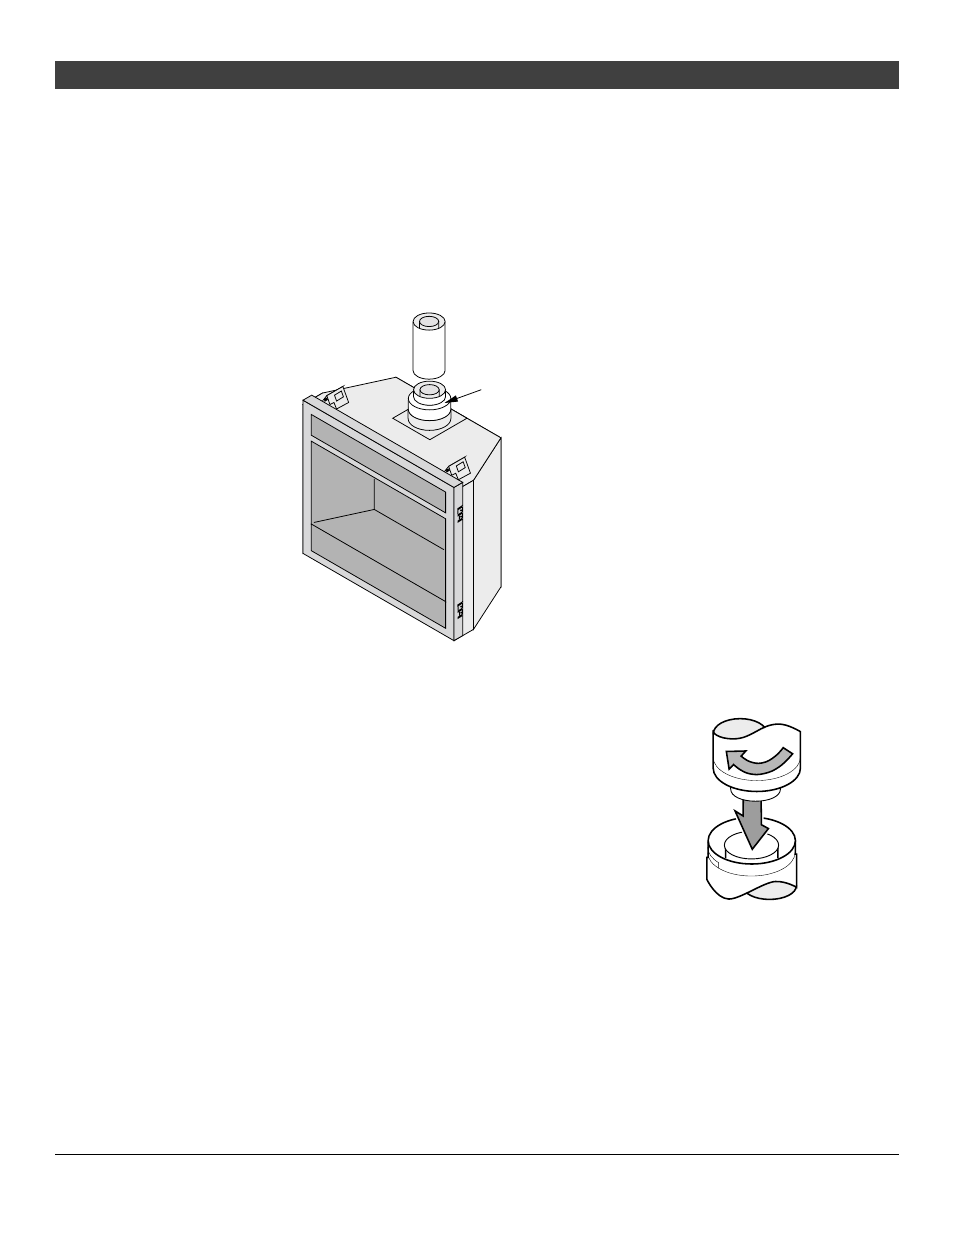
Approved Vent
•
Rear vent configurations use 8" diameter Simpson Dura-Vent Model GS vent.
•
Top vent configurations use 8" or 6-5/8" diameter Simpson Dura-Vent Model GS vent. If using 6-5/8"
diameter vent, attach the 8" to 6-5/8" reducer (Travis part # 98900165) to the fireplace.
NOTE: When using 6-5/8” diameter vent, make sure to accommodate the 4” clearance above the vent
for the first 48” of rise (see vent clearances on page 22). Standard firestops do not include this
clearance.
•
Installation instructions for Simpson Dura-Vent may be found at www.duravent.com
6-5/8" Diameter Vent
Reducer - # 98900165
Vent Installation
•
Slide the vent sections together and turn 1/4 turn until the sections lock in
place.
•
Screws are not required to secure the vent. However, three screws may be
used to secure vent sections together if desired.
•
High temperature sealant is recommended at the appliance starter section
connection (use high-temperature silicone or Mill-Pac®).
•
If disassembly is required, at time of re-assembly check to see if the vent
creates a tight fit. If it does not, apply high temperature sealant to the joints of
the affected sections.
•
Horizontal sections require a 1/4" rise every 12" of travel
•
Horizontal sections require non-combustible support every three feet (e.g.: plumbing tape)