Installation – Audio Enhancement Product Manual User Manual
Page 39
39
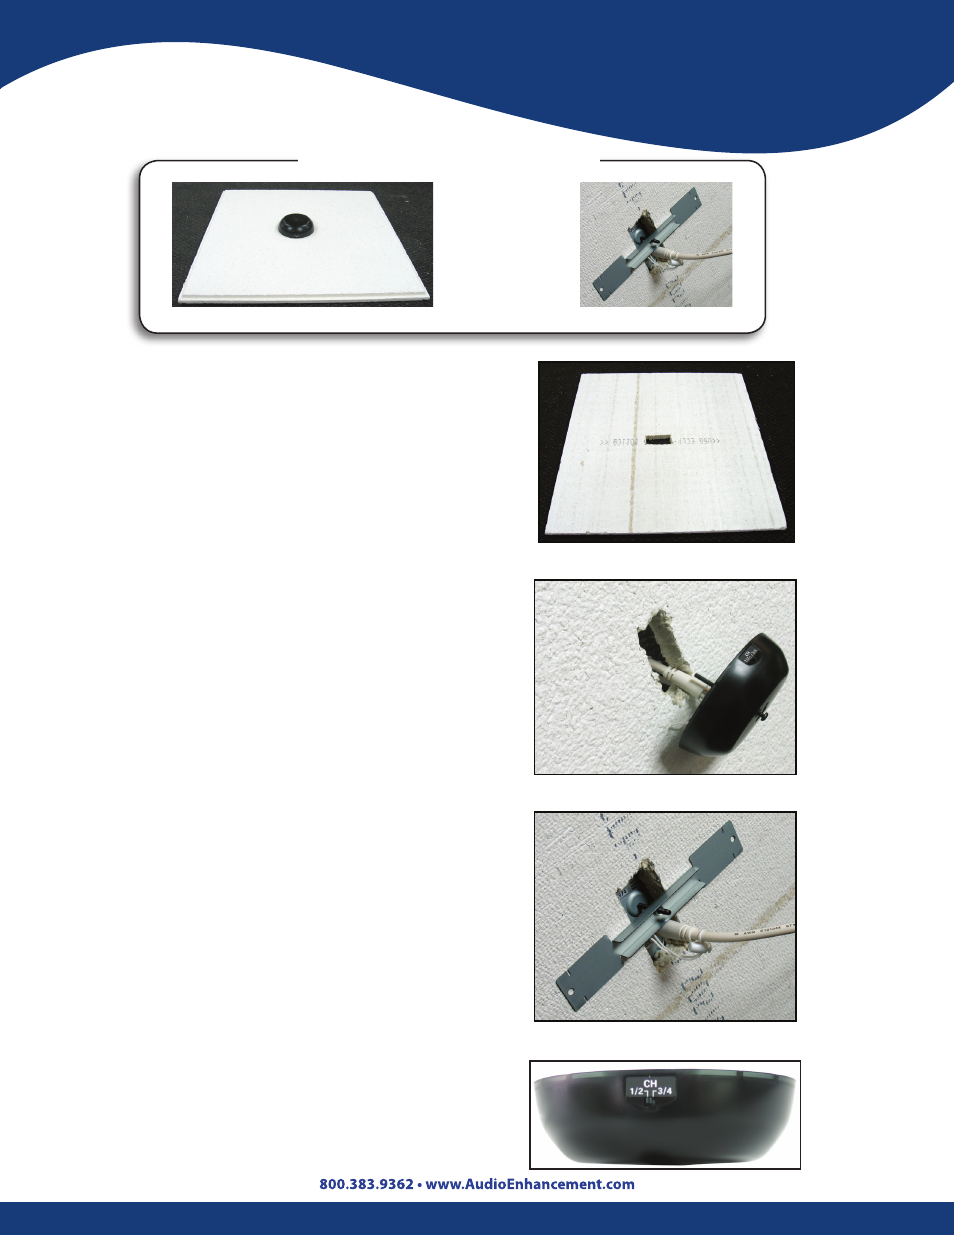
Pictures of finished installation
Front side of tile
Rear side of tile
Step 1 - On the rear side of the tile, locate the
center of the tile .
Step 2 - Cut a hole in the tile using a roto tool,
keyhole saw or saber saw . The hole can be
rectangular 32 mm (1 .25 in) by 57 mm (2 .25 in .) .
A 30 mm (1 .2 in .) diameter circular hole will
work just as well .
Step 4 - Place the dome sensor bracket on the
rear of the tile directly behind the hole . Use the
long screw to fasten the sensor through the
hole into the bracket .
Step 5 - Align the bracket as shown and tighten
the screw until it is snug .
Step 3 - Feed the coaxial cable through the
hole from the rear side of the tile, slip the
anchor strap (white cord assembly with spring
lock) over the cable and cinch the spring lock
snug against the cable .
Step 6 - Check the position of the Channel
Selector (CH) switch . This should be set to
½ position unless it is being used with a four
channel IR system AND it is the second IR Dome
Sensor in the installation . Then it should be set
to the ¾ position .
Installation