Operating controls, Handheld microphone – Audio Enhancement Product Manual User Manual
Page 20
20
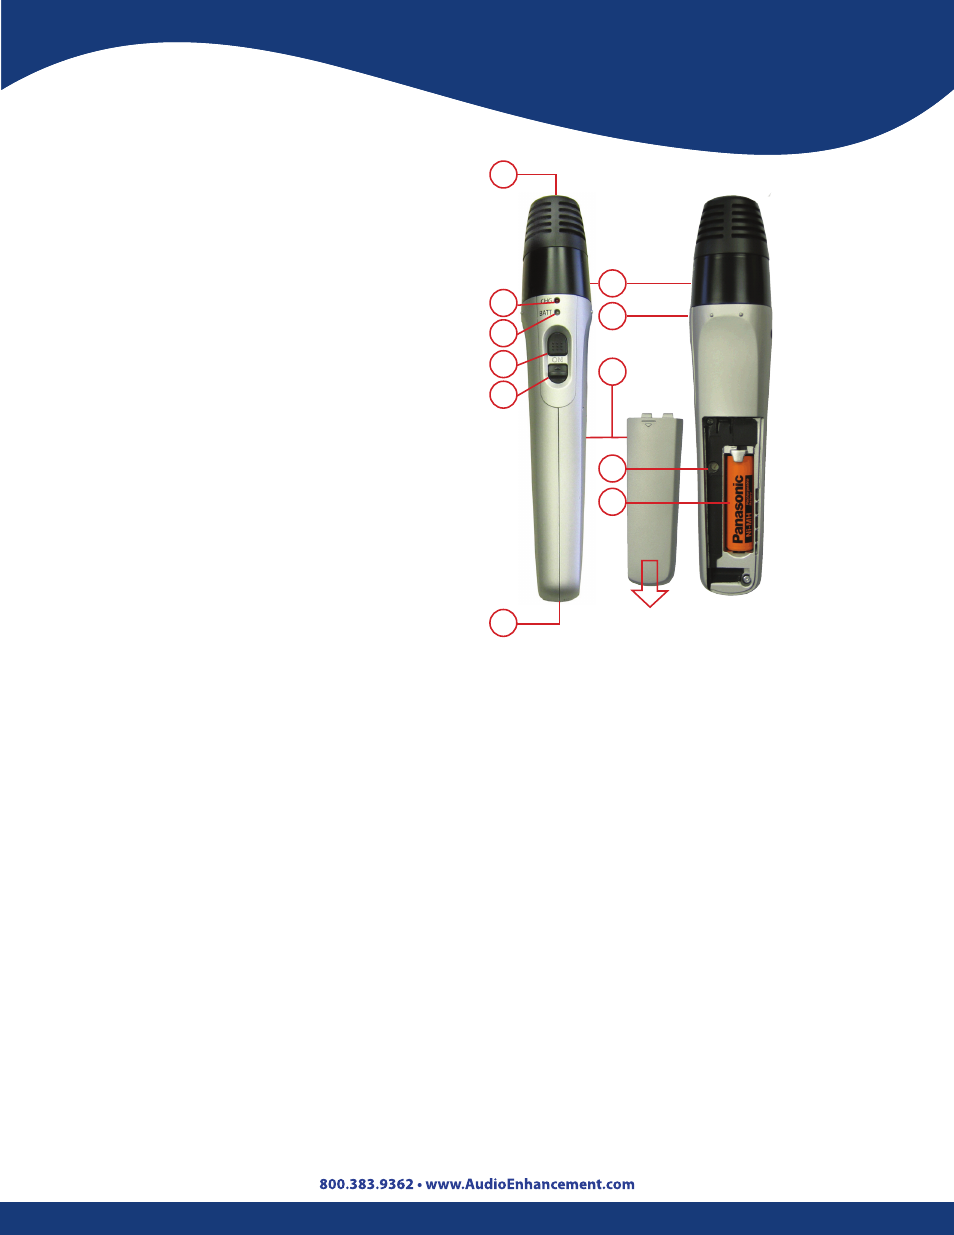
1. Momentary Power Switch: Push to talk .
2. Continuous Power Switch: Slide up to
lock, then talk .
3. Power Indicator: Lights green when the
power is turned on either momentarily or
continuously .
4. Microphone (audio pickup): Speak into
this part of the microphone .
5. Infrared Signal Emitters: The infrared
signal is broadcast from multiple infrared
signal emitters .
6. Battery Case: Slide the battery cover
down to remove .
7. Charging Terminal: Charging input
for charging the battery with the AC
Adapter or the battery charger .
8. Charging Indicator: The charging indicator provides a red light to indicate the following
conditions when the power switch is off and the microphone is being charged:
• Charging: Solid steady ON
• Finished Charging: OFF
• Charging error (trying to charge an alkaline battery): flashing very fast
9. External Auxiliary Input Terminal (on the side): Used to connect a CD or MP3 player or
other devices . Allows the user to wirelessly connect a source to the system .
10. Single “AA” NiMH rechargeable battery or non-rechargeable Alkaline battery.
11. Channel Assignment Switch: Channel Switch (inside the battery case) - Set the channel
of the infrared wireless microphone to the desired channel .
• Channels 1 or 2 for use with Achiever and Ultimate IISE.
• Uses one Panasonic NiMH AA rechargeable battery.
• Charging time is approximately four hours but may vary depending on the condition
of the battery .
Operating Controls
8
4
5
9
6
11
10
3
1
2
7
To Change the Battery:
1 . Slide the back cover down towards the bottom of the
microphone .
2 . Replace battery with a standard “AA” Nickel-Metal-Hydride
(NiMH) rechargeable .
Note: A standard “AA” Alkaline cell can be used on a
temporary basis .
Handheld Microphone