Delta 20-330 User Manual
Page 8
8 - English
RELEASE FRAME
Disconnect machine from power source.
Unpack the band saw unit from carton box and load the
band saw unit on a workbench for easy assembly, as
shown in Fig 2. Using an open-end wrench, release the
saw frame from the shipping strap (A) Fig. 3.
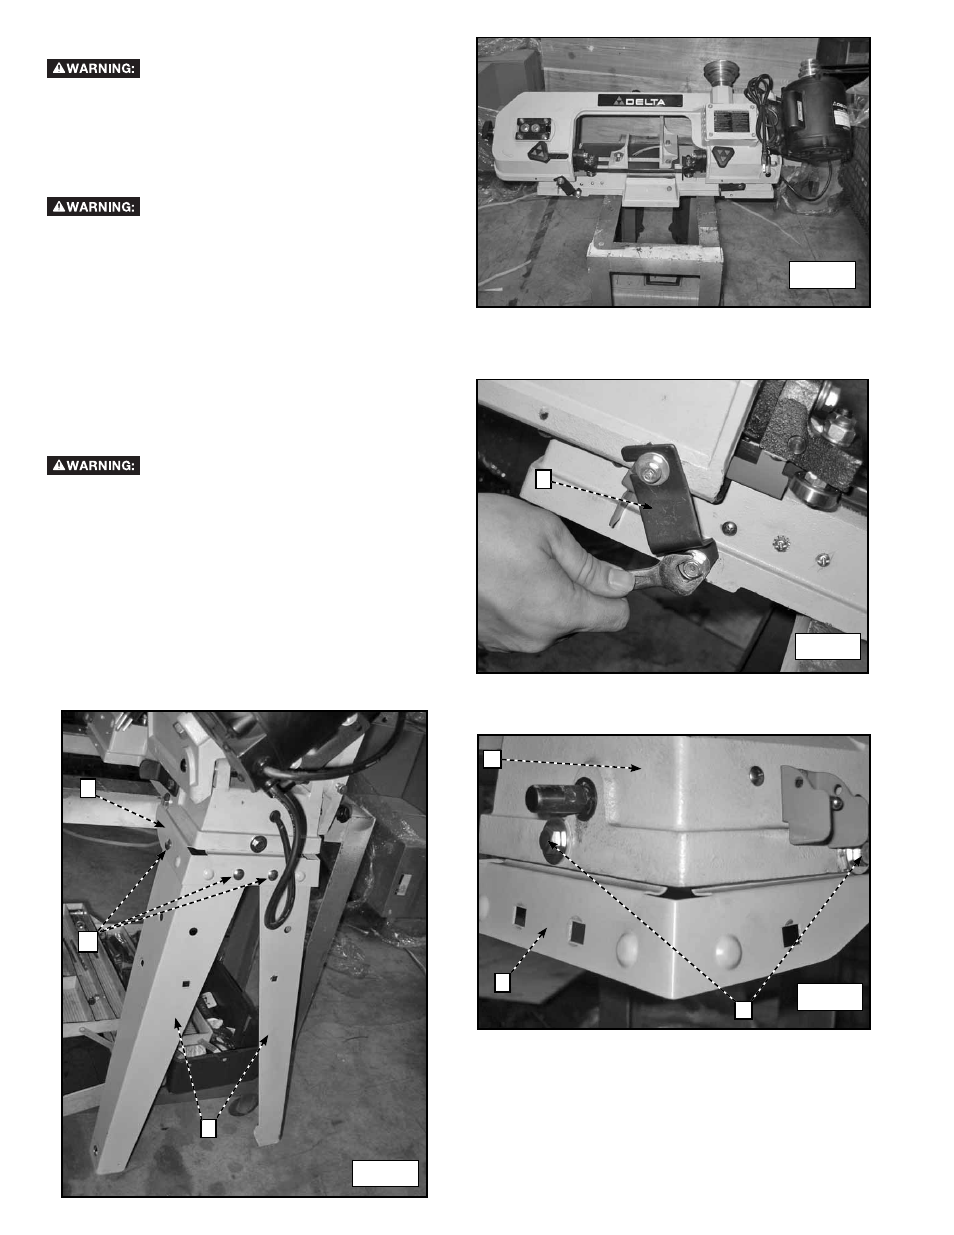
MOUNTING U-BRACKETS ONTO BASE
Disconnect machine from power source.
Assemble the two U-brackets, one of which is shown at
(B) Fig 4, to the band saw base (C). Use six 5/16"-18x1
hex head screws, two of which are shown at (D), twelve
5/16" flat washers and six 5/16" hex nuts. Align the
holes in the base with the holes in the U-brackets, place
a 5/16" flat washer onto the 5/16"-18x1 hex head screw.
Then, insert screw through the hole in the base and the
hole in the U bracket. Place a 5/16" flat washer onto
the screw and thread a 5/16" hex nut onto the screw,
and tighten securely. Repeat this process for the five
remaining holes.
MOUNT LEGS ONTO U-BRACKETS
Disconnect machine from power source.
To assemble legs, two of which are shown at (E) Fig. 5,
to the U brackets (B), use the 5/16"-1/2" carriage bolts,
three of which are shown at (F), and the 5/16"-18 flat
washers and the 5/16" hex nuts. Align the hole in the
U brackets with the hole in the leg and insert a 5/16"-
1/2" carriage bolt through the hole in the U bracket and
the hole in the leg. Then, place a 5/16" flat washer onto
the screw and thread a 5/16" hex nut onto the screw
and tighten securely. Repeat this process for the seven
remaining holes.
Fig. 3
Fig. 4
Fig. 5
Fig. 2
A
B
C
D
E
F
B