A escalade/denali heat ex, Escalade/denali heat exchanger installation -1, Heat exchanger installation – Paxton Superchargers Denali User Manual
Page 49
17-1
P/N: 4809639
©2004 Paxton Automotive
All Rights Reserved, Intl. Copr. Secured
12APR04 v3.0(01-03Denali/Esc(4809639v3.0))
Section 17
HEAT EXCHANGER INSTALLATION
17.A
ESCALADE/DENALI HEAT EXCHANGER INSTALLATION
A.
Remove the plastic push pins securing the
radiator core support cover to the vehicle.
Remove the core support cover.
B.
DENALI: Use a screw driver to unsnap
the four twist snaps securing the grill.
Remove the last screw so that it is possible
to unsnap the grill and remove it from the
vehicle.
ESCALADE: Unsnap the two top snaps
and lift the bottom tabs out of their slots.
Remove the grill from the vehicle.
C.
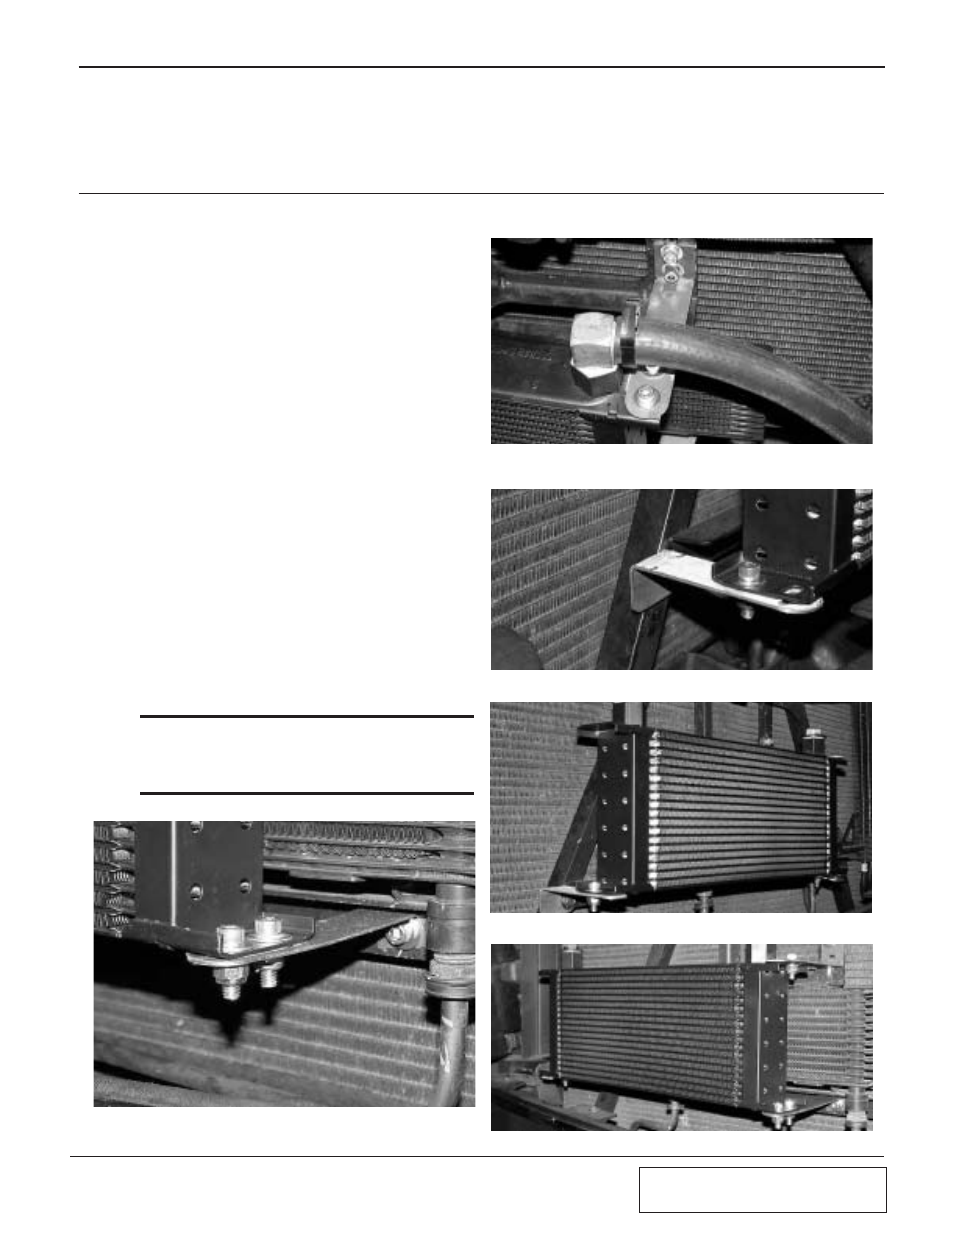
Using sealant, install two 90° brass fittings
into the inlet and outlet of the cooler. Take
brackets A, B and C and mount them to
their corresponding tabs on the heat
exchanger. (See Figs. 17.A-a, 17.A-b,
17.A-c.)
D.
Take the heat exchanger with all three
brackets mounted and place it into posi-
tion. Mark the hole positions from brackets
A and B and drill with a 17/64" drill. To
mount bracket C, you will remove and use
an existing screw in the lower passenger’s
side of the hood latch support structure.
Use the 1/4-20 x 3/4" hardware to secure
brackets A and B. (See Figs. 17.A-d,
17.A-e.)
*** NOTE ***
Temporarily place a piece of sheet metal between the
A/C condenser and the support when drilling to
ensure that the condenser is not punctured.
Fig. 17.A-a / BRACKET A - Mount To Lower
Driver’s Side Tab On The Heat Exchanger.
Fig. 17.A-b / BRACKET B - Mount To The
Upper Driver’s Side Tab.
Fig. 17.A-c
Fig. 17.A-d
Fig. 17.A-e