A escalade/denali surge a, Surge and reservoir tank installation – Paxton Superchargers Denali User Manual
Page 47
16-1
P/N: 4809639
©2004 Paxton Automotive
All Rights Reserved, Intl. Copr. Secured
12APR04 v3.0(01-03Denali/Esc(4809639v3.0))
Section 16
SURGE AND RESERVOIR TANK INSTALLATION
16.A ESCALADE/DENALI SURGE AND RESERVOIR TANK INSTALLATION
A.
Screw two 3/4" straight brass fitting into
the plastic surge tank. (See Fig. 16.A-a.)
B.
Using the supplied 1/4-20 x .50 hardware
and washers attach the surge tank mount-
ing bracket to the surge tank.
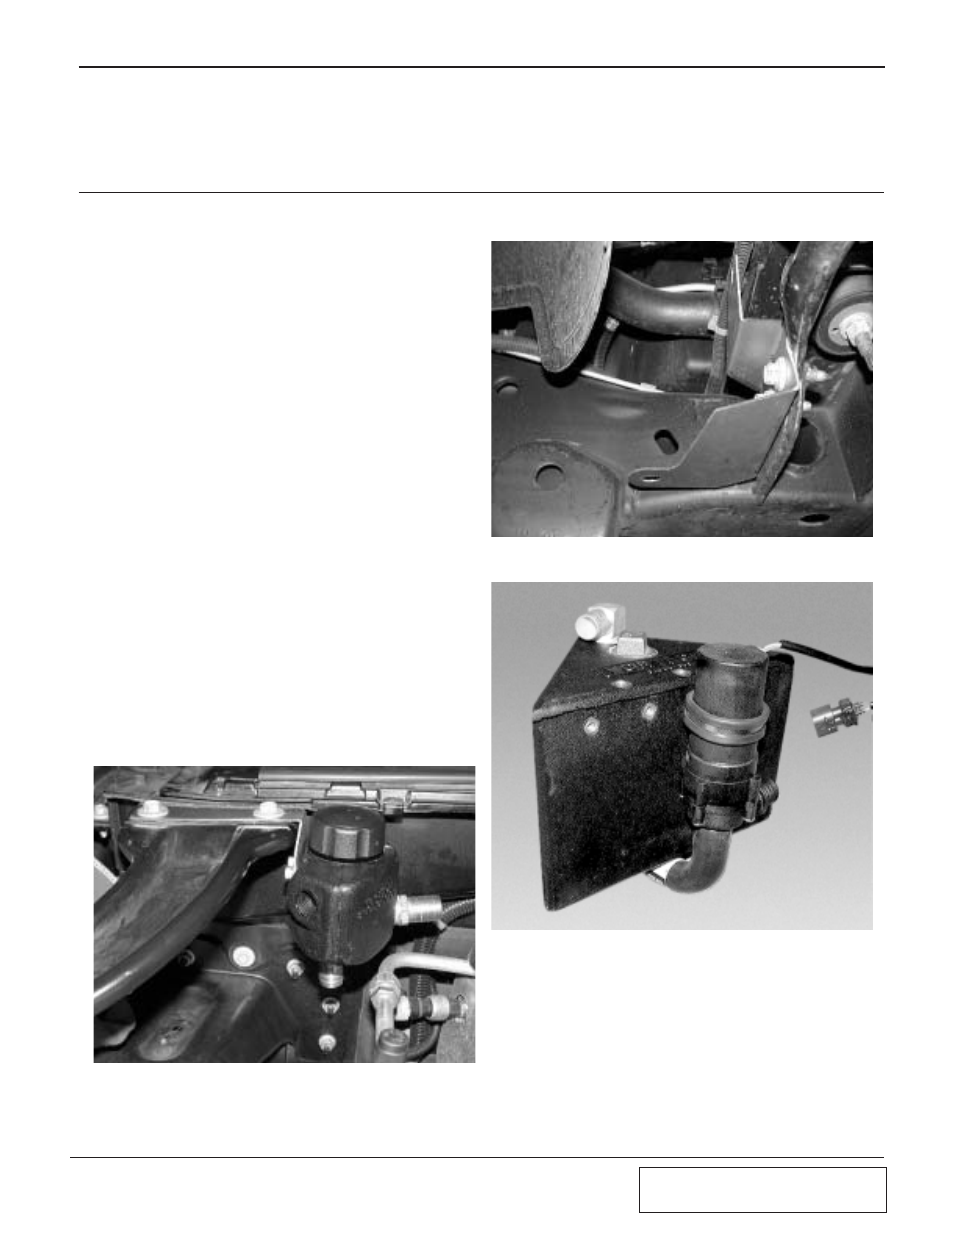
C.
Unbolt the two bolts holding the passen-
ger’s side hood hinge brace at the base of
the windshield. Install the surge tank and
bracket assembly using the stock hard-
ware. (See Fig. 16.A-a.)
D.
Remove the two screws holding the front
bumper brace in the passenger’s side fend-
er well. (See Fig. 16.A-b.)
E.
Install the reservoir bracket as shown using
the two factory screws. (See Fig. 16.A-b.)
F.
Screw the 3/4" 90° brass fittings into the
top and bottom of the water reservoir.
G.
Install the water pump on the reservoir
using the supplied adel clamp, 1/4-20 x .50
screws and 1/4" washers. Take the short
90° molded elbow and connect the inlet of
the water pump to the bottom 90° brass fit-
ting. (See Fig. 16.A-c.)
H.
Mount the water pump/reservoir assembly
to the previously installed bracket in the
fenderwell using two 1/4-20 x .50" cap
screws and washers. (See Fig. 16.A-d.)
Fig. 16.A-a
Fig. 16.A-b
Fig. 16.A-c