Supercharger installation, Supercharger installation -1 – Paxton Superchargers Denali User Manual
Page 21
5-1
P/N: 4809639
©2004 Paxton Automotive
All Rights Reserved, Intl. Copr. Secured
12APR04 v3.0(01-03Denali/Esc(4809639v3.0))
Section 5
SUPERCHARGER INSTALLATION
A.
Remove the Paxton installed drain fitting
cap and attach the supplied 1/2" oil drain
hose to the supercharger and tighten the
clamp.
B.
Loosely install the supercharger onto the
Paxton bracket. Start all five 3/8-16 x 2-
1/4" supercharger mounting screws with
washers.
C.
Tighten the supercharger mounting screws
in a rotating pattern to 18 ft-lbs (25 N-m).
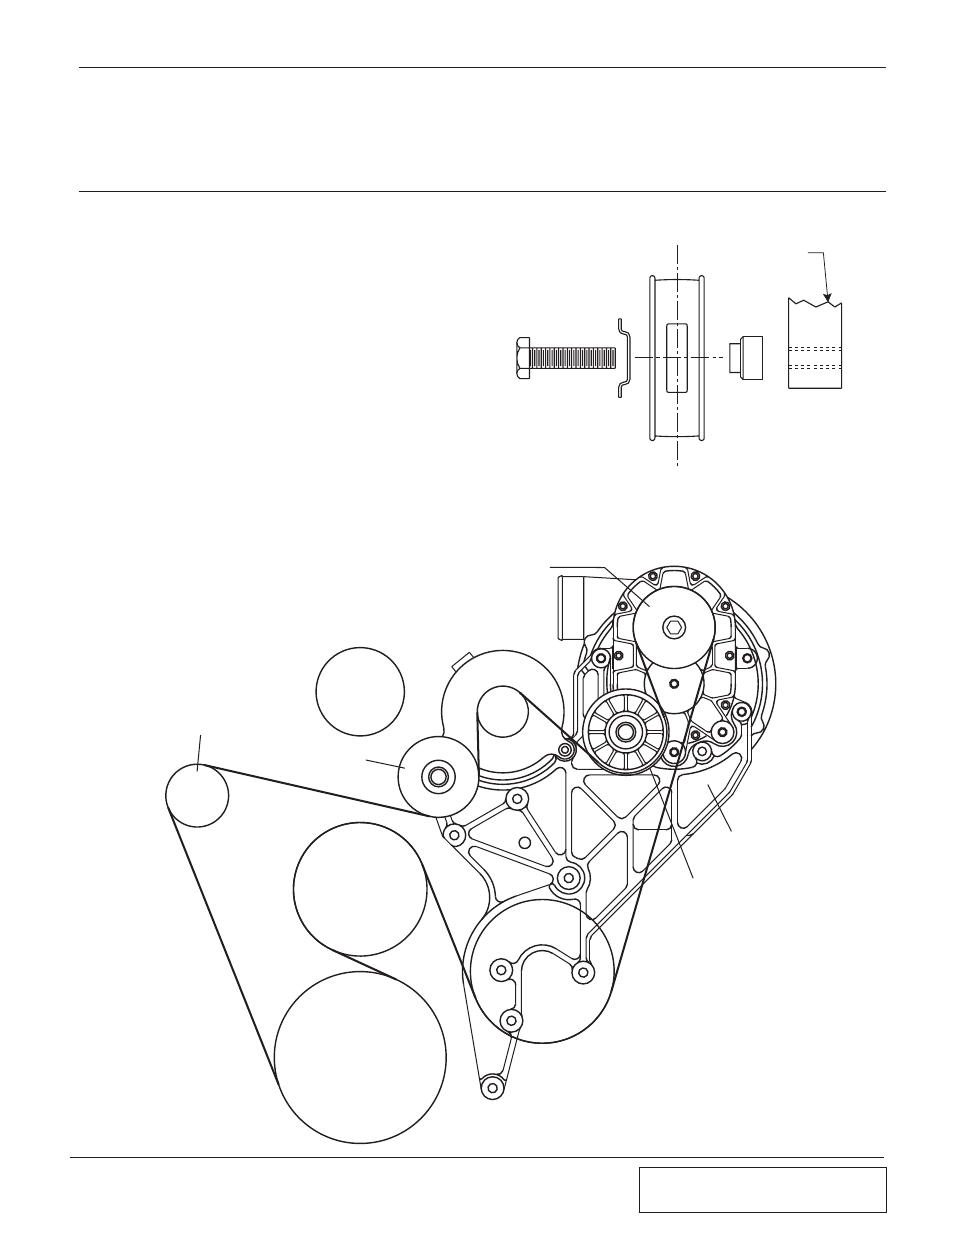
D.
Install the Paxton supplied M12 x 50mm
bolt, dust cover, idler pulley and spacer
onto the supercharger cover as shown in
Figs. 5-a, 5-b.
E.
Install the supplied supercharger/accessory
drive belt per Fig. 5-b.
5.
SUPERCHARGER INSTALLATION
SUPERCHARGER
COVER
THROTTLE
BODY
ALTERNATOR
PAXTON
MOUNTING
BRACKET
PAXTON
SUPPLIED
IDLER
POWER
STEERING
PUMP
PULLEY
CRANK
PULLEY
WATER PUMP
PULLEY
SPRING
TENSIONER
FACTORY IDLER
SUPERCHARGER PULLEY
Fig. 5-a
Fig. 5-b