Cable outlet description, Hardware installation, Cable outlet description hardware installation – NEXCOM NCr-302-VHR User Manual
Page 16
Copyright © 2013 NEXCOM International Co., Ltd. All Rights Reserved.
6
Chapter 1: Product Introduction
NCr-302-VHR User Manual
Cable Outlet Description
1. The camera features two waterproof connectors, the left one in the
diagram is for PoE connection, while right one is for line in, line out, DC
12V/AC 24V and DI/O connections.
2. The right one features four wire holes. Please cover unused holes with
sealing plugs to prevent water from entering.
3. Applicable cable diameter:
4. * Ø 2.5~1.8mm (Right)
5. * Ø 6.9~4.7mm (Left)
Line-out
Line-in
DC12V/AC24V
DI/O
Ethernet
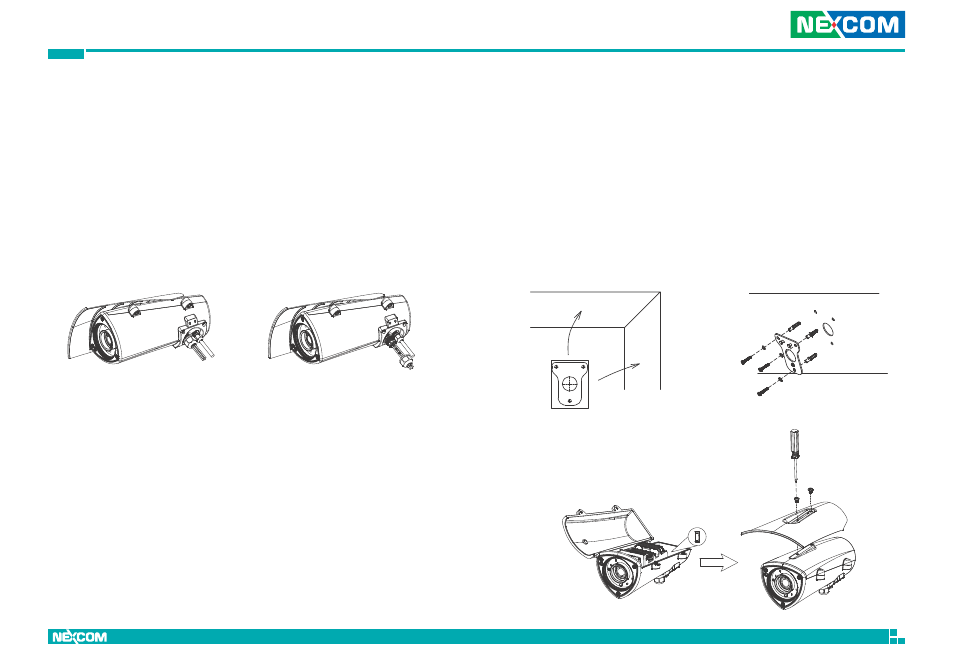
Hardware Installation
1. Position the placement sticker at the desired installation location and use
a driller to drill the three holes on the sticker.
2. Insert three screw anchors into the holes then place the wall mount base
on top of them with the mounting holes aligned.
3. Open the camera’s cover and glue the dehumidifier packet onto the metal
bracket using the adhesive sticker on its back, as depicted in the diagram
below. Close the camera’s cover and ensure the clip is locked in position.
Install the sunshield and tighten a torx screw on the side of cover.