Development board setup, Powering up the board, Chapter 4. development board setup – Altera Transceiver Signal Integrity User Manual
Page 13: Powering up the board –1
December 2014
Altera Corporation
Transceiver Signal Integrity Development Kit,
Stratix IV GT Edition User Guide
4. Development Board Setup
The instructions in this chapter explain how to power up the signal integrity
development board.
Powering Up the Board
To power up the board, perform the following steps:
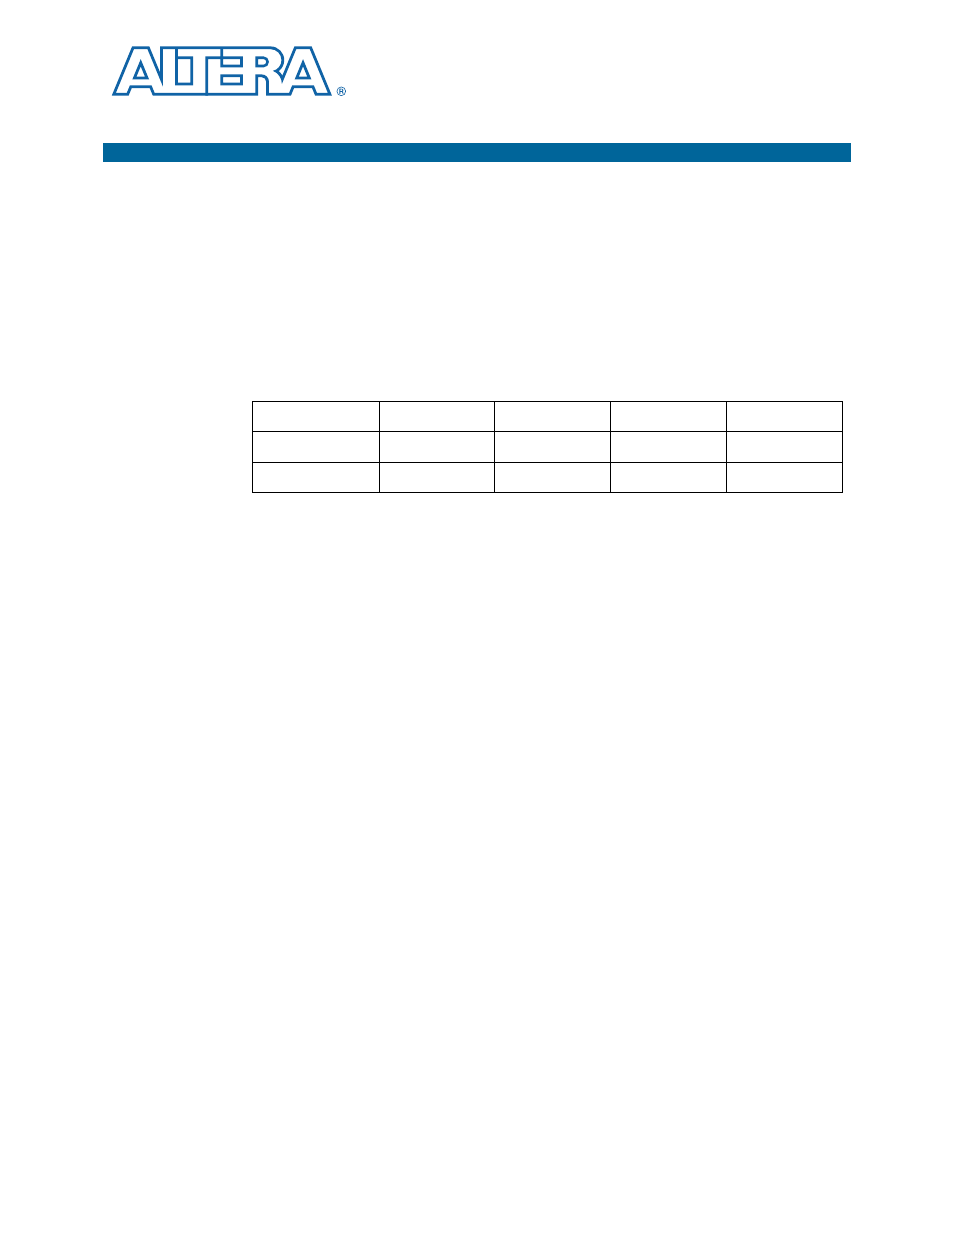
1. Verify that the MAX/JTAG jumper J26 is OFF, and that the mini-DIP switch SW2
settings located adjacent to jumper J62 match the settings in the following table:
1
Maintain these settings as they control the speed of the board oscillator. For
more information, refer to the
.
2. Connect the power cable to the board and plug the other end into a power outlet.
3. Connect the DC adapter (+16 V, 3.75 A) to the DC power jack (J1).
c
Use only the supplied 16-V power supply. Power regulation circuitry on the
board could be damaged by supplies greater than 16 V.
4. Ensure the POWER switch (SW1) is in the ON position. When power is supplied to
the board, LED D3 turns on indicating that the board has power.
After the board powers up, the on-board flash memory, which ships preprogrammed
with the factory design, automatically configures the Stratix IV GT device. The
FACTORY LED illuminates, signaling that the Stratix IV GT device is configured with
the preprogrammed factory design.
Table 4–1.
Switch Pin
SW2.1
SW2.2
SW2.3
SW2.4
Label
S0
S1
S2
S3
Position
up or 0
down or 1
down or 1
down or 1