Woodhaven 4962: Taper Master User Manual
Page 2
1
BEFORE BEGINNING
The
4962 Taper Master makes cuts up to 40" long and
can be used in either miter slot of a table saw as long as the
miter slot is between 4-1/2" to 6" from the saw blade. Make
sure the 40" capacity is sufficient and your miter slot locations
are in the range given before proceeding. Identify and verify
that you have all the parts listed. Read the instructions at least
once, familiarizing yourself with the parts, before beginning
assembly. We recommend a #3 Phillips screwdriver for the
1/4" screws and a #2 Phillips screwdriver for smaller screws.
If used on a table saw, this unit relies on the
miter slot of your saw being parallel to the saw blade for
it to work properly. If this is not the case, make those
adjustments to your saw before proceeding. The 4962
Taper Master may also be used on a band saw.
ASSEMBLY
Most people use their miter gauge in the left miter
slot so these directions show that location being used.
Open the 17-3/4" Jig Bars (4918B) and assemble/
adjust the bars according to the instructions that come with
them. Lay the Jig Bars (4918B) with their countersunk
holes facing down, end-to-end in the miter slot of your saw.
Align the mounting holes in the Jig Base (4962B) with the
threaded holes in the bars so that the base overhangs the
cutting path of the blade by 1/2" or less. Attach the bars to
the base with 1" screws (MF045) and re-check the fit of
the bar/base assembly, making sure it slides smoothly.
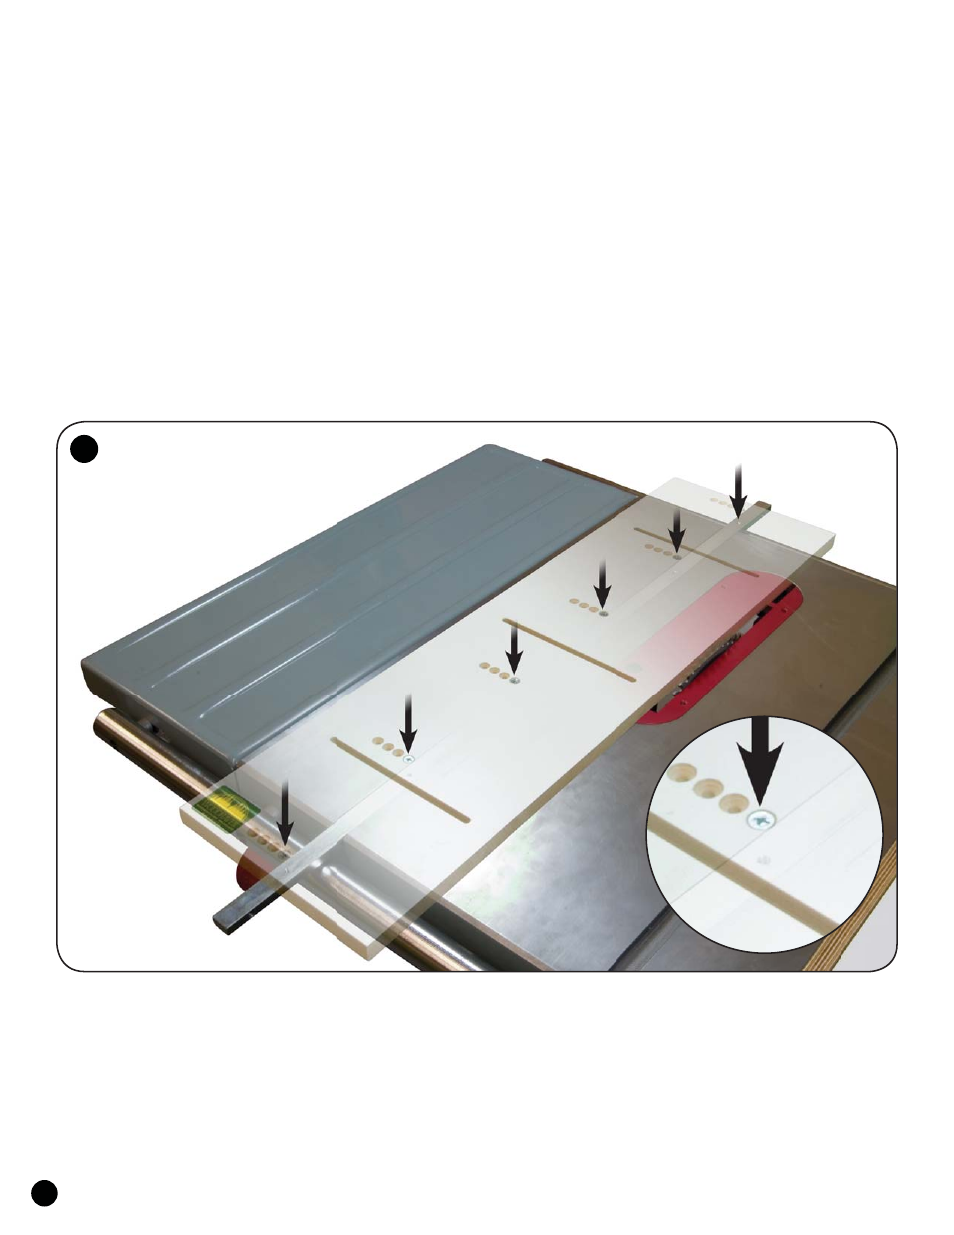
Turn the saw on and cut off the edge of the base
overhanging the saw blade (This should be no more
than 1/2"!), guiding the bar/base assembly in the miter
slot. Turn the saw off, disconnect the power and lower
the blade on your table saw completely. See fig. 1.
1
Jig Bars (4918B) placed
with their countersunk
holes facing down, end-
to-end in the miter slot
MF045