Circuit breaker instructions, Grinding tips – Weston Commercial Electric Meat Grinders User Manual
Page 16
-16-
CIRCUIT BREAKER INSTRUCTIONS
PLEASE NOTE: This Grinder features an all hardened steel gear
transmission. This causes the Grinder to operate at a higher volume and
temperature than other Grinders. This is normal and will not affect the
Grinder’s performance.
This Grinder is equipped with a Circuit Breaker
as a safety precaution. If the Grinder stops running
follow these steps to remedy:
1. Turn
the
Grinder to the “Off” position.
2. Check
the
Grinder to see if there is a jam in
the Grinder Head. If there is, the jam needs to be
cleared of the obstruction as outlined in “Grinding
Tips”.
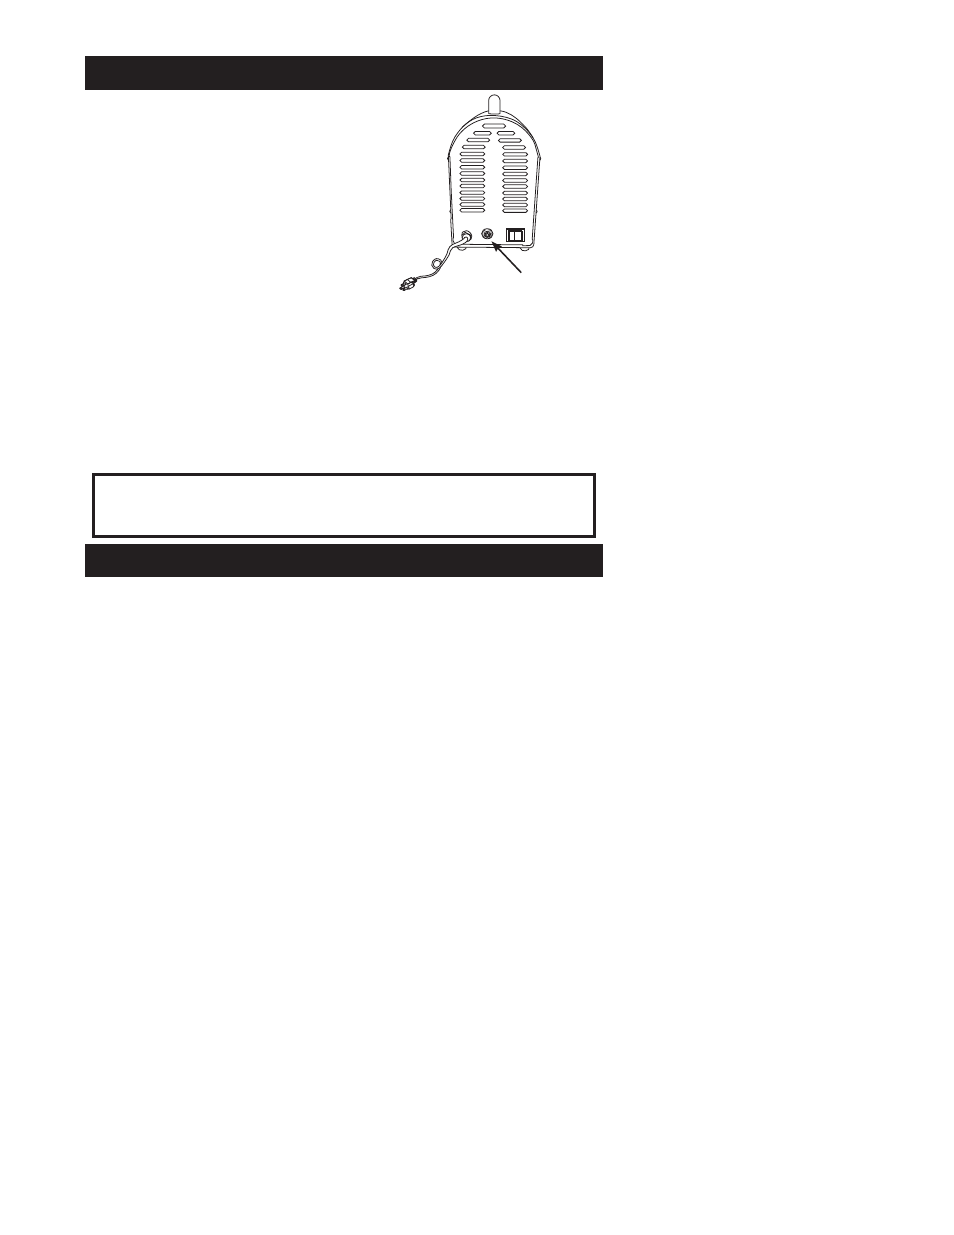
2. Press
the
Circuit Breaker Reset Button
(Figure 13)
.
3. Turn
the
Grinder back on and resume grinding.
4. If the Grinder still does not turn on, check that the electrical wall outlet is properly
working. Plug in another appliance to see if that appliance works from the wall outlet.
Check that the household circuit breaker has not been tripped. If none of the above
steps remedy the situation, or if the Circuit Breaker repeatedly shuts off the Grinder
contact a customer service for further assistance.
WARNING! DO NOT continue to use the Grinder if the Circuit Breaker trips
repeatedly. Continued use may cause permanent damage to the Grinder and will void
the warranty.
Circuit Breaker
Reset Button
.
DO NOT over-tighten the Front Ring Nut. It should be fi rmly tight.
.
Make sure the Grinding Knife blades lay fl at on the Grinder Plate.
.
DO NOT operate the Grinder without meat in the Head. Running the Grinder
while dry could damage the Head and Auger.
.
ALWAYS lubricate the Head, Grinding Plate and Grinding Knife with a food-
grade silicone spray after cleaning.
.
DO NOT grind bones, nuts or other hard objects.
.
If the Grinder Plate becomes jammed/clogged during operation, follow these
steps to restore normal output.
.
Turn the Grinder “OFF” and disconnect the Power Cord from the electrical outlet.
.
Remove the Front Ring Nut and Grinding Plate.
.
Thoroughly clean the Grinding Plate. Make sure all of the holes are clear.
.
Re-install the Grinding Plate and Front Ring Nut.
.
Re-connect the Grinder to the electrical outlet.
.
Continue with grinding.
.
Repeat as necessary.
GRINDING TIPS
FIGURE 13
O I