Standard stuffer assembly instructions, Warning – Weston Commercial Electric Meat Grinders User Manual
Page 11
-11-
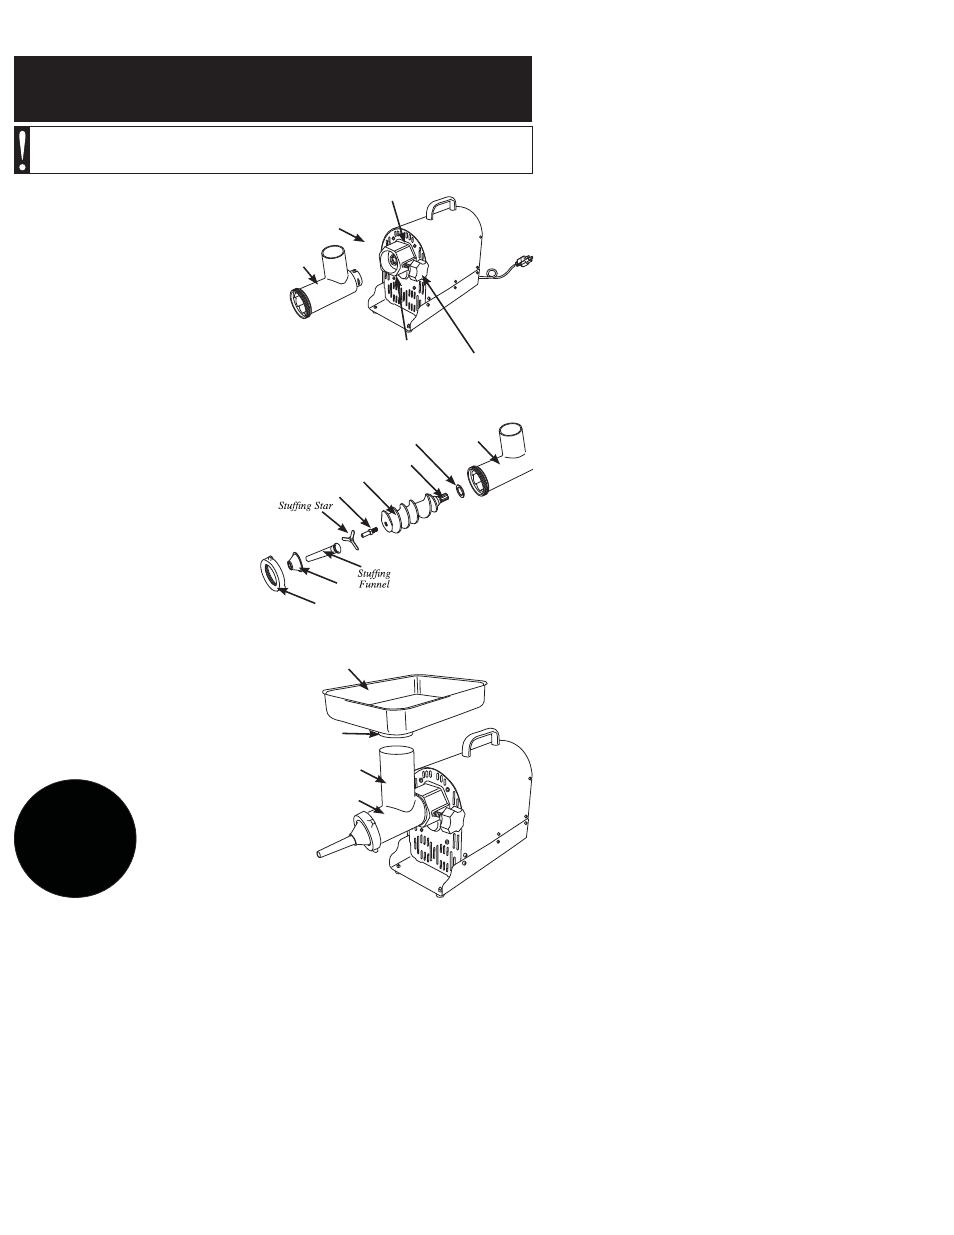
STANDARD STUFFER
ASSEMBLY INSTRUCTIONS
1. Insert
the
Head into the Gear Housing
with the feed chute of the Head facing straight
up. You will need to line up the slot in the
Head with the Pin inside the Gear Housing.
Be sure the Head is seated fully into the Gear
Housing
(Figure 5)
.
2. Tighten
the
Head Locking Knob to lock
the Head into place.
3. Insert the Auger, with the Auger
Bearing attached, into the Head
(Figure 6)
.
Align the Auger Splines with the Drive
Shaft of the Grinder.
NOTE: Periodically inspect the Auger
Bearing for wear. If the Auger Bearing is
worn excessively, replace it immediately or
Head damage could result.
4. Slide
the
Stuffi ng Star over the
round portion of the Auger Pin.
5. Slide one of the Stuffi ng Funnels
through the Flange and place it
through the Front Ring Nut.
6. Install
the
Front Ring Nut, DO
NOT OVERTIGHTEN. Turn the
Front Ring Nut until it makes contact
with the Flange, then make 1/4 turn
more to tighten into place.
7. Insert the neck of the Tray into the Feed
Chute
(Figure 7)
.
8. NEVER operate Grinder without the
Tray secured in place
(Figure 7)
.
REFER TO “STUFFING INSTRUCTIONS”
FIGURE 6
Head
Auger Bearing
Auger
Auger Splines
Auger Pin
Front Ring
Nut
Flange
Gear
Housing
Head
Slot in Head
FIGURE 5
Head Locking
Knob
Feed
Chute
WARNING!
Before cleaning, assembling or disassembling the
Grinder, make sure the Grinder Motor is OFF and the PLUG IS REMOVED
FROM THE OUTLET/POWER SOURCE!
FIGURE 7
Tray
Head
Feed
Chute
Neck
WARNING!
See Safety
Guard
Instructions
Prior
Operation!