Installing optional flaps – ParkZone PKZ5280 User Manual
Page 14
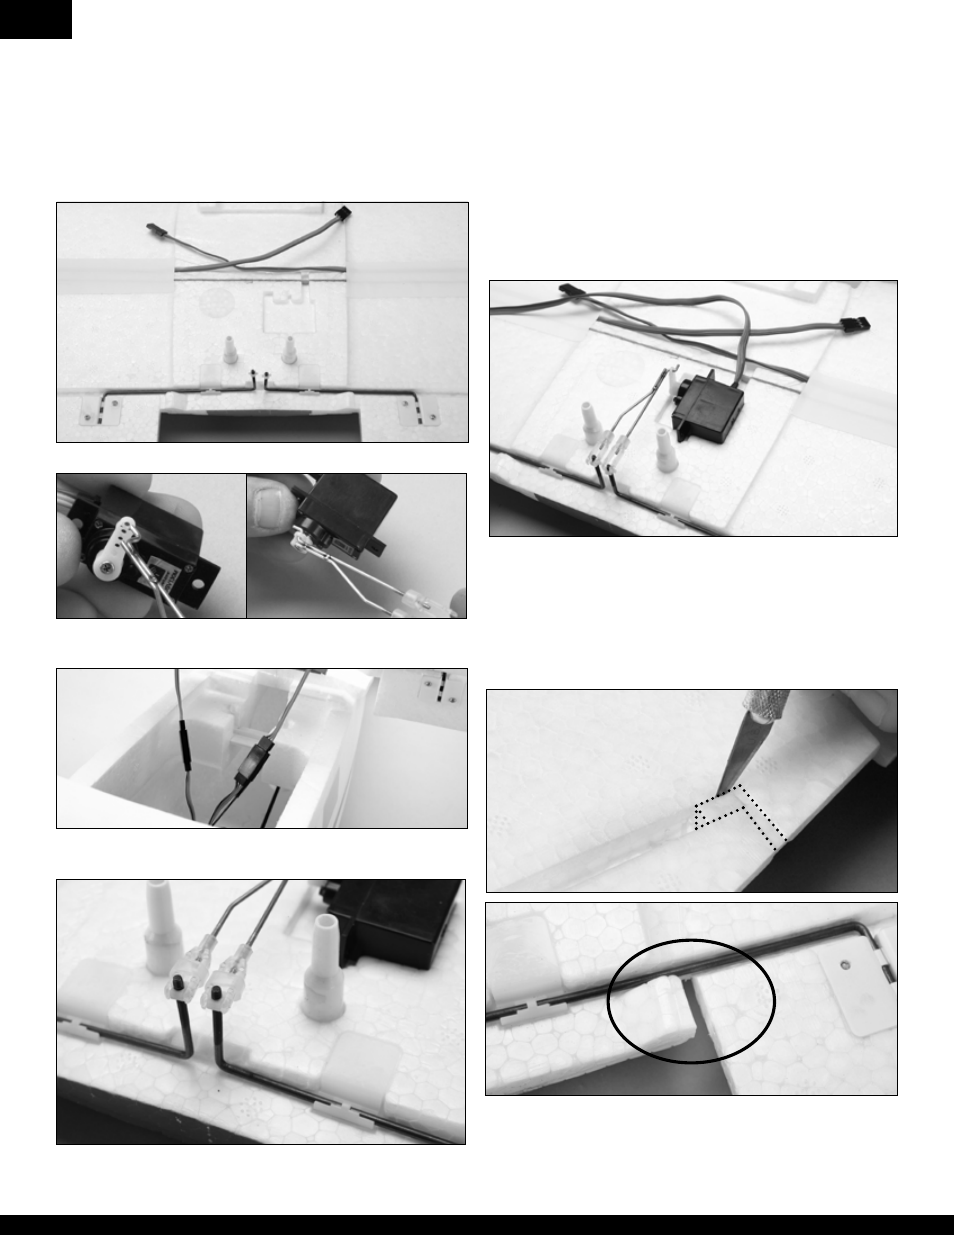
Installing Optional Flaps
The Stinson Reliant is equipped with a servo pocket under the
wing (inside the fuselage when the wing is installed) for making
flaps operational. In addition to the flap pushrod set included
with the aircraft, a servo (PKZ1090) is required, and servo
extension (JSP98110) is recommended.
1. Adjust the servo arm for control of the flaps (see photo).
2. Install servo lead or extension (JSP98110) in the gear channel
of the receiver.
3. Install the flap servo connector in the servo extension or
install servo plug in the gear channel of the receiver.
4. Power on the transmitter and move the flap or gear switch to
the up position.
5. Turn off radio and disconnect battery from the aircraft. (See
image 2 for servo arm orientation in the up position.)
6. Install flap servo in pocket in the underside of the wing using
hot glue, silicon glue, or double-sided servo tape.
Note: A removable glue is recommended, so flap servo can be
removed if needed.
7. Attach flap pushrods to flap servo.
8. Attach flap clevises to flap torque rod.
9. Cut left and right sides of each flap at panel lines to make the
flap free to move. Make sure there is 1/16 inch gap between
the flap and the wing to prevent interference between the two
surfaces.
10. Power on the aircraft and transmitter and make sure there
is the same travel for both flaps. Adjust the clevises on the flap
pushrod to ensure that both flaps are symmetrical, both in the
up and the down positions.
Root of flap, nearest fuselage
Outermost edge of flap
EN
14
15