Installation – Glow-worm Clearly Heat Pumps - Standalone Module System User Manual
Page 23
0020096321_00 - 07/10 - Glow-worm
- 21 -
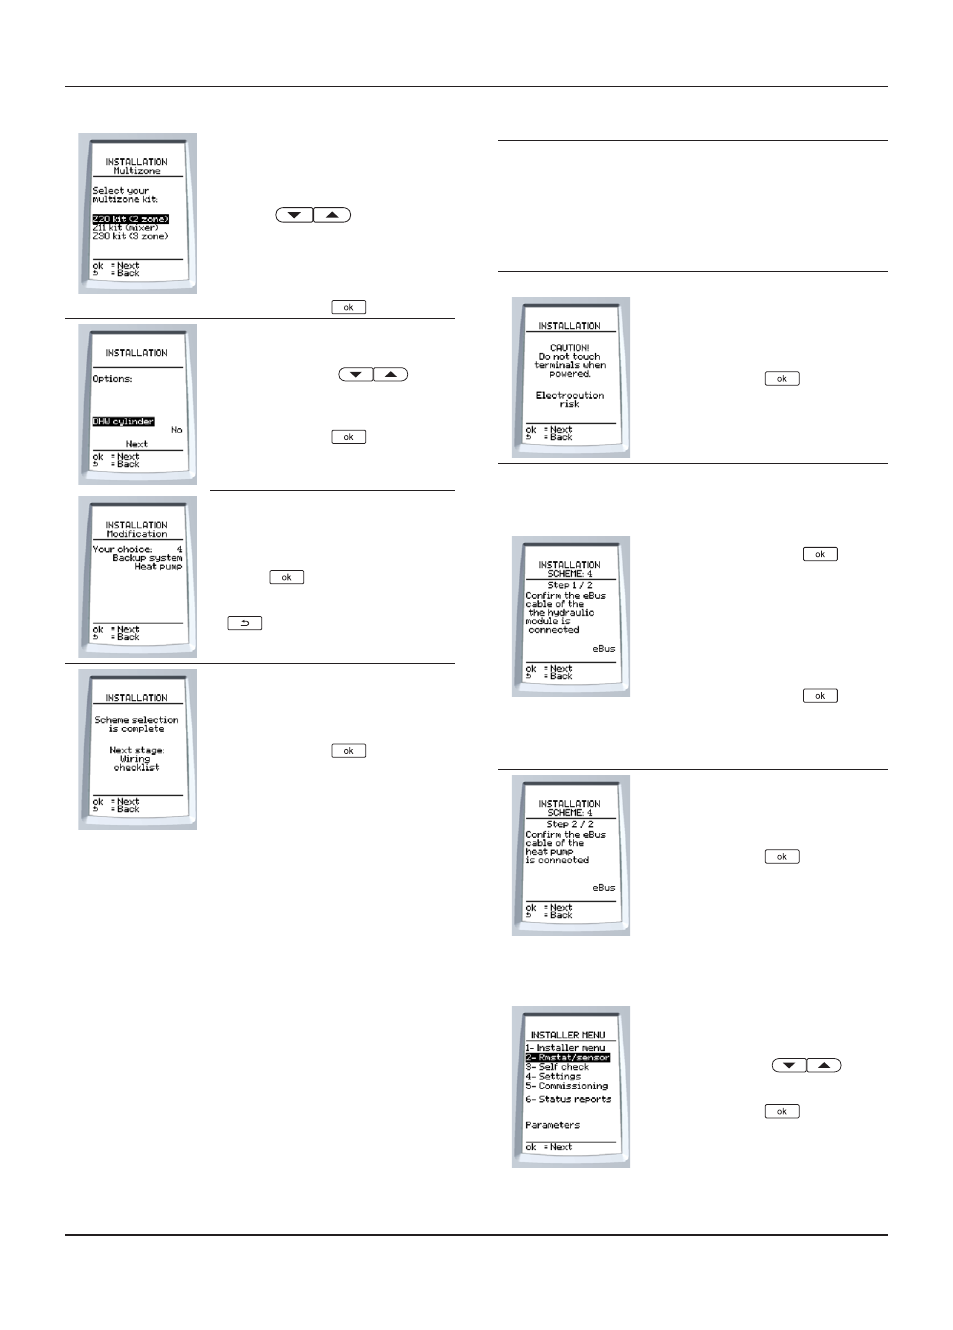
INSTALLATION
This screen is only displayed if you
answered “YES” to the previous
question.
• Select number of heating zones
present on the system using the
buttons
.
- Z20 kit = 2 heating zones
- Z11 kit = not available
- Z30 kit = 3 heating zones
• Press the button
to confi rm.
• Using the buttons
,
select DHW cylinder on the screen,
if the option is installed.
• Press the button
to confi rm.
The control unit summarizes your
installation.
• If this is correct, confi rm with the
button
.
• If it is not correct, press the button
and change the data you
introduced.
• Press the button
.
10.2 Wiring
summary
e
To check or modify a connection:
• Set the control box switch to the Off (O)
position.
• Set the circuit breaker located on the
electrical panel and connected to the control
box to the Off position.
• Press the button
.
Via the screen, you will be asked to
verify, step by step, the connections you
made to the control unit.
• If the connections are correct,
confi rm with the button
.
• If they are not correct, disconnect
the control unit’s power supply and
complete the necessary wiring as
indicated.
• Once completed, connect on the
control unit’s power supply and
confi rm with the button
.
Once the control unit has been
reconnected, it returns to the current
control function.
• Press the button
.
10.3 "Thermostat / sensor" menu
• Using the buttons
,
select Rmstat/sensor on the screen.
• Press the button
to confi rm.