Fig. 41, Final steps, Fig. 42 fig. 43 – EZ-ACCESS TITA MODULAR ACCESS SYSTEM User Manual
Page 22
– 22 –
8.8 When child rails are required, the lower (child) handrails and the various returns and connectors
are installed in the same manner as the upper (normal) rail using the lower set of holes provided.
Refer to instructions in previous steps.
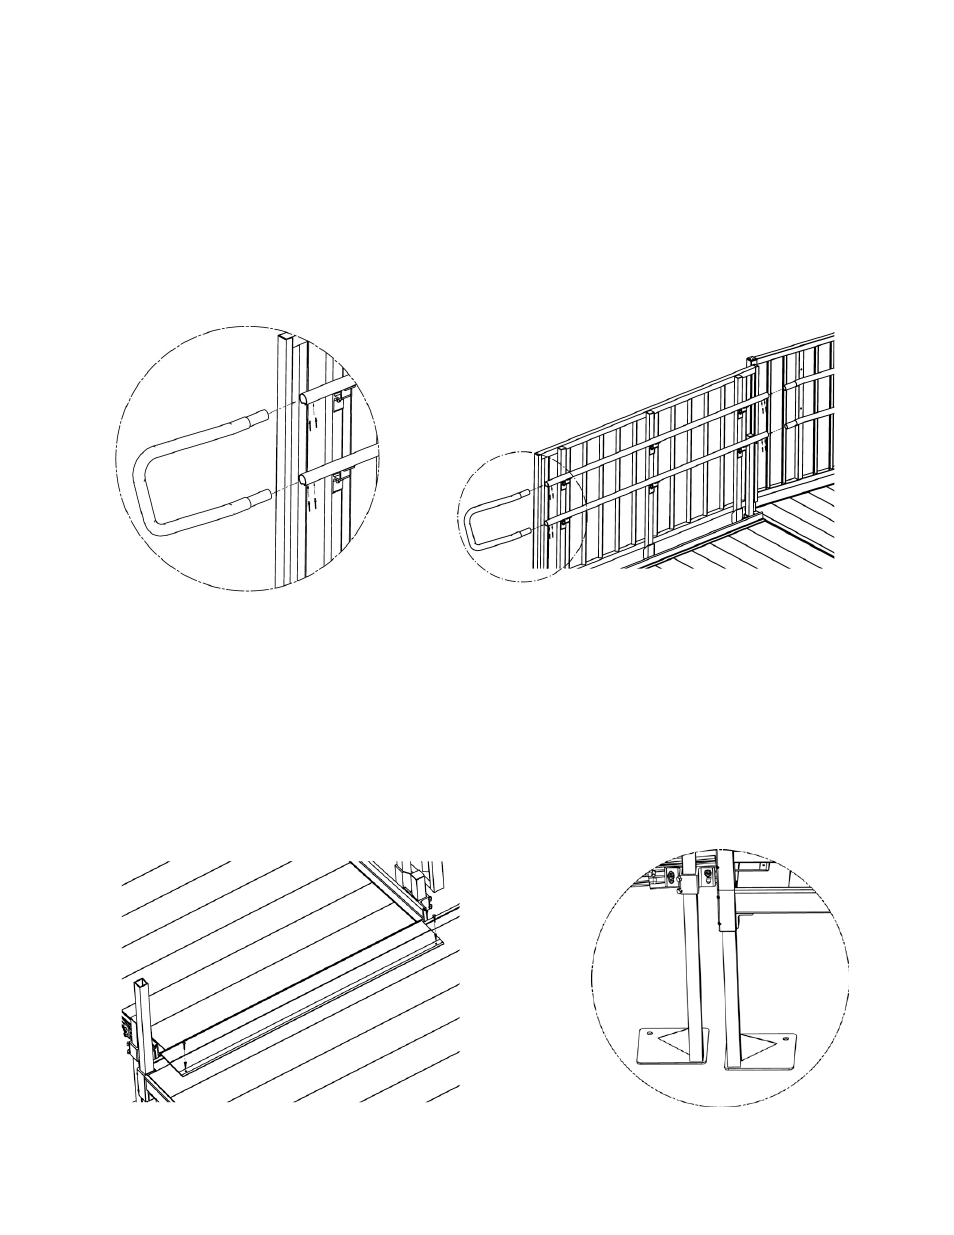
8.8.1 The upper (adult) handrail is also installed in the same manner except the upper and lower
termination loops are not used. These components will be replaced by either an upper or
lower dual termination loop (FIG. 41).
8.8.2 Install connector pieces of dual termination loop into ends of upper and lower handrails.
8.8.3 Drill two holes between 0.129” and 0.133” dia. (#30 drill size) through the handrail tube and
the connector piece in the underside of the end of each handrail where a dual termination
loop is used. Drill one hole approximately 3/4” from the end and the second hole
approximately 1-3/4” from the end.
8.8.4 Install two 1/8” dia. rivets (provided) in the end of each handrail using holes drilled in
previous step.
FIG. 41
9. FINAL STEPS:
9.1 Once all handrails and components have been positioned and all fasteners tightened, screw
transition plates to platforms using two 1/4” x 1” long self drilling square drive screws (FIG. 42).
9.2 Ramp and platform legs can be secured to the ground using stakes or concrete anchors and the
holes provided in the feet, if needed (FIG. 43). Note: Hardware not included.
9.3 Ensure that all fasteners are in place and secure.
9.4 Walk on the assembled system, checking for any undue movement.
9.5 Remove any debris and metal chips.
9.6 Ensure that the level and slope has not shifted during installation.
9.7
Check that all handrail ends are terminated with loops, returns, or end caps.
FIG. 42
FIG. 43