Project a13, Light sensitive timer project a14, Shot in the dark – Elenco XP&trade User Manual
Page 21
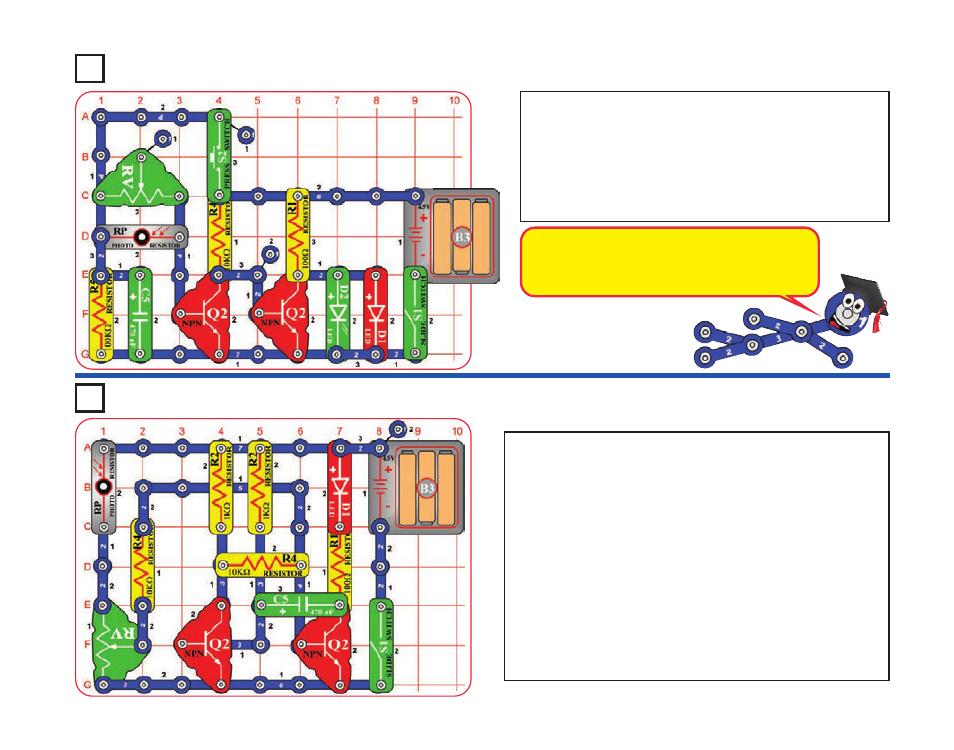
Project A13
Build the circuit, turn on the slide switch (S1), and push the
press switch (S2). The LEDs (D1 & D2) light for a while and
then turn off. Push the press switch again to turn the LEDs
back on. The brighter the light shining into the photoresistor,
the faster the LEDs turn off.
The adjustable resistor is used as a fixed resistor in this circuit,
so moving its lever won’t change anything.
Light Sensitive Timer
Project A14
You need a flashlight for this project. Build the circuit, and note
that there is a 3-snap wire across base grid locations F3-F5,
which is under the left NPN transistor (Q2). Turn on the slide
switch (S1).
Take the circuit into a dark room. Shine the flashlight into the
photoresistor (RP), and carefully move the lever on the adjustable
resistor (RV) until the red LED (D1) lights. You will use the
flashlight as a gun, and “shoot” at the photoresistor.
Keep the room dark and move away from the circuit. “Shoot” your
flashlight by quickly switching it on and off. Try to hit the
photoresistor with the light beam from the flashlight. When you
are on target, the red LED will light. You can have contests with
your friends to see who has the best aim.
Shot in the Dark
-20-
Notice how the green LED turns off a little faster than
the red LED. The LEDs are made from different
materials, and the red LED is a little more sensitive to
electricity than the green LED.