Dillon Precision Super 1050 User Manual
Page 20
Dillon dies whenever possible.
c.) Wrong size or missing locator but-
tons.
2.) Bending or breaking decapping pins:
a.) Wrong shellplate (#12600*).
b.) Slightly bent decapping assembly
or pin.
c.) Berdan primed cases.
d.) Dirt in shellplate pockets.
e.) Handle being moved too rapidly
on the down stroke.
f.) Rocks or other foreign objects in
cases.
Station 3: Primer Pocket Swaging
Problems
1.) Primers smearing or crushing:
a.) Swage back-up rod not down far
enough (#13332 or #13348).
b.) Swage rod not adjusted high
enough (#20314 - large or #20313 -
small).
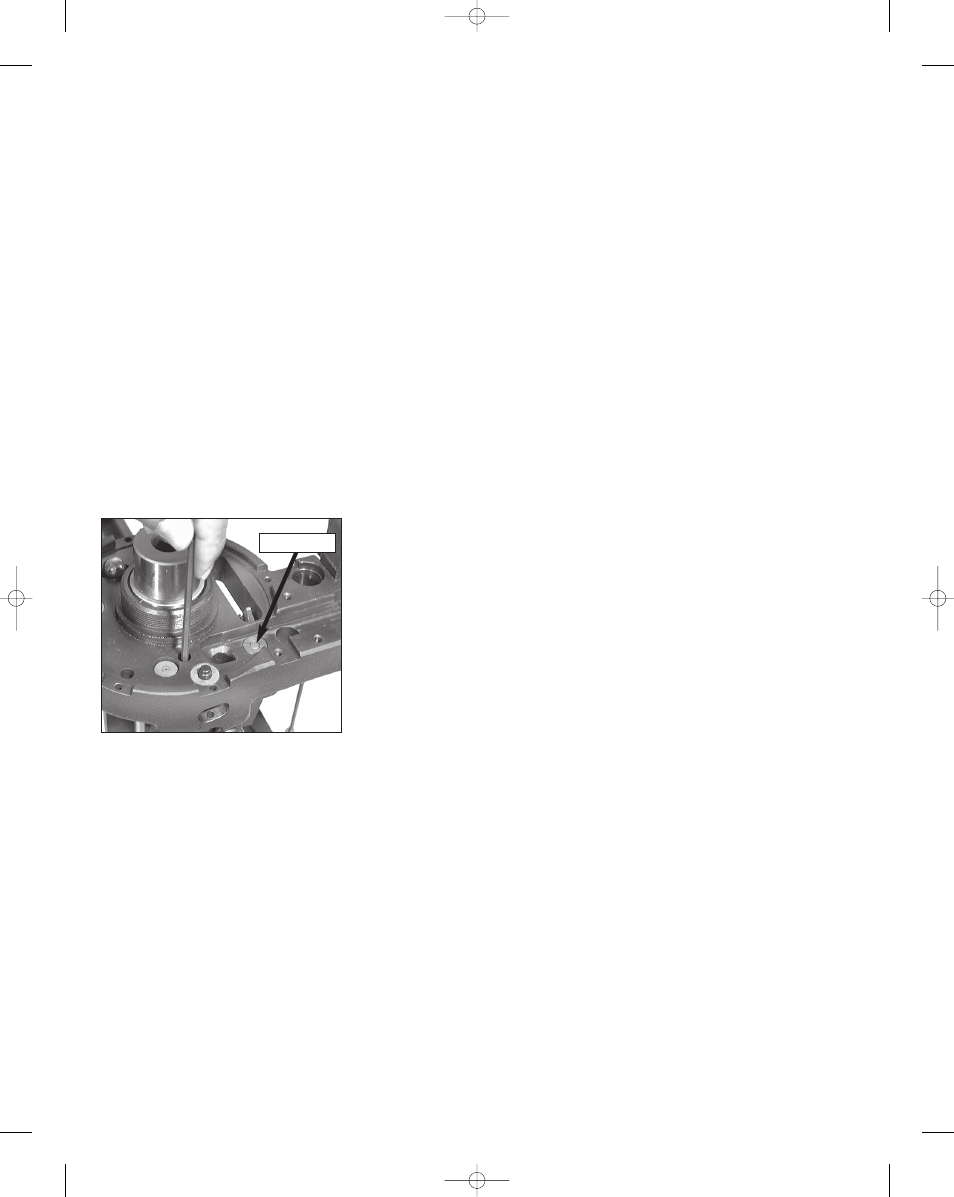
Station 4: Priming Problems
The above photo shows the rocker
arm set screw (#13226) being adjusted.
The Super 1050 comes from the factory
with this set screw properly adjusted, but
over time it can move. When the rocker
arm set screw is out of adjustment, it can
dent primers and/or cause the primer
slide to stick. When properly adjusted,
the primer punch (#12849 large -
#13307 small) will be flush with the
platform surface – see arrow above.
1.) Crushed primers:
a.) Swage rod (#20314 - large or
#20313 - small) not adjusted correctly,
dirty or worn out.
b.) Dirt in the shellplate (#12600*).
c.) Ringed primer. When a spent
primer has been pierced by the decap-
ping pin leaving a ring of metal from the
primer in the pocket.
d.) Primer station retain tab (#12930)
not adjusted correctly.
e.) Worn primer punch (#12849).
f.) The bench that the machine is
mounted on is not rigid enough. This can
be corrected by affixing a board to both
the wall and your bench.
g.) Hot-loaded ammo that has been
fired several times and the base of the
case has been flattened out.
2.) High primers:
a.) Adjust the primer push rod
(#12819).
b.) On .223 cases the swage back-up
rod (#13332) is down too far, slightly
collapsing the primer pocket and not
allowing the primer to seat fully.
c.) Loose shellplate (#12600*).
d.) Erratic handle motion.
e.) Do not remove the rubber piece on
the primer slide.
3.) Smeared primers - see Station 3:
Primer Pocket Swaging - item 1
4.) Locator tab:
a.) When adjusting the priming sta-
tion locator tab, it should be set as
close to the case as possible without
touching it. Be sure the cases in the
shellplate rotate freely past the tab.
Change primer magazine tips every
20,000 rounds. Note: Move the handle
down, bringing the toolhead down.
Move the locator tab in to the case in
the priming station.
Station 5. Powder and Case Mouth
Belling Problems
1.) Crushing cases:
a.) Wrong size or missing locator
buttons.
2.) Spilling powder:
a.) Slamming or going too fast with
the operating handle (#17071).
b.) Stick or pencil-lead type powders
bridging on the case mouth in the pow-
der funnel (#13005). See conversion
chart.
c.) Check powder bar adjustment.
3.) Erratic belling:
a.) Variation in case length. Divide
cases by brand.
b.) Handle not moving all the way
down on each stroke. Note: Try setting a
bullet on the case mouth in Station 6.
4.) Erratic powder charges:
a.) Powder bar not moving full length
of its travel. Turn the powder die down
until it does.
Station 7: Bullet Seating Problems
1.) Erratic seating depth of the bullet:
a.) Build up of lead shaving and/or
lube in the seater or crimp dies.
b.) Bullets having erratic dimension
(length and/or the ogive).
c.) Use the proper seating stem for the
type of bullet being used.
d.) Variations in case types and/or lots
– sort brass.
e.) Refer to a loading manual for prop-
er loaded length (OAL) and additional
information.
Station 8: Crimping Problems
1.) Erratic crimping:
a.) Length of cartridge cases erratic,
probably due to mixed brands of brass.
b.) Worn out or improperly made die,
use Dillon dies whenever possible.
2.) Loose bullet:
a.) Too much taper crimp. Note, this
condition also ruins accuracy.
b. Wrong expander (#12749*).
c.) Thin cases.
Maintenance
Loctite
Loctite should be used following
adjustments to or replacement of all
threaded screws. Please note that Loctite
should be applied to threaded portions
only and should be of a non-permanent
type. Blue Loctite #242 is recommended.
Swage
Clean the swage by pulling the operat-
ing handle down and use a small brush
to clean the tip. Every 10,000 rounds,
remove the swage rod (#20314 - large
or #20313 - small). and clean, lightly
grease and replace. Note: Do not grease
the tip of the swage where it contacts the
primer pocket.
20
primer punch
Super 1050, May 2007 5/21/07 12:00 PM Page 20