Dillon Precision Super 1050 User Manual
Page 19
the die out one full turn and secure it in
place with the lock ring (#14067).
Leave the handle in the down posi-
tion. With a wrench, screw the back-up
rod into the back-up die. Turn the
back-up rod down until it touches the
inside bottom of the case. Note: Do
not force the expander as this will
damage the case and the shellplate.
Now secure the lock ring (#13483).
Raise the handle.
Screw the eyebolt (#13245) all the
way into the swager. Grease the clevis
pin (#13522) heavily.
Put the swager into position. Push the
clevis pin through the connecting rod
and eyebolt and secure with the hitch
pin (#13840). Replace the swage cover
(#13064).
With the military case still in Station
3, pull the operating handle down with
your left hand. Now turn the swager
upward with your right hand until it
meets resistance.With your left hand
raise the operating handle about 10
inches. With your right hand turn the
swager up a 1/4 turn. Cycle the handle
down.
Raise the handle just enough to
remove the case and inspect the primer
pocket to see the amount of swaging
being done. The swager should leave a
radiused entrance on the primer pock-
et. Fig. 59
Turn the swager in, using 1/4 turn
increments until you achieve the proper
swage. Secure the jam nut (#13682).
Note: Do not over swage. This condition
will cause damage to the shellplate
(#12600*).
When your swager is properly adjust-
ed you will feel resistance during the
final 1/2" to 1" of the downward stroke
of the handle.
RL1050 vs. Super 1050
Not all parts are the same but some
are still interchangeable. We have made
changes to several parts used on the
Super 1050 that are not interchangeable
with the RL1050 machine.
• The Super 1050 primer lever assembly
(#21145) has a longer arm to accom-
modate the higher toolhead travel. This
is not available for RL 1050 machines.
Primer feed body (#20773) will fit both
machines but again the primer lever
assembly will not.
• The Super 1050 index lever has been
changed considerably and will not
index properly on RL 1050 machines.
• The Super 1050 mainshaft, mainshaft
pivot pin, crankshaft assembly, and
bearings are completely different.
• The casefeed body has been modified
to allow long cases to feed through
but is interchangeable between the
Super 1050 and RL 1050 machines.
• Any RL 1050 toolhead assembly will
fit the Super 1050 machine, but the
toolhead ratchet (#11686, RL 1050)
must be replaced with ratchet
(#11688, Super 1050).
• The toolhead spring, bushing and
sleeve, as a set, are longer to accom-
modate the increased toolhead travel
on the Super 1050 but they will
work on the RL 1050.
• The RL 1050 spent primer cup has
been replaced with a larger, plastic
spent primer cup and bracket. It is not
interchangeable.
Using RL 1050 toolheads and
dies on the Super 1050...
If you want to interchange an RL 1050
toolhead already set for a caliber you
want to load onto the Super 1050 you
will need to check for the following
clearances.
1. Remove the toolhead assembly
from the Super 1050.
2. Replace the shellplate with the
shellplate for the caliber you intend to
load with.
3. Remove the toolhead spring and set
the toolhead onto the mainshaft while
holding the handle at about mid-travel
for proper alignment into the frame.
Next, install the washer and toolhead
bolt.
4. Slowly lower the handle and look
to see if any die comes in contact with
the shellplate. Readjust dies as needed.
5. Place one unprimed case in the
swage station and again slowly lower the
handle. Readjust the expander and
swage rod as needed.
6. Once you have reset the dies to the
machine, remove the toolhead and rein-
stall the toolhead spring and complete
the rest of the conversion and set up to
reload. Reinstall the toolhead.
Troubleshooting
.308 Winchester and related calibers
with similar case length (.243 and/or
.22-250) also lend themselves to reload-
ing on this new machine. No special
changes are necessary to the die set.
Hard or Incomplete Indexing
1.) Wrong size locator buttons.
2.) Index pawl bent or worn (#13705).
3.) Shellplate lock ring adjusted too
tightly (#20311).
4.) Dirt under the shellplate (#12600*).
5.) Bent or broken shellplate (#12600*).
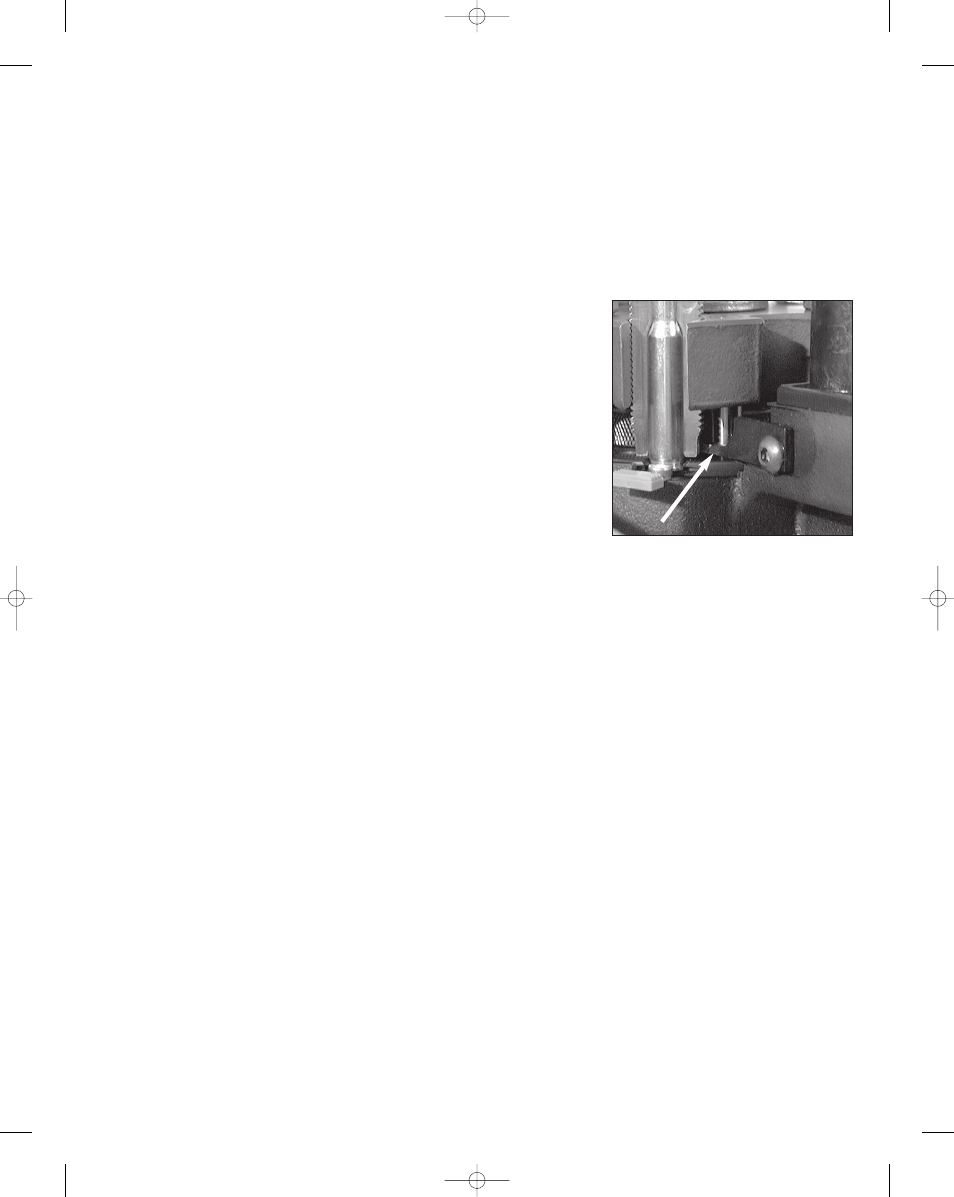
6.) Ejector tab (#13189) interfering with
the shellplate - see above photo.
Station 1: Case Insertion Problems
1.) Wrong size case insert plunger
(#13073*).
2.) Wrong case insert adapter (#13654*).
3.) Shellplate lock ring not adjusted tight
enough.
4.) Dirt in the shellplate (#12600*) pock-
ets or damaged shellplate.
5.) Handle being moved too rapidly on
upstroke.
6.) Bent or broken roller bolt (#13333).
7.) Dirt or media in casefeed track.
Station 2: Resizing and
Decapping Problems
With .30-06 and .270 calibers it is
important to note that the seater and
crimp dies must be shortened for clear-
ance reasons. They are available and are
included with the respective conversion
kits.
1.) Crushed cases:
a.) Shellplate lock ring too loose or
too tight.
b.) Not enough radius on the die. Use
19
When reinstalling the ejector tab (#13189) it
is vital that it is not set too low or it will
interfere with the shellplate.
Super 1050, May 2007 5/21/07 12:00 PM Page 19